
Look at these lovely and unusual roses, given to me at work for a job well done, it’s nice to be appreciated.

My Soul is fed with needle and thread

It’s nice to be appreciated.
Look at these lovely and unusual roses, given to me at work for a job well done, it’s nice to be appreciated.
The fabric covering the stool was torn and rotten, the padding had disintegrated.
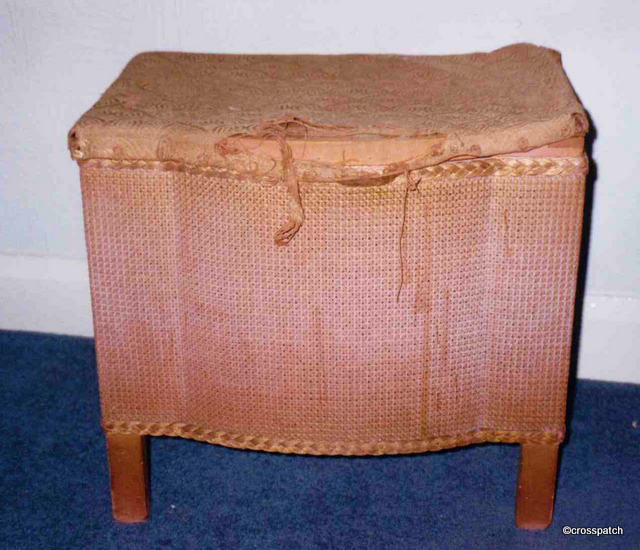
This began as a project when I was studying paint effects; I took two pairs of beech legs which had originally been bought to make a foot stool, and transformed them into “mahogany” ones using paint and glaze. The finished article needed to be completed for my end of term assessment, and I didn’t have the necessary materials to complete the footstool. However I had just redecorated my bedroom and had some fabric spare which matched the Toile De Jouy wallpaper and in Dad’s Garage stood unused and unwanted this Lloyd loom bedroom stool in that awful Germoline pink which had been popular in the 1930’s ( I suspect it may have belonged to my Grandmother) The fabric covering the stool was torn and rotten, the padding had disintegrated but the box itself was in good order, Dad sawed the original legs off close to the body so that the new legs could be screwed on in their place. I painted it cream inside and out, even though I knew little of it would be seen, I didn’t want any Germoline pink showing through.
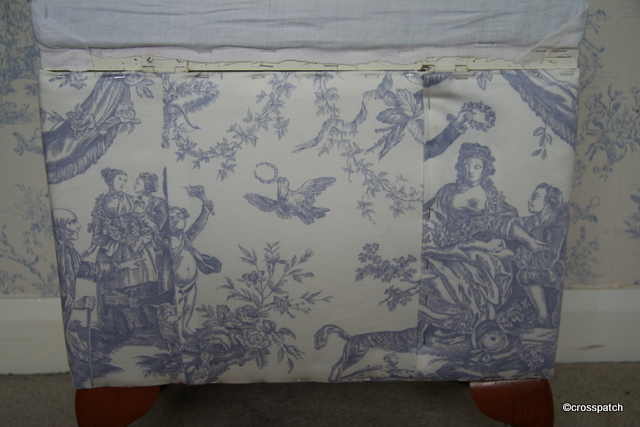
The body of the box was covered in a thin polyester wadding, to give it a padded effect, this was glued in place. I then cut a piece of fabric so that the main pattern image was centred on the front of the box, and pieced the back to make it fit round the box. I stapled the join in place as a temporary fix till I could find a curved needle to stitch up the join, ( I’ve just discovered recently that I never did stitch the back properly, tut, tut.)
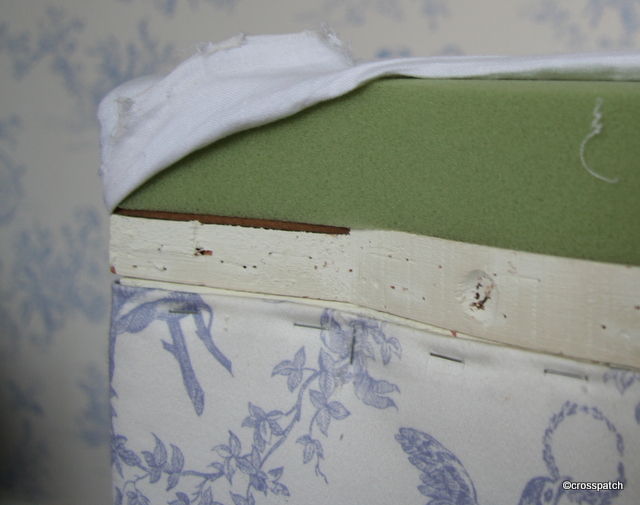
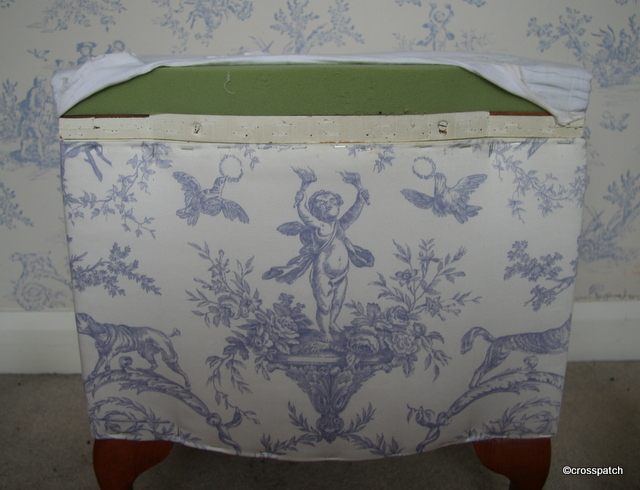
The top needed a new padding, one and a half inch upholstery foam cut to fit, ( I made a template by upending the box on a sheet of newspaper and drawing round it to make a pattern). This was glued onto the box lid, and because it is blue and would show through the ivory fabric, I covered it first in a piece of old linen sheet. A staple gun was needed for this bit. I had then covered the lid with another piece of fabric bearing the main pattern image and staple gunned it in place, the plan was to buy some upholstery trimming to finish it, it would be glued in place using a glue gun.
The snag was that we don’t have a local supplier of said trimming, and the box was made long before I was in the habit of shopping on line so it languished incomplete for years. During that time it was rather ill used, and the top became grubby and the raw edges ragged, so by the time I found the trimming I wanted the top needed a wash. On a positive note I realised it needed a tassel of some kind to raise the lid without touching the fabric, so now that I have deconstructed the top to wash the fabric I can incorporate a tassel in the finished article. Realising the tassel will probably get grubby too, I can attach it on the inside of the lid rather than the outside so I can make it detachable.
GRRRRR!! problem….now I have washed the top its a different colour to the bottom, now what? Do I take off and wash the bottom, or find some different fabric for the top? all suggestions gratefully received.