A simple thing which brings a smile to every day tasks.
something simple to give pleasure in use
William Morris (British textile designer, associated
with the British Arts and Crafts Movement.)
said “Have nothing in your house that you do
not know to be useful, or believe to be beautiful.” Well I have a number of things in my house which while
useful, do not bring me joy.
the starting point
One such is
my tabletop ironing board that I use for craft projects; I had been aware for a
while that when ironing I could feel and sometimes see the wire base imprinting
on the fabric. It needed a make over. So I took it apart and then realised I
didn’t have the wadding I needed to repair it. Rats! Being on lockdown due to Covid 19 there was
no bobbing out to buy more.
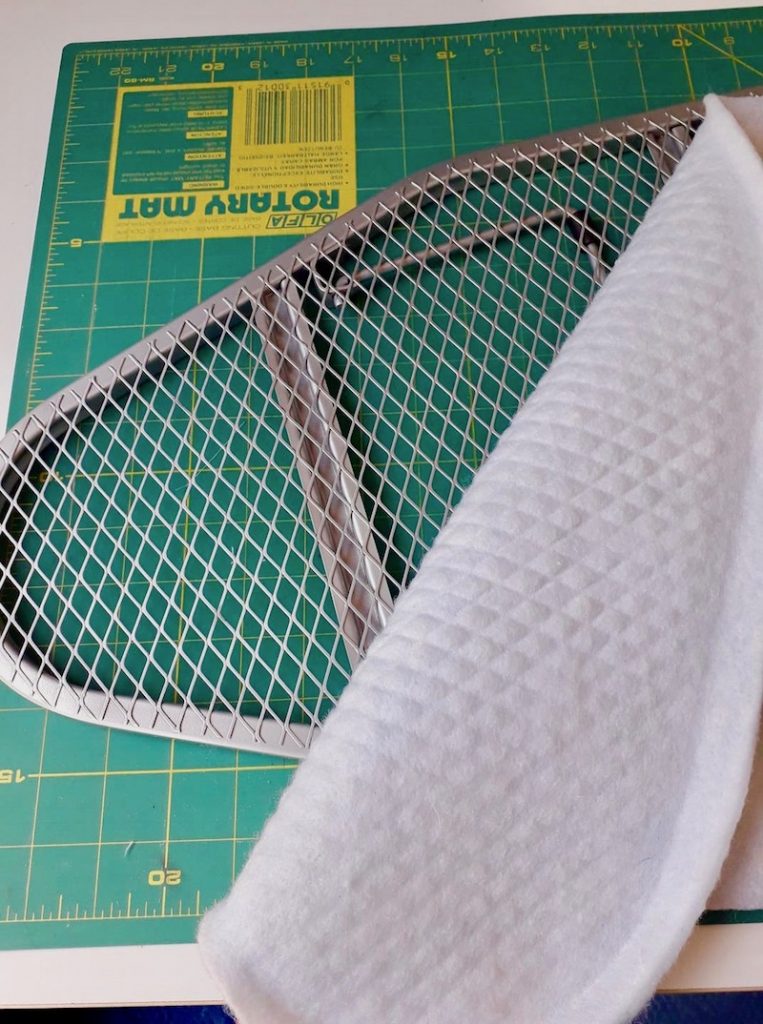
a little pieceing needed
Finding a couple of small pieces, which I
thought would be suitable, I needed to piece it to fit the frame. A simple
zigzag stitch keeps it together. I’d taken the cover off and so took the
decision to wash it while I sorted the lining.
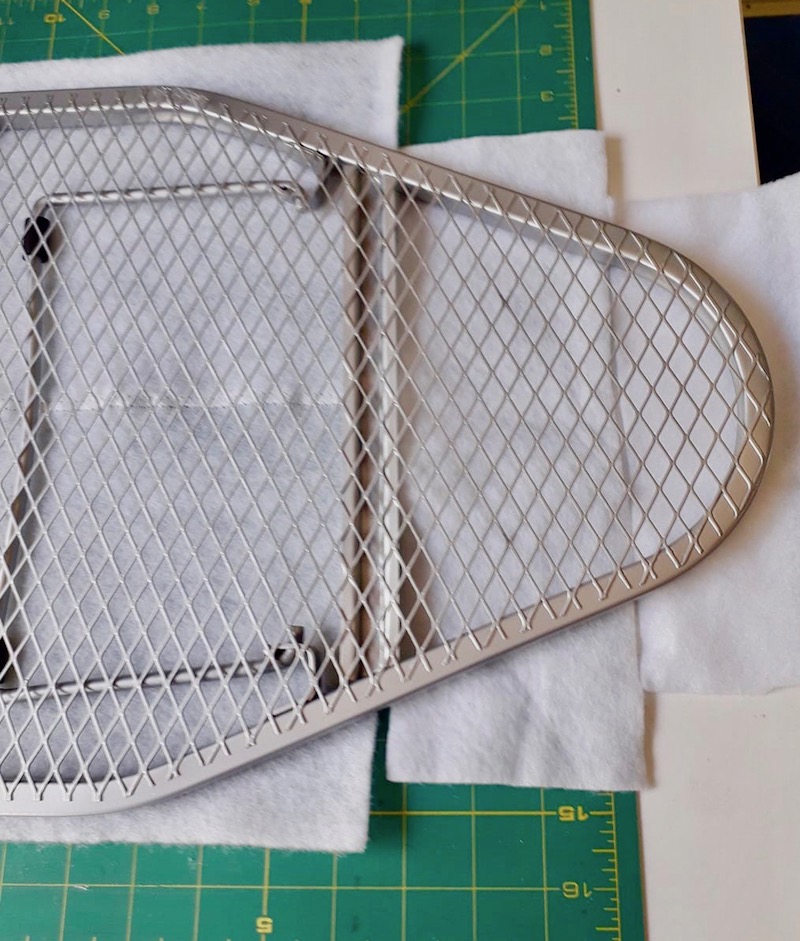
The new wadding was stuck to the original
wadding with spray glue to stop the two layers moving against each other. The
two layers together gave a much more substantial padding, which I hope will
improve the pressing of my craft projects.
Grubby, faded, not giving me joy
Putting the old cover back on didn’t fill me with joy, its boring, white and still stained, and to make matters worse when trying to get it off I snapped the draw string which fits it to the ironing board. I thought I might use elastic to replace it but again due to Covid19 I had no elastic. Well I did but I had another far more important use for it, of which more later ( see blog post “worldwide pandemic” )
Trawling
through my haberdashery stash I found a cone of black polyester ribbon about
.5cm wide, normally I wouldn’t dream of using black ribbon as a drawstring on a
white project but needs must. It threaded well with a bodkin and it did the job.
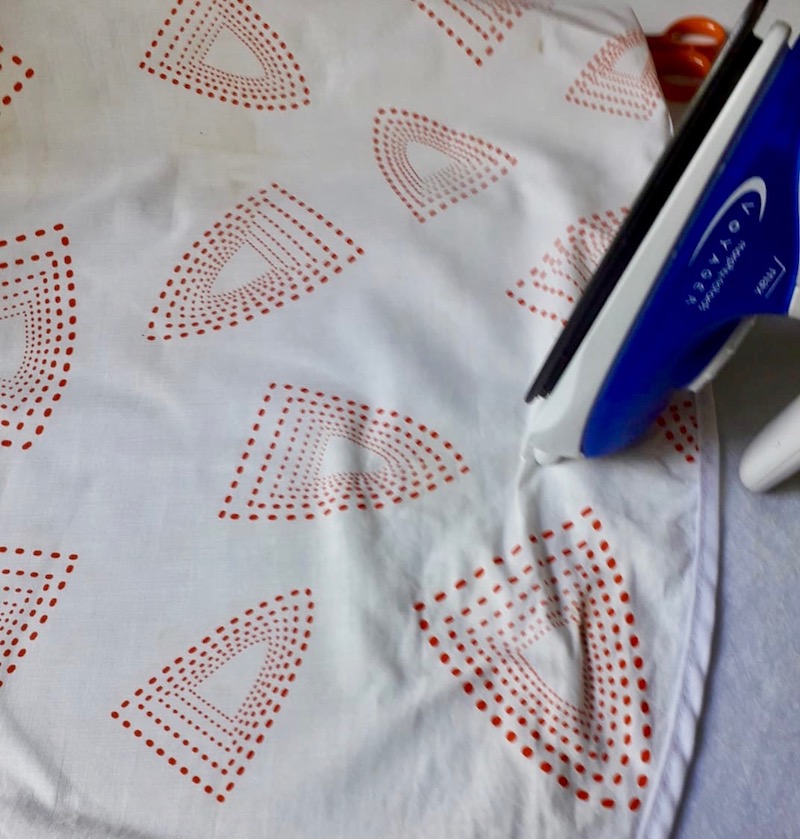
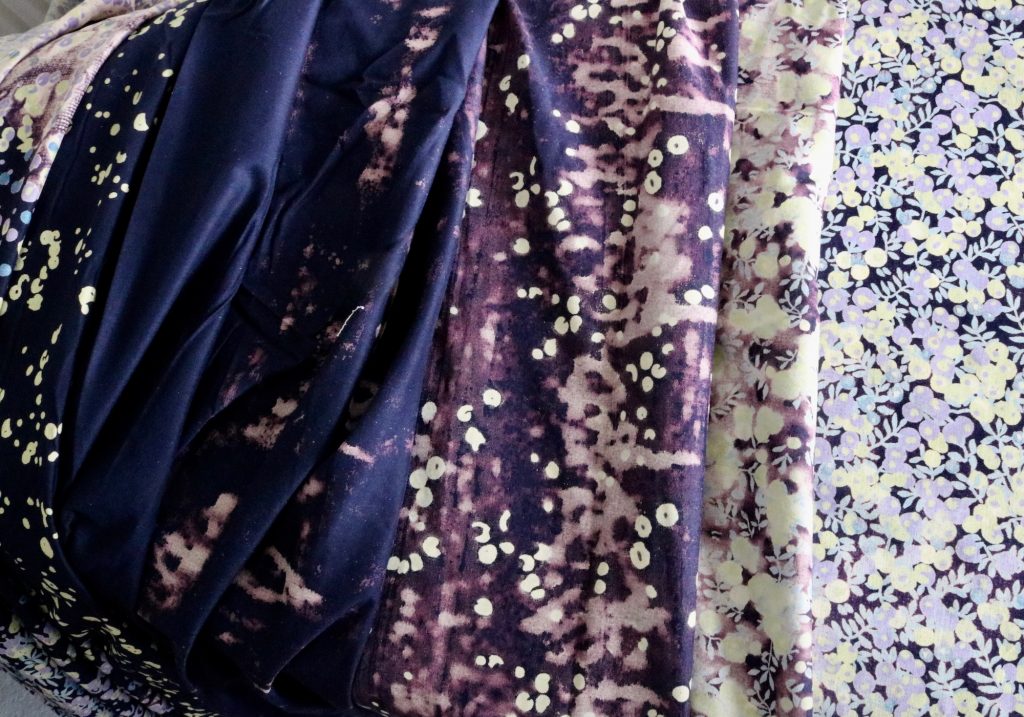
even misprints have their uses.
Before putting it back on I used it as an approximate pattern for another cover. I’d seen on another blog somewhere, sometime, can’t remember when, a new cover made with a gorgeous Liberty fabric. I have some Liberty fabric, bought many years ago again can’t remember where or when but it’s mis-printed so over the space of several yards there are many different misprints, from almost perfect, to completely unrecognisable. Consequently I’ve never found a purpose for it. So I reckoned I could spare a half yard piece from one end.
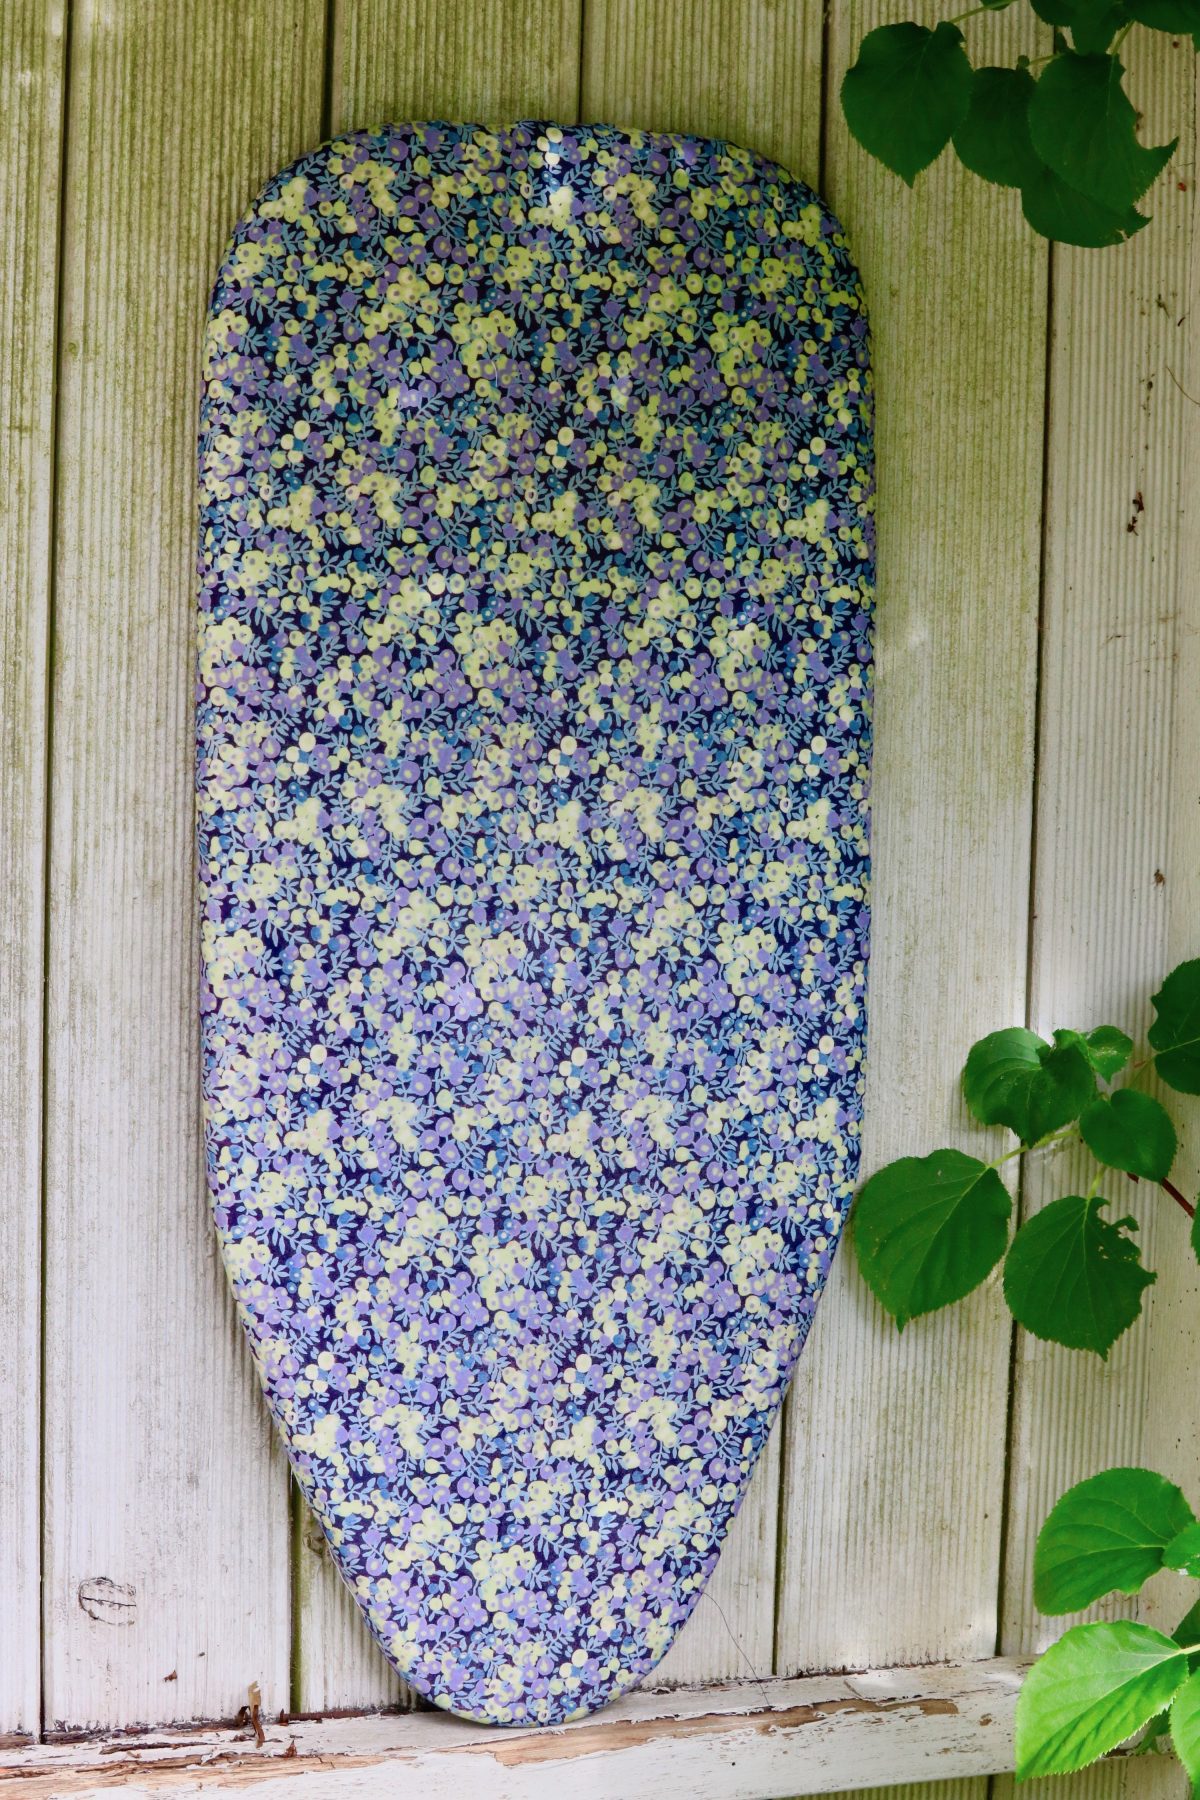
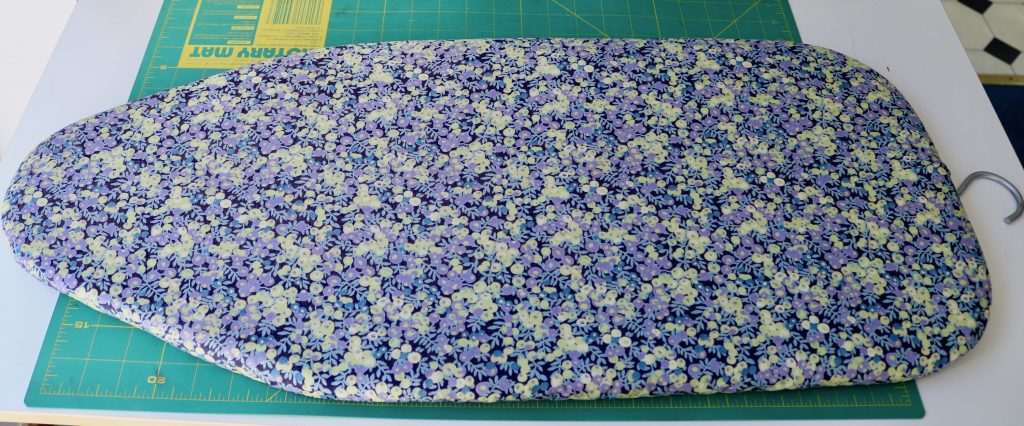
the finished article, a joy to use.
The result is another cover, over the original, and with a similar black poly ribbon drawstring. It fills me with joy. Such a simple change, no money spent, everything came from my stash. A pleasure to use, and I don’t have to hide it or stow it away when we have visitors. A simple thing which brings a smile to every day tasks.
I wanted to give Miriam a leaving gift that was personal from me to her, no shop bought gift , it had to be hand made.
Recently one of my staff team handed in her notice, I was very sad to see her go because she is a great practitioner and a lovely human being, but I was happy to see her progress in her career.
Naturally I wanted to give Miriam a leaving gift that was personal from me to her, no shop bought gift , it had to be hand made. A cushion was all I had time to achieve, so this is the tale of Miriam’s cushion.
Finished!
I decided all would be made from my fabric stash, and wanted something very pretty, so Liberty prints seemed to fit the bill.
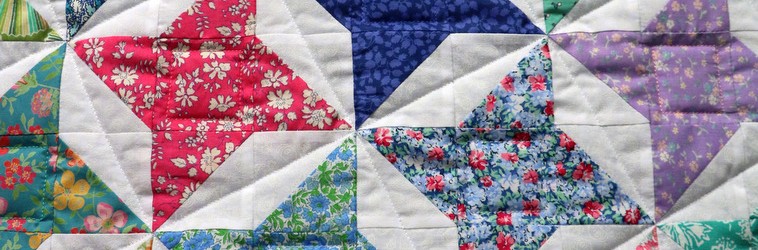
I wondered if perhaps there was a block called Miriam, well there is but it isn’t particularly pretty, and its also known as Crazy Susan, so that wouldn’t go down well. Stars was my second thought. Pinterest supplied this idea, Miriam’s cushion was going to be Fab.
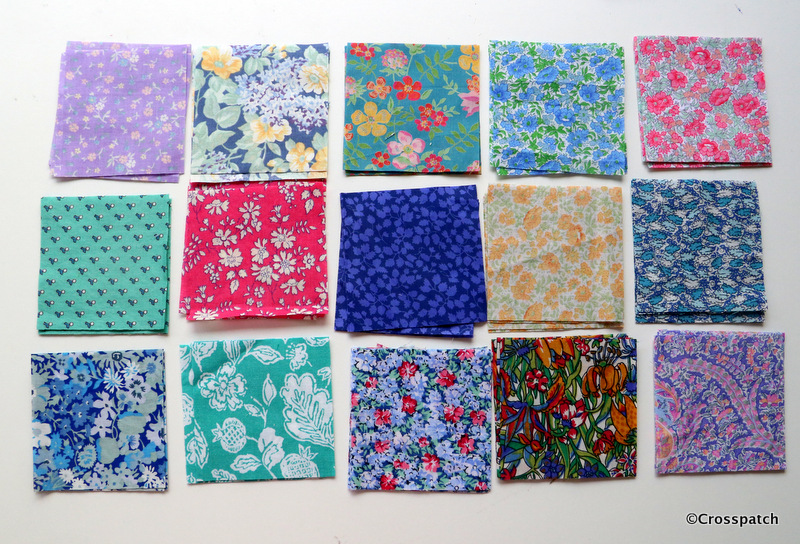
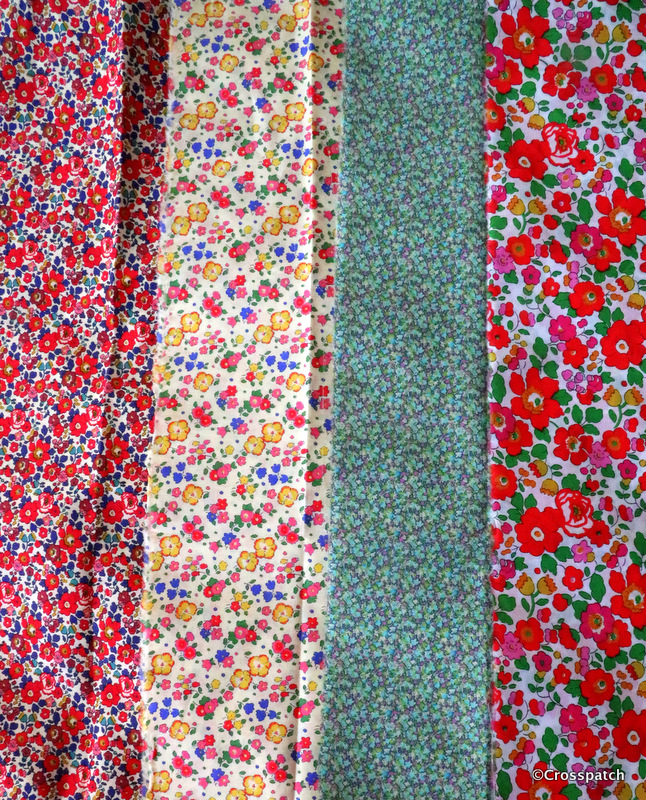
Liberty prints
15 different fabrics were picked out of my stash, and a new white on white fabric was bought to tie them all together, there was nothing suitable in my stash.
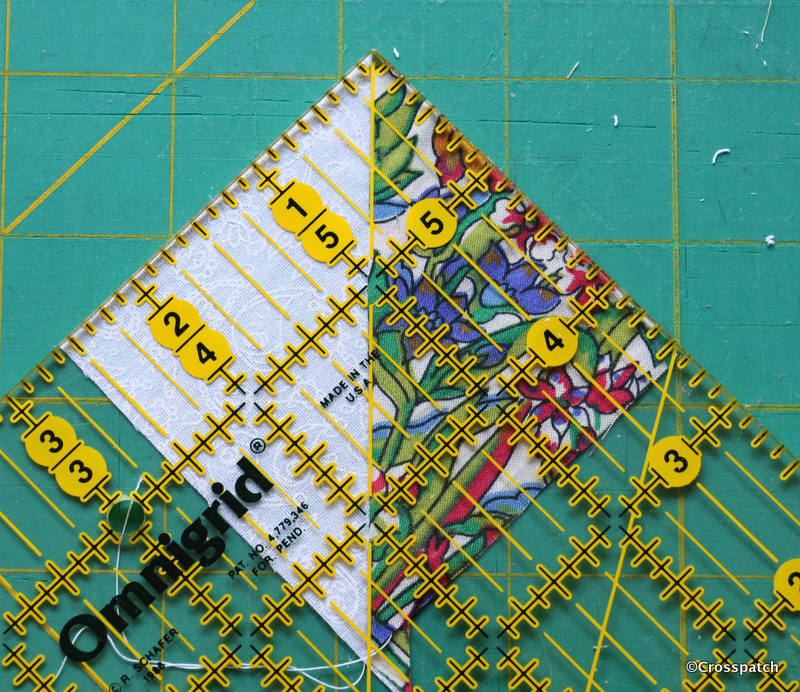
trimming down to 2.5 “
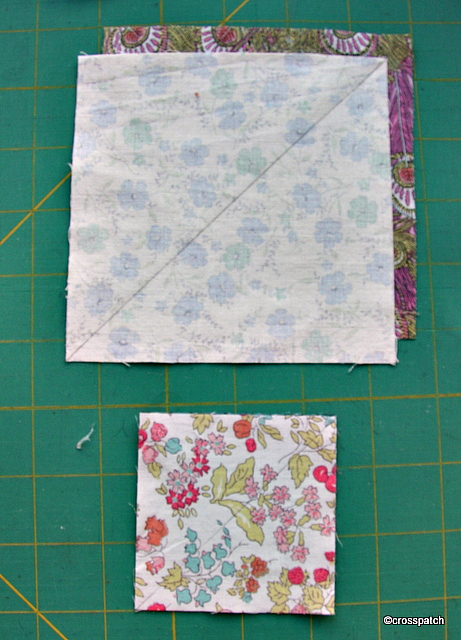
From each fabric one 2 ½ “ square and four 2⅞ “ triangles were required. I found it easier to cut 2 x 3 “ squares from each fabric and the same from the white to make 4 half square triangle units by putting a Liberty fabric square right sides to right sides with a white square, sewing two lines half an inch apart across the diagonal and cutting them apart, pressing to the dark side, then cutting down to 2 ½ “.
Half square triangle units are traditionally made by marking a fine pencil line diagonally across the paler fabric, so that it can easily be seen, and sewing a ¼“ from either side of the line. We press the seam allowance towards the darker fabric so as not to allow the darker fabric to show through the paler, it also helps to nest seams for a flatter, neater end result.
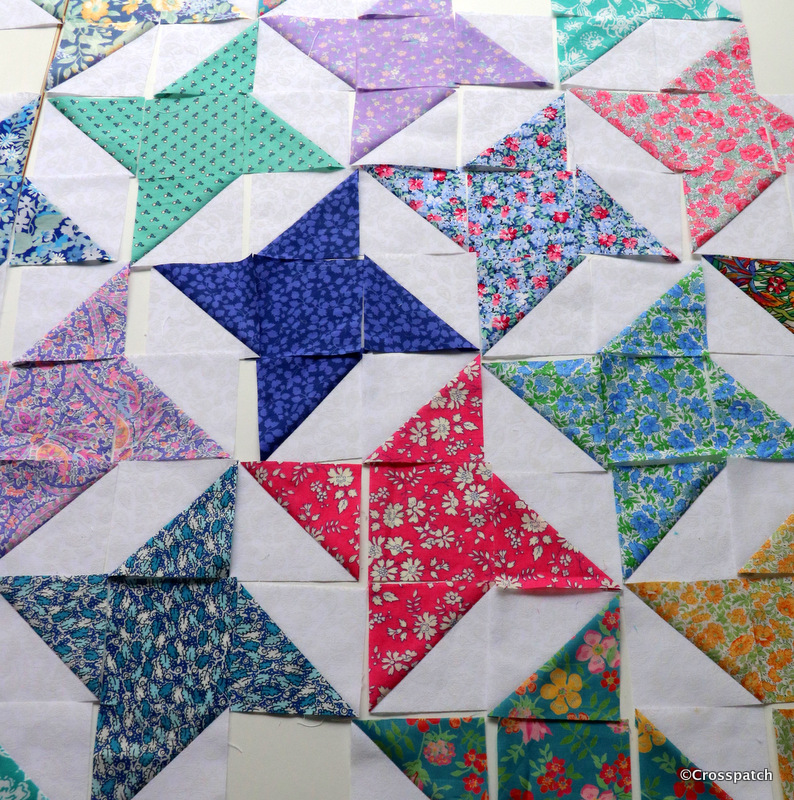
placing fabrics
Once I had 15 sets of square and triangles, I had to decide on placement of the fabrics, with this pattern there are no blocks which can be made up and colour placement decided later, each fabric interlocks with its neighbours row on row , so the whole design must be laid out in advance. Thank goodness it was only a cushion, I don’t have space to lay out an entire quilt in this way.
Numbering the rows so that I didn’t get myself in a tangle I stitched each row individually, then pressed the odd rows in one direction and the even rows in the other direction so that the seams would nest neatly.
I was under time pressure, so as I worked I considered how to finish Miriam’s cushion, I wanted to finish the edge with a binding which would look like piping without the faff of having to use piping. But that left me with a problem of how to close the cushion cover.
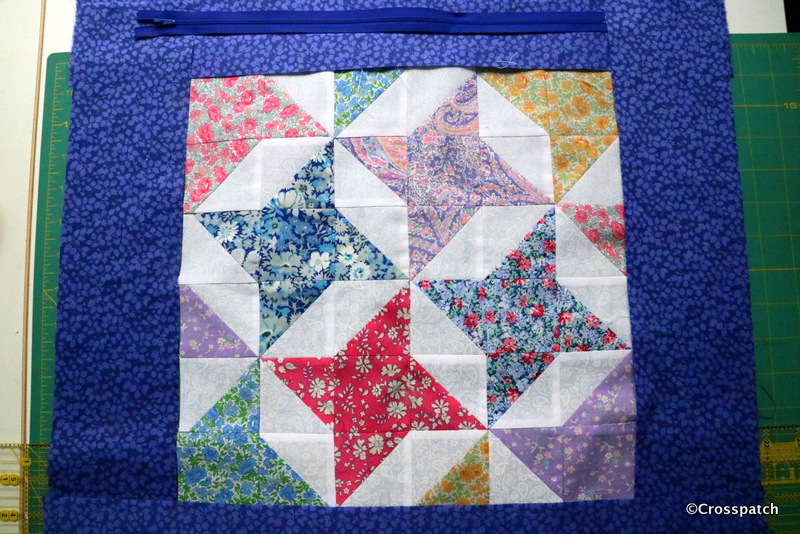
A Zipper looks better than an envelope back, which I always think looks baggy and unfinished, but I couldn’t figure out how to put a zipper in a bound edge. So rather than make a matching back I had to make a smaller version of the front for back with a sashing to insert a zipper and leave a raw edge to bind.
cushion back with zipper
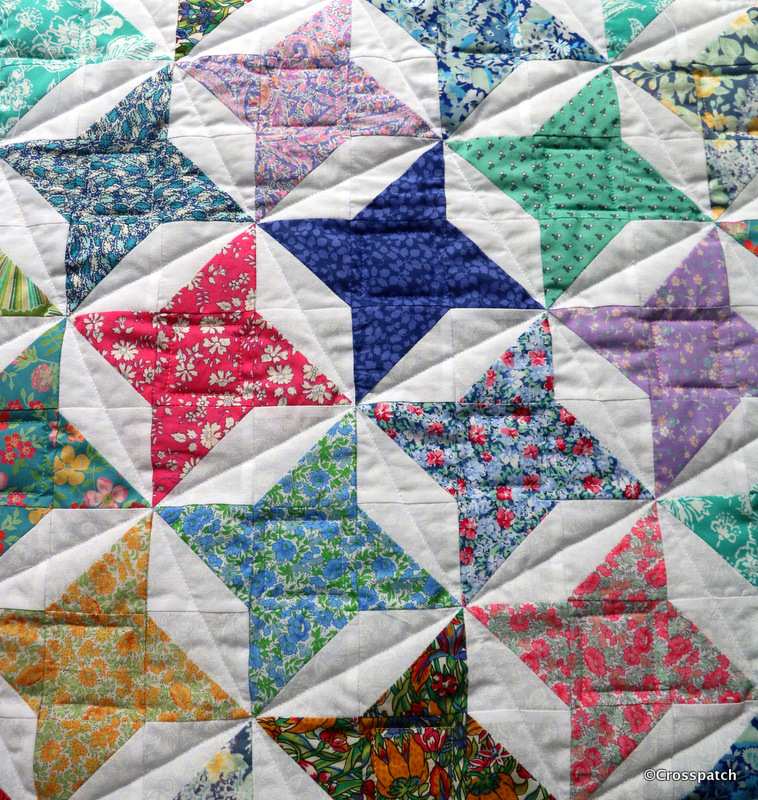
Each side was sandwiched with a 2oz wadding bought specially at Abakhan (https://www.abakhan.co.uk/stores) in Preston; and quilted simply with diagonal lines, happily because the wadding was quite chunky, it didn’t need a lot of close quilting.
quilting Miriam’s cushion
I sewed the front to the back wrong sides together with the raw edges on the outside, a ¼ “ seam allowance.
Finally I cut and stitched the binding ; I cut a 2 ¼ “ binding and folded it in half lengthways, right sides out, sewing it to the front of the cushion just a smidge wider than ¼ “ so that the first seam isn’t showing. It also stabilises and strengthens the seam around the edge being stitched round a second time. Then rolling the binding over the raw edge by hand, because I have folded the binding I now have a folded edge to hand stitch along the seam line on the reverse side.
Finished!
I used the same fabric for the binding as the sashing so that any wobbliness of the binding or the hand stitching would be less obvious on that side. I was burning the midnight oil by this time; Miriam’s cushion had to be finished, she was leaving the following day.
I wanted to label the cushion, but not for it to be seen announcing myself constantly, so I made a label and stitched it inside the cushion, just under the zipper. It simply says it was made for Miriam, it is Miriam’s cushion.
When I gave Miriam’s Cushion to her, I pointed out my two errors, the zipper isn’t centrally placed, can’t figure out how that happened, but I didn’t have time to fix it, and the far corner fabric isn’t quite “right”, but I left it in because, as all quilters know, “only God is Perfect”.
There was one final flourish that I had planned to add but I ran out of time. It was a bible quotation I sought out especially For Miriam, a committed Christian, as she was leaving us for another job nearer to her home. I had planned it to be sewn inside like the label.
So here it is :-
To enjoy your work and accept your lot in life—this is indeed a gift from God. (Ecclesiastes 5:19)
It’s more than simply Miriam’s cushion it is a gift to express fond appreciation of the person she is. Thank you Miriam for passing through my life however briefly, it has been a pleasure to know you, to work with you, to see you develop and flourish in your profession.
only to find I was a week too early. Curses! Well at least I now have time to stitch that binding on, and take it back next week.
Little winner
We all deserve a little luck occasionally; this quilt was made from a little bit of mine.
I’m lucky enough to live near a company called Standfast and Barracks, they print fabric for Liberty and Designers Guild amongst others. They have a factory shop where these fabrics can be bought in small amounts for discounted prices. You won’t be surprised that I shop there often. They also have a facebook page. (https://www.facebook.com/search/top/q=standfast%20%26%20barracks%20fabric%20factory%20shop ) and some time ago they ran a little competition to win some fabrics … guess who won?
lucky Me
I won… Four lovely pieces of Liberty Tana Lawn; now what to make?
I decided to make a disappearing nine patch, I had only used that block once before but I knew it would go together quite quickly, and I liked it, you don’t need a better reason, do you?
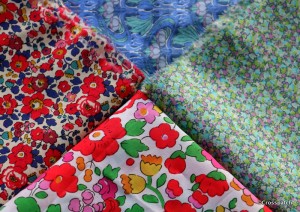
3 of the 4
I fiddled around for a while trying to work out the placement of the fabrics and came to the conclusion that I needed more contrast, a different colour. I dug out my enormous stash of Liberty Tana lawn remnants from Standfast and Barracks, and found a blue which I thought would work.
2 and a contrast
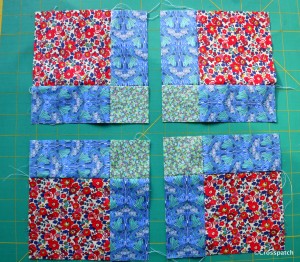
Thinking about the balance of your fabrics in simple terms, the fabric you want to use the most of or to be the dominant fabric should go in the corners of the nine patch block .
nine patch block
The next fabric or fabrics should go on the four sides of the nine patch , you could use all one colour as I did or you could alternate two colours which would create a completely different look.
NB , if you use a fabric with a directional pattern, as I did the pattern should not be placed the same way up, but directed from the sides to the middle of the nine patch block, otherwise when you cut it up and try to put it together again, you’ll find the pattern going every which way. It won’t work.
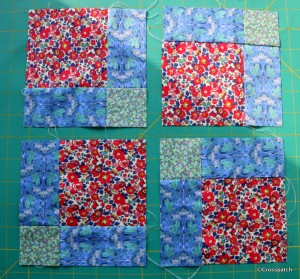
Disappearing nine patch
Finally the fabric you have least of if you are using scraps, or you like least, or would dominate the quilt if used in greater amounts, goes in the centre of the nine patch block. The disappearing nine patch block has a balance of fabrics which is expressed by 4, 2, 2, 1 . The largest patch is 4 times bigger than the smallest and the middle sized patches are half of the larger, if you see what I mean?
180 degrees
Having put together the nine patch I cut it into 4 quarters and put it back together having turned two of the quarters 180 degrees. All the blue patches are aligned in the same direction. If two patches had the pattern aligned along the length, and the other two along the width, it would be visually distracting.
neither works for me
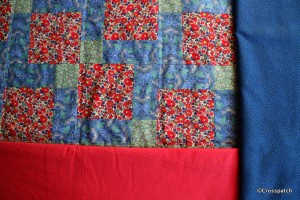
Nine nine patch blocks gave me a 30” quilt top and used up all of the flowered and the blue fabrics, to make it big enough for a lap quilt usually 40 -45 “ square, borders were needed. First I considered a darkish blue… too dark, then a bright watermelon pink… too bright. I thought it would dominate and make my pieced disappearing nine patch centre look dull.
blue and green work together
I added a narrow green border to separate the pieced top from the outer border, using the green helped to balance the colour across the quilt and use the green up too. Finally I took my centre back to Standfast and Barracks, draped it over the rolls of fabric for sale in the shop. I found another blue that worked for the border. I also bought a piece of the flowered fabric big enough to back and bind the edge, leaving enough left over for the hanging sleeve too.
simple quilting
I planned to submit this to my quilt group’s exhibition; the third of my three items, and thinking it needed to be handed in in a few days time I was in a hurry to finish it. The last time I had used this disappearing nine patch block I used a circular quilting to balance the very square pattern, I began to mark out the circles, but my disappearing pen was dried up and useless, pencil was too laborious, I had to do something simple.
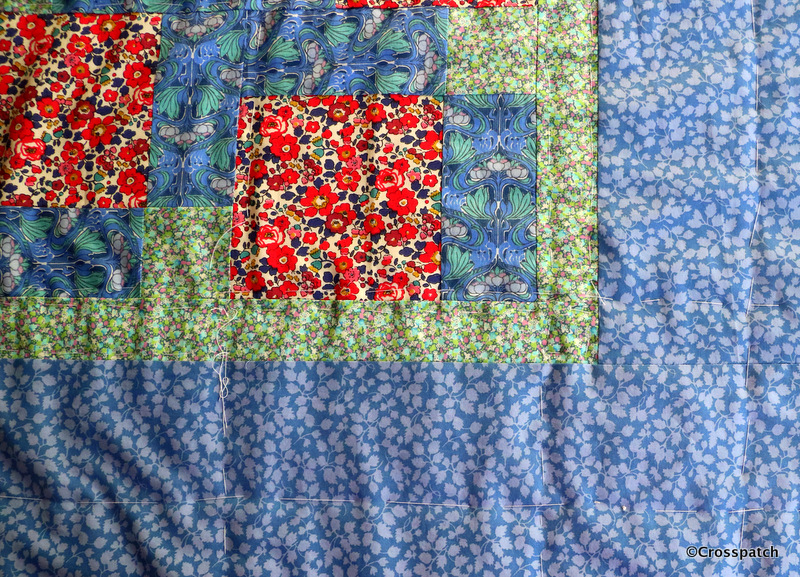
It’s stitched in the ditch, just outlining each quarter block, and the border follows the pattern of the disappearing nine patch block in a simplified form.
burning the midnight oil, less than 24 hrs to go
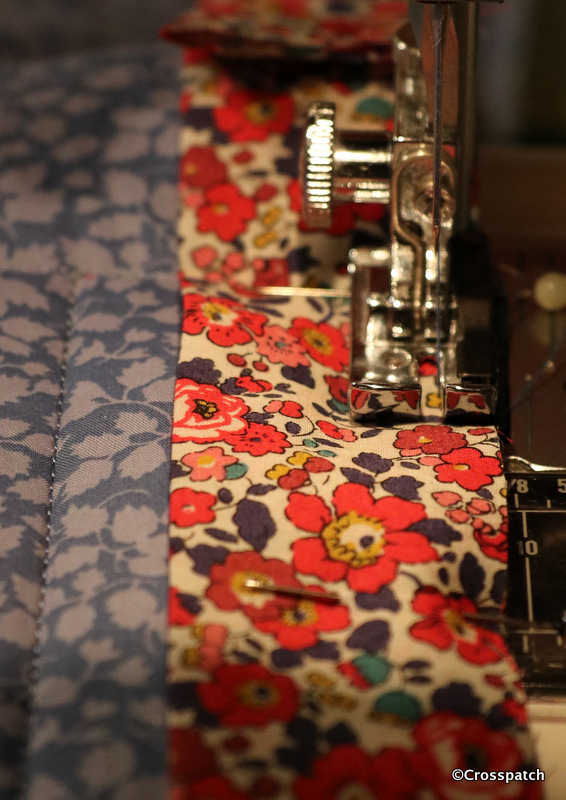
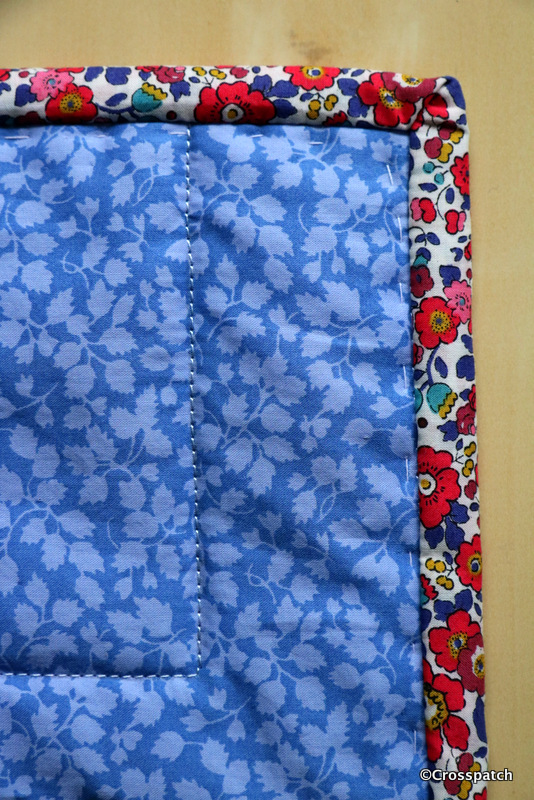
The binding was stitched onto the front, rolled over and tacked down over the stitch line on the back, almost ready but time was up. I drove out to the village where my Quilt group meet to hand it over, only to find I was a week too early.
how neat is that?
Curses! Well at least I now have time to stitch that binding on, and take it back next week.
In case you are wondering I have a plan for the other two fabrics not used in this quilt, with the addition of that bright watermelon pink, I think I’ll make a disappearing four patch… watch this space.
Imagine it in red and white, a striking alternative to the traditional double Irish chain. Perhaps it would work in black and red if you have a Goth in the household, or black and neon Brights if you want a stunner.
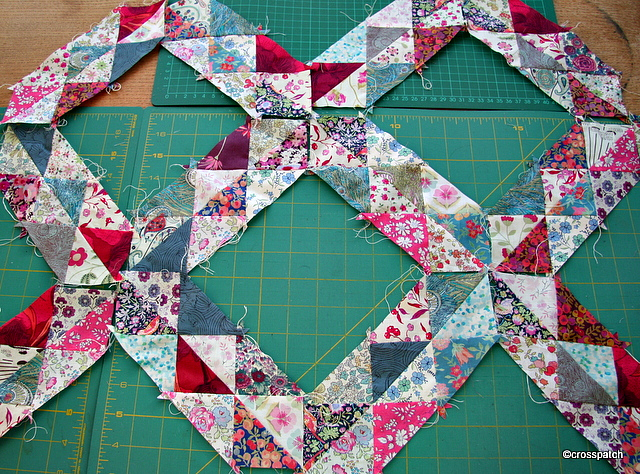
This is something I have been tinkering about with for months; I’m making a scrap quilt from all my Liberty lawns. I have many small pieces sometimes a quarter or half yard many with print errors which need to be carefully cut around, so scrappy quilts lend themselves to such a collection. All my Liberty prints are roll ends and misprints from the factory shop, but for a project like this they are perfect.
so far so good
This block makes a wonderful scrap quilt but can just as easily be adapted to use only two fabrics or a carefully chosen mix of your favourite palette, the only stipulation I would make is that you need lights and darks to ensure clear definition, if you choose fabrics which are too close in shade or tone you will lose the pattern.
half lights half darks in two sizes
It would work with pastels on white or ivory, for a baby quilt; or two plains for the team colours of any keen supporter, claret and blue for a West Ham supporter perhaps. Imagine it in red and white, a striking alternative to the traditional double Irish chain. Perhaps it would work in black and red if you have a Goth in the household, or black and neon Brights if you want a stunner.
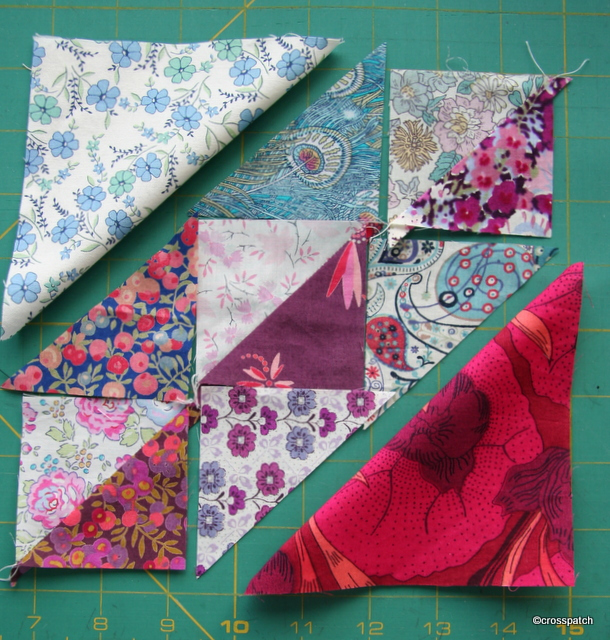
nearly finished block
I’ll explain how it’s made and give the dimensions when it is finished, but there is a long way to go yet; now that the nights are drawing in and the days getting colder and wetter my garden needs to be “put to bed “, and then the quilting can begin.