Return to sender, for refill

The stocking needed …(a gift tag)… with very specific instructions, to return the stocking to sender for an annual refill.

Christmas Sparkle
Christmas Sparkle

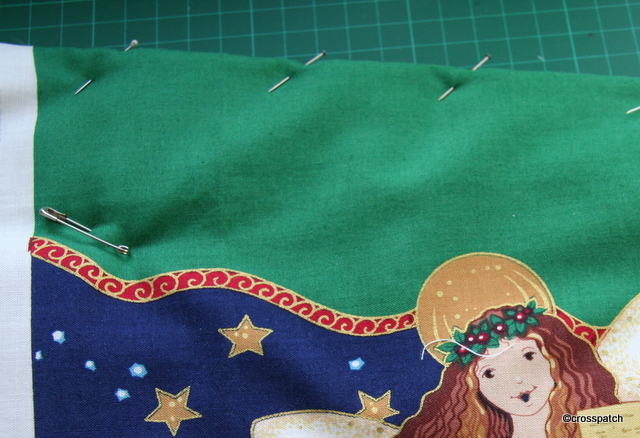
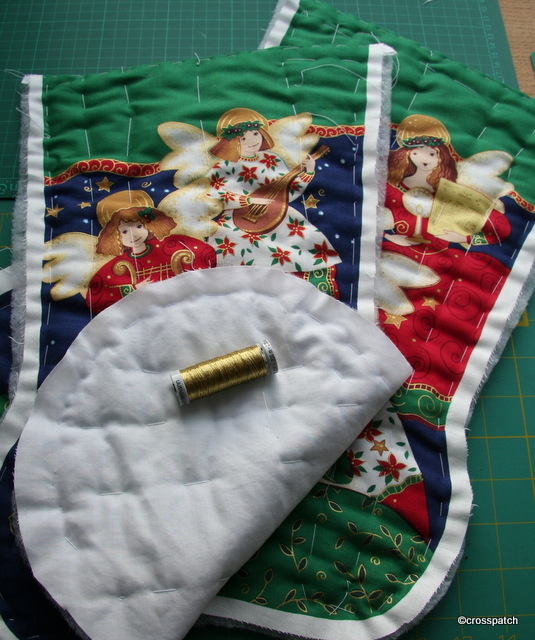
The Angels have all been outlined in gold thread to give them some shape and depth. Some of the stars stitched to hold the layers together, and the continents outlined too. Then the two sides stitched together, a ribbon tucked into the back edge to allow the stocking to be hung up; the excess wadding trimmed off and the seam allowance snipped where needed on the curves to allow the stocking seams to lie flat. I hand rolled and stitched the raw edges of the seam allowance to neaten the inside.

return to sender
return to sender

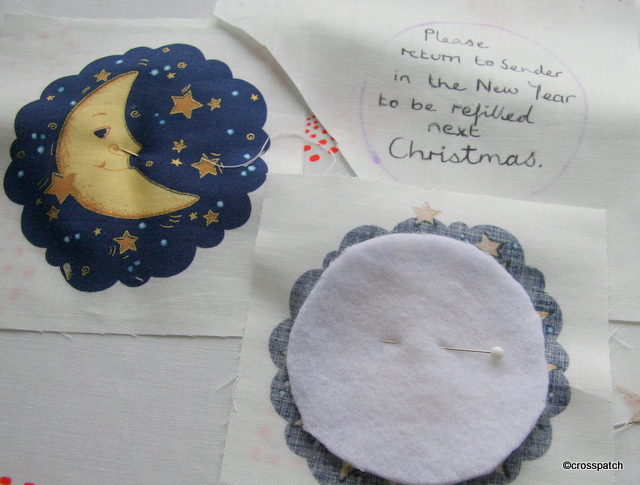
This stocking needed two gift tags one to identify the planned recipient and wish her a Happy Christmas, and the other with very specific instructions, to return the stocking to sender for an annual refill. Each panel had a medallion printed on it, a sun and a moon, which I wanted to use to make the gift tags. Problematically they were largely but not accurately round, I initially planned to force the medallions onto a circular shape but realized that I would lose the integrity of the design, so they finished up with all of the design intact but a rather wobbly, not quite round tag. I cut a circle of wadding first, applied it to the back of each medallion, and stitched it down with a little gold thread, then took a plain piece of the panel and wrote my messages on with a laundry marker, sadly the marker did not enhance my hand writing, it kept running dry and had to be retraced, but it’s the sentiment which matters, not the wobbly hand in which it is written. The two sides were stitched together with a gap at the top and turned out, a ribbon attached and the small gap closed with hand stitching. A line of gold top stitching holds the edge flat and secures the ribbon.

coins and an orange
coins and an orange

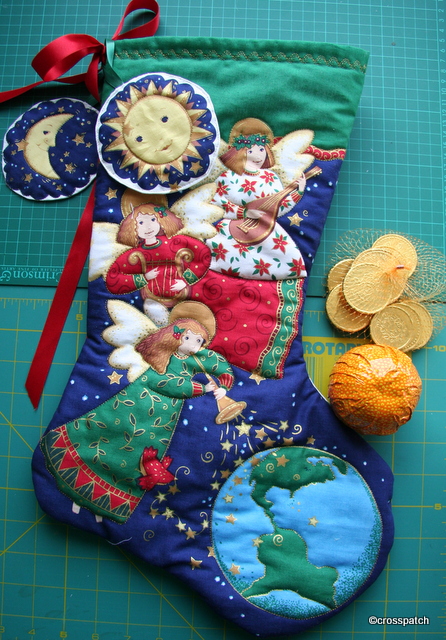
What to put in the stocking? Traditionally it should be a few coins and an orange, or in this case chocolate gold coins, and a Terry’s Chocolate Orange. I won’t tell you what else is in the stocking, the recipient should be the first to know and I’d hate to spoil the surprise. I had planned to deliver the stocking today but yesterday my car decided to make ominous noises, bump, thud, bang, metal screeching on metal so I had to stay off the road today until I could get it fixed.

Oh Dear, parking brake spring disintegrated into rear nearside brake disc, much damage done, big bill, but back on the road, thankfully.

ready to go
ready to go

Hurry up, Christmas is coming

so I put the fabric aside in a safe place till I was ready to begin….but where?

For months now I have been searching without success for a stash of fabric I had put aside to make a quilt for a friend for Christmas, I had planned to make it last year but ran out of time and energy, so put the fabric aside in a safe place till I was ready to begin….but where? I can’t find it anywhere, and I guess even if I did now, I would not have time to make even the simplest quilt. I even pulled out one of my UFO’s and considered finishing it for her but decided not, I love her dearly, she deserves her own quilt conceived and made specifically for her, in her colours. It doesn’t have to be now and it shouldn’t be rushed or ill conceived, besides I am still having ideas about it, so clearly it is not yet a done deal.

£2.99 Oxfam, Kendal
£2.99 Oxfam, Kendal

However I am making something for her, her own stocking. I found in a charity shop some weeks ago a printed panel for a Christmas stocking, and bought it for £2.99, I guess it would have been £5 to £10 pounds or more to buy in a quilt shop.
I cut the two sides apart and cut out the shapes with a centimetre seam allowance, it needs to be greater than a quarter inch because I will use the seam allowance turned in on itself to neaten the seam. I will sew it at 5/8ths and this will ensure no white will show at the edge.

press before you sew

I cut a lining from a plain white fabric I had to hand and a piece of wadding for each side, and sewed all three together along the top edge the front and the lining right sides together, with the wadding on the back.

not a wadding sandwich


Then the wadding was trimmed back as close to the seam as possible , and the printed panel flipped over so that the wadding is now in the middle. I neatly pinned the top edge then tacked it to ensure the lining did not roll out and show above the printed panel. I will top stitch when it has been tacked together to keep the top edge stable.

stabilise the top edge


Having tacked all three layers together I am now in the process of quilting the layers together with a gold machine embroidery thread to add a little Christmas sparkle.

a little sparkle to be added

a completed task

Back to the drawing board then, what does a girl have to do to get some appreciation around here?

finished cushion:front

The two sides were quilted in circles using a CD and a circle cut from card as my quilting guide, and the zip carefully set into one side.the wadding cut back and the lining turned under and slip stitched to the zip fabric, to allow the zip to run. The whole thing then stitched round and turned out through the zip opening. Had the cover turned out to be too big, I would have top stitched around the edge to adjust the size, but it worked out just right.
So I finally finished the cushion, and proudly presented it to the 13 year old to be met with an unimpressed grunt, such is to be expected from a teenager.
The next day I noticed he wasn’t using it, “its scratchy” he tells me… it is so soft to the touch because it’s made from recycled, well washed fabrics!
Finally he asked could it be made smaller, could I “cut a bit off all round” so it will fit on the chair better? I admit I made it to fit the cushion I had, rather than the chair. Back to the drawing board then, what does a girl have to do to get some appreciation around here?

finished cushion: back

Pinwheel Quilt

Looking at it now I think it reminds me of the sugar bag quilts of the 1930’s, it’s a happy quilt, and deserves to be seen.

This is one of the first quilts I made circa 1985, and the first I think which expressed my love of bright colours. It was intended as my own bed quilt. Not sure why, but I don’t think it ever sat on my bed, or was ever slept under.  I suspect that by the time it was finished I already despised it, made as it was with (shock, horror) polyester cotton sheeting! I didn’t really know any better back then, I think I was a student at the time so money was in short supply. Finding fabrics in saturated colour was difficult, and 100% cottons almost unheard of, quilt supplies hard to find. It was made with really thick polyester wadding so it is not heavily quilted, but it is quite puffy and pillowy. I think it would benefit from more quilting, but I’m not planning to do any more, I’d have to re tack it, and as it’s hand quilted, the additions would have to be hand quilted too, it’s a long time since I hand quilted anything, I’m terrible at it, as you can see if you look closely.


To see how the block is made  you need to see it as a four patch, divide the block into 4 quarters diagonally and vertically; each of these squares is made up of two triangles, each of which is made of 4 pieces, which when put together make the pinwheel in the centre and the frame surrounding it.


It began well but I suspect I lost interest after making twelve blocks, another row would have required an additional 18 blocks, instead of which I made 4, one for each corner and finished it off with very wide borders.  It did mean that there was plenty of colour in the quilt, perhaps if I’d had more pinwheel blocks it would not have given as much impression of colour, the balance of colour and white in the finished quilt would have been more even, and perhaps more anaemic.

see that 60’s fabric yet again 12.00 till 2.00


Looking at it now I think it reminds me of the sugar bag quilts of the 1930’s, it’s a happy quilt, and deserves to be seen. I might put it on the bed in my studio, rather than allow it to languish unseen in a packing box in the corner of that room. Then at least it will be slept under occasionally. I sometimes retire to that bed in the middle of the night if I cannot sleep; too hot (me), or too much snoring (not me).

The Quilt on my bed

my Dearest likes a 14 tog duvet, while I’d be happy with 4 togs (it’s my age, I’m told). In that single week in May we call Summer when the nights are warm and the duvet is cast off the bed, a sheet and this quilt suffice to sleep under.

This is the quilt which lives in my bedroom and is the first to be put on the bed if extra warmth is required, admittedly rarely because my Dearest likes a 14 tog duvet, while I’d be happy with 4 togs (it’s my age, I’m told). In that single week in May we call Summer when the nights are warm and the duvet is cast off the bed, a sheet and this quilt suffice to sleep under. It is my most used quilt but my Dearest still gets told off for sitting on it “en deshabille”.

The block is a simple collection of 16 x 2 inch squares put together randomly from scraps to create a 6 inch square, each block is interspersed with another block made of 4 quarter square triangles in ivory and burgundy, which are then placed with the colours positioned alternately in each row; so that each block of scraps appears to be set in the centre of a larger square of either ivory of burgundy.


Again I used some of my favourite tiny scraps, my 1960’s dress fabric features again, probably only because it could be made from such tiny pieces, and all I had left were the tiniest scraps. In fact I tend to cut 2 inch squares if I can from any fabric scraps I have left, on the grounds that if I can’t get a 2 inch square out of it, it probably isn’t worth keeping. These are then stored in a tin for my next scrap quilt project. It is hand and machine quilted very simply in ivory thread, I didn’t think it needed anything elaborate, scrap quilts don’t, their beauty lies in the fabrics.

The quilt is titled Remembrance, the blocks were a ”Block of the month” challenge which I won sometime back in 1996; made into a quilt that year and exhibited the following year. I didn’t attend the group meeting the night I won the blocks, I had been at a funeral that day, my cousin had lost a long fight with cancer. I thought of her often as I made this quilt, she was younger than me and the first person I had lost still in the flower of youth. Over the years this quilt has been packed away, or otherwise hidden from view, but whenever it surfaced my cousin was always my first thought when I saw it again, it might seem morbid but it isn’t to me, I’m happy to be reminded of her, she was a beautiful woman, and she lived her life. My memories of her are happy ones.