a completed task

Back to the drawing board then, what does a girl have to do to get some appreciation around here?

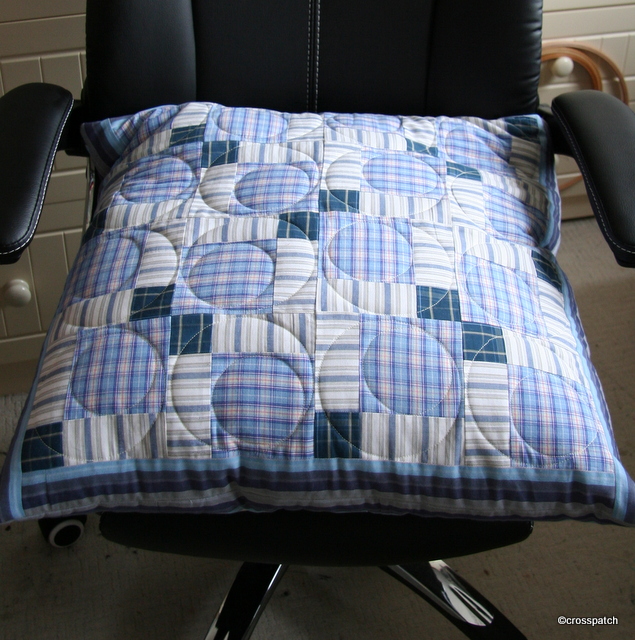
finished cushion:front

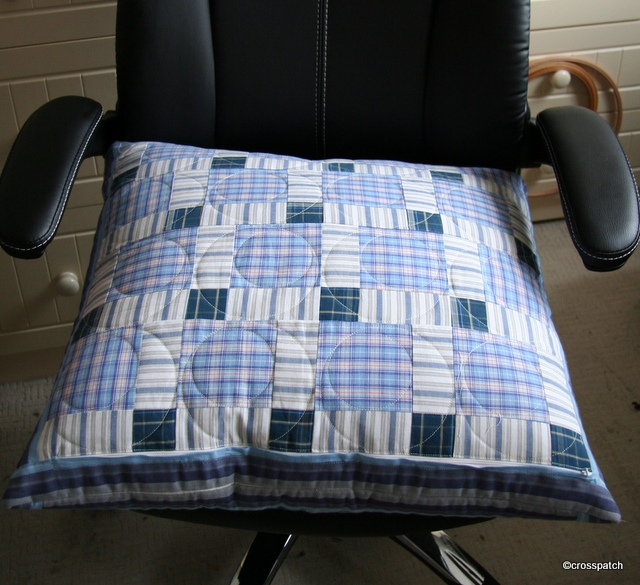
The two sides were quilted in circles using a CD and a circle cut from card as my quilting guide, and the zip carefully set into one side.the wadding cut back and the lining turned under and slip stitched to the zip fabric, to allow the zip to run. The whole thing then stitched round and turned out through the zip opening. Had the cover turned out to be too big, I would have top stitched around the edge to adjust the size, but it worked out just right.
So I finally finished the cushion, and proudly presented it to the 13 year old to be met with an unimpressed grunt, such is to be expected from a teenager.
The next day I noticed he wasn’t using it, “its scratchy” he tells me… it is so soft to the touch because it’s made from recycled, well washed fabrics!
Finally he asked could it be made smaller, could I “cut a bit off all round” so it will fit on the chair better? I admit I made it to fit the cushion I had, rather than the chair. Back to the drawing board then, what does a girl have to do to get some appreciation around here?

finished cushion: back

A challenging challenge

I like the curvy line quilting because it’s easy to do and does not rely on the accuracy of the piecing, in fact if your piecing is not accurate curvy line quilting is very forgiving. That’s always a good thing.

What do you do if you don’t like the challenge block? Hide it.

Cecily's favourite churn dash block

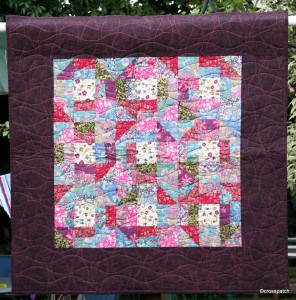
This Lap quilt is made using the Churn Dash block (or monkey wrench), I think it was the favourite block of our most venerated late member and the instigator of our quilt group’s challenge, Cecily. But I dislike it. I wanted to rise to the challenge as always but I find the block rather pedestrian, perhaps because I’ve only made it in co-ordinated colours and plain fabrics, so a decided to do it in heavily patterned fabrics and mix it up so that the pattern was lost and the fabric became the star of the piece rather than the block.
Good idea, but I think I took it too far, the pattern is completely lost and with it the sense of rhythm to the quilt top, as a consequence what stands out are the pale squares, rather than the fabric in general. All of the fabrics are Liberty scraps from the printer’s factory shop, I’m so lucky to live nearby; I call in occasionally to buy craft packs, but I can also buy off the roll if I have a big project in mind.

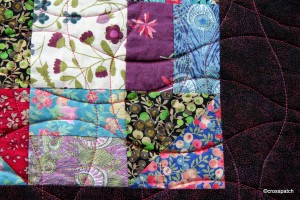
Detail of quilting on Churn Dash quilt

In other senses I’m happy with the quilt; it hangs beautifully flat and straight and is evenly quilted throughout. I created my own wavy line quilt guide using taped together strips of cereal packet, with a hand drawn wavy line. On one side the wavy edge has wide and fairly flat curves, on the other side they are closer together and therefore appear deeper. I used the flatter side, drew on the lines with an air dispersible pen, and chalk pencil taking the quilt pattern right out in a continuous line to the edge of the quilt.
I like the curvy line quilting because it’s easy to do and does not rely on the accuracy of the piecing, in fact if your piecing is not accurate curvy line quilting is very forgiving. That’s always a good thing.

More Christmas Stockings

You might want to consider tucking a ribbon (to use as a hanger) into the back seam of the outer pair, but remember to put it between the seam on the INSIDE before you stitch it, you don’t want it between the outer and the lining do you?

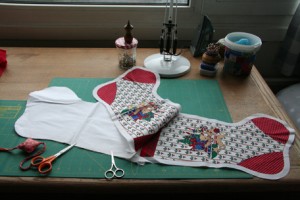
If you want to make your own quick and easy Christmas stockings you can buy ready printed panels, or simply choose a Christmassy fabric and a simple lining. Once you have found or drafted a pattern you are happy with cut two stockings from the outer fabric and two from the lining, make sure you cut them right sides of the fabric together so you get a left and a right, rather than two lefts or two rights.

Stitch each outer and its lining together along the top edge, then lay the two right sides together outer on outer, lining on lining and stitch right round the whole piece, leaving a gap on the back seam of the lining as indicated between the points of the scissors in the photo

You can then turn the whole thing right sides out, hand stitch the opening in the lining closed and then tuck the lining in.
You might want to consider tucking a ribbon (to use as a hanger) into the back seam of the outer pair, but remember to put it between the seam on the INSIDE before you stitch it, you don’t want it between the outer and the lining do you?
You might also want to top stitch the top edge to stop the lining rolling out, and a few stitches in the seam at the toe to hold the lining in place. And if you aren’t wadding and quilting then choose a furnishing fabric to give some substance to your stocking.

Christmas is coming

thank goodness I didn’t make them bigger, stockings have to be well filled at Christmas, a thin and meagre stocking is so dispiriting isn’t it?

And I need to finish a project I began 5 years ago, we were driving to Hull and back twice each weekend to facilitate contact with   my Dearest’s 7 yr old son and 11 yr old daughter. To while away the long car journeys and thinking I might have two children staying with us at Christmas, I began to make them a stocking each to hang at the fireplace.
I have already made a number of Christmas stockings but they are for adults and generally fairly small for the kind of little stocking gifts that amuse adults, these stockings would need to be bigger, much bigger.
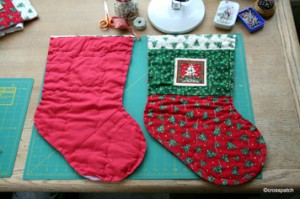
I can’t remember where I got the original pattern from, but it has been modified a number of times over the years. There are plenty of stocking patterns on the net if you’d like to try this yourself.
The fabric was my quilt group’s Christmas challenge fabric for 2007, sadly I’m five years too late to enter the challenge, but they will be finished this Christmas, come what may!  There were two colours of co-ordinating fabric, and a collection of small panels. I chose two matching panels one for each side of each stocking, a different colour way for each stocking, so that I could tell them apart.
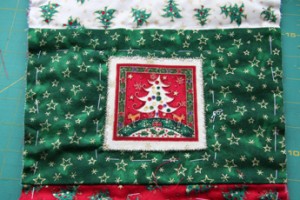
The panels were applied using bondaweb, and the edge stitched with Gold thread using a fancy machine stitch. I used a stitch which reminded me of icicles, it would have worked far better in silver but the embellishment on the fabric is gold, so my embellishments had to be gold too.
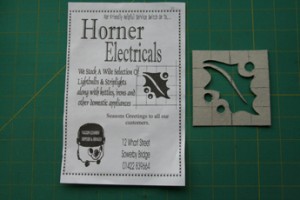
 

I will have to quilt the panels in gold tread before I stitch up the sides of the stockings, and I haven’t quite worked out how I will quilt them, but probably the holly leaves and berries, which I have used before. It’s easy to create your own quilting patterns or stencils, I found a simple line drawing of a holly leaf and berries on an advertising handbill, scaled it up and cut it out of cereal box. I might have used plastic film if I needed to use it on an entire quilt, but cereal packet is fine for a few uses.

Each stocking will have metre of ribbon folded in half and stitched into the back seam so it can be tied with a bow to whatever I want to attach it to, the banister rails are a favourite place.
I plan, if I have time to make a swing tag,a gift tag to hang from each stocking like the little dog on a Radley handbag, with just an initial for each of them V and T, the children are now 12 and 16, their gifts tend to be smaller and more expensive than back then, so the stockings are probably large enough, thank goodness I didn’t make them bigger, stockings have to be well filled at Christmas, a thin and meagre stocking is so dispiriting isn’t it?