I just have to use these little squares, waste not want not. My first thought was to just put them together , on a red background, or maybe add some applique.
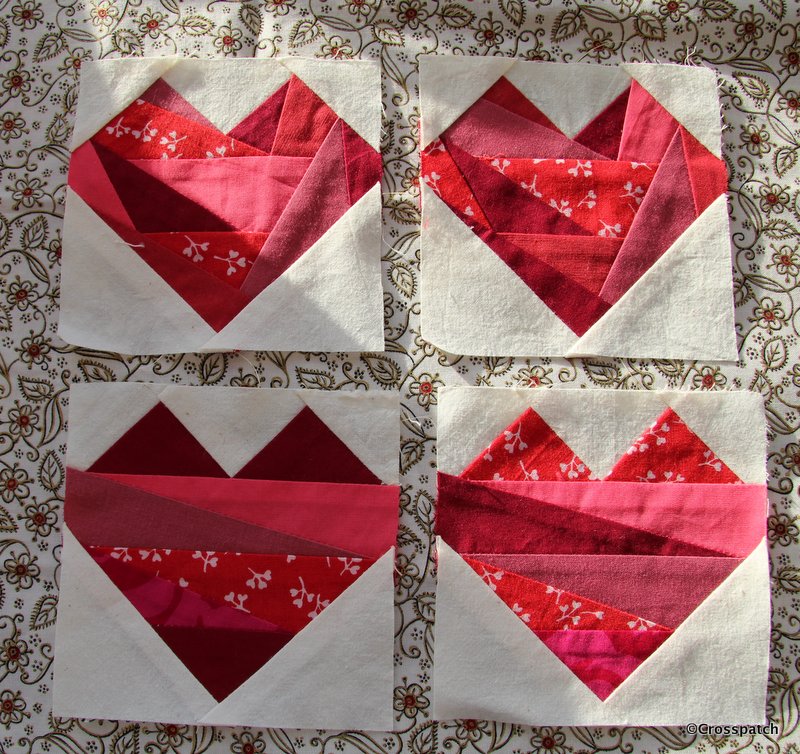
foundation pieced hearts
What do you do with your unfinished projects, I don’t remember making these scrappy hearts blocks, who knows how long they have a lain unloved in the bottom of a box? While searching for some star templates to finish another project I found another UFO (Un-finished Object) four little red hearts foundation pieced from scraps of red fabric on cream calico. Well what can I do with those? Looking at the fabrics I don’t think I have any left, I don’t recognise them at all, but no matter, I think I can finish them into a usable size by introducing another red fabric.
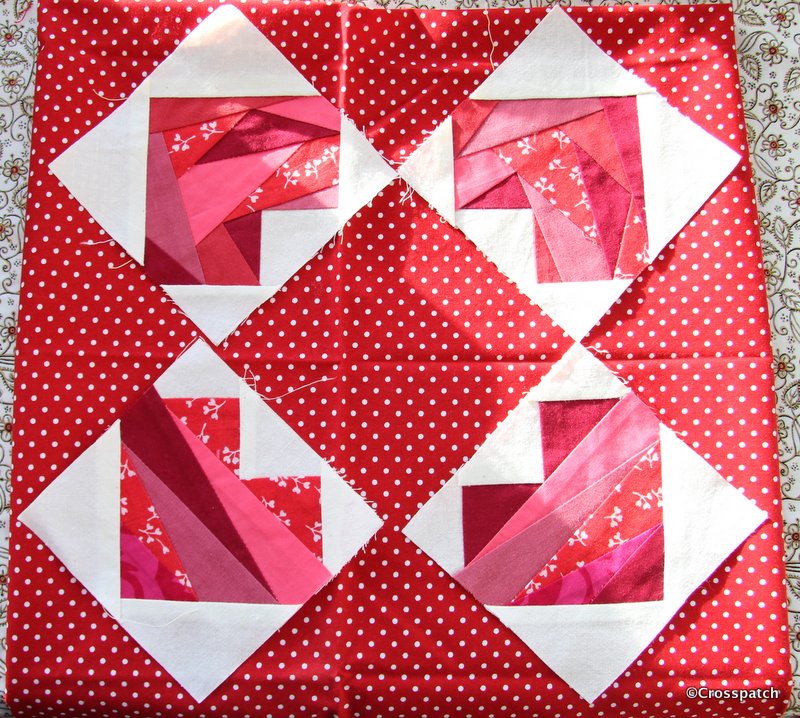
maybe like this?
Co-incidentally, my quilting group’s annual challenge this year is “call it red“. I just have to use these little squares, waste not want not. My first thought was to just put them together as in the picture, on a red background.
Or… I could add some applique hearts in Calico on red, with red stitchery… perhaps some more foundation pieced hearts in different reds… perhaps… anyway I have till July to figure it out.
I love red and white quilts and I had been planning to begin a red and white quilt for Cecily’s challenge , a feathered star in white on a red background, but if I’m honest it’s not likely to happen, not unless I find an eighth day in the week, or am in the happy position of being able to retire before July. So I’m really pleased to have found these Hearts, I can get them made into something before July… surely.
I have recently redecorated and re-carpeted my Studio and am back in and free to sew again, but for one small problem, now the room is clean and warm and bright, a certain 15 year old who had denied any designs upon the space, now thinks his own room is way too small for him and perhaps my playroom will suit him better. In the summer when I have redecorated the living room, I will have to think about decamping to what is currently the dining room, so hopefully I can get my little red hearts quilt completed before then.
I dread to think how many times I pieced and unpicked that border, and every time it was wonky.
30 years of scraps
This year’s challenge from my Quilt group, was Crazy, put simply anything made from crazy patchwork, fill your boots. My plan was to collect silk ties to cut up, and I did buy a few from my favourite charity shop, but I soon realised that I would need a lot of ties, to have enough variety of colours and patterns, so back to the stash.
rejected scraps
I found a bag of scraps, (well three actually), sorted it into three piles, blue and white Laura Ashley scraps dating back to 1977, (of which more later), a pile of pastels some Laura Ashley of the same vintage and some from the 80’s, and a reject pile the colours of which would not meet the criteria for my piece, brown orange, cream etc.
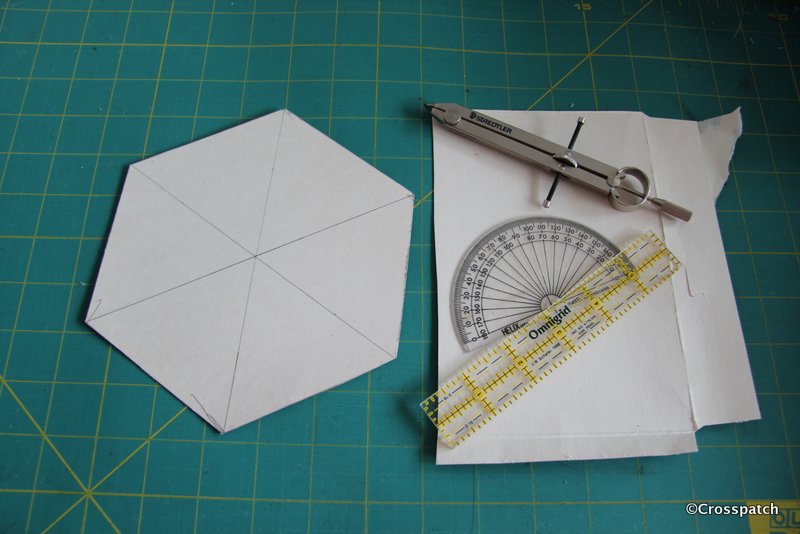
always knew Geometry would come in one day
I wanted to work on small pieces which could be joined together in a larger piece, and had seen a number of crazy patchwork studies created as large hexagons, all I needed was a large hexie pattern. So out came the cereal packet, compass and ruler, not difficult, simply draw a circle, divide into 6 equal parts (60 degrees), and draw a line from radius to radius, where the circle intersects, to create a hexagon. The size of the hexagon was determined by the size of the cereal packet.
big mistake
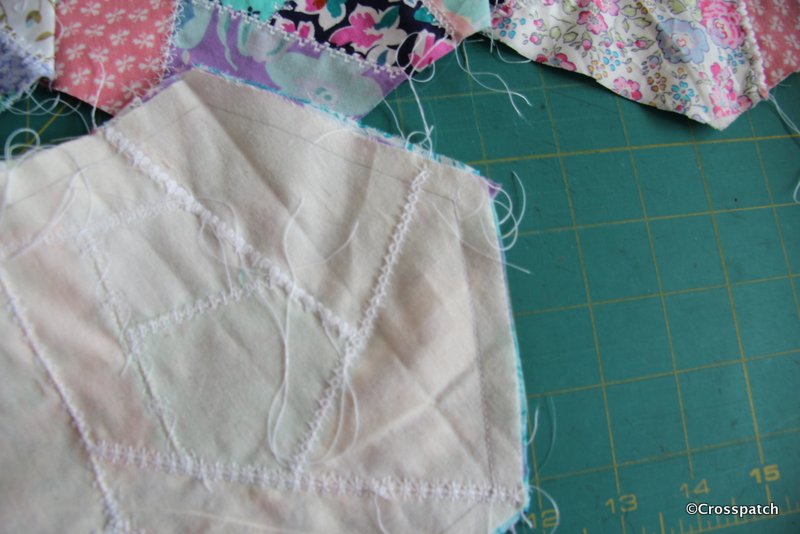
Initially I followed the advice in my only Crazy patchwork book, (big mistake, but excellent lessons) I cut and laid the pieces on a backing fabric cut from cotton calico (lesson one backing layer too thick). I overlaid the pieces by a eighth of an inch and then stitched them down with a fine zig-zag stitch using transparent filament, (mistake two, this is nasty scratchy stuff and leaves a ridge of stitching which then causes drag when using machine embroidery stitching on top).
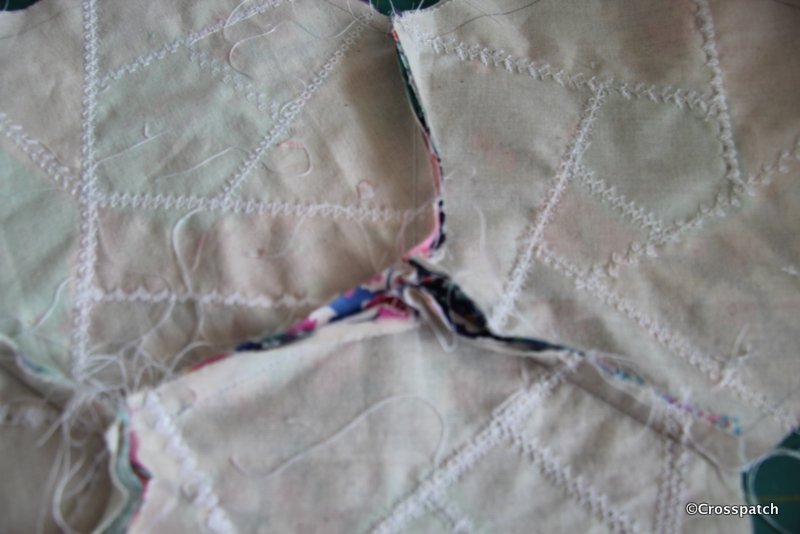
seen from the back
Running out of time (72 hours and counting) I realised using differing coloured threads to embroider the patches would take time I didn’t have and possibly require threads I didn’t have, so I decided I could pull the whole thing together and achieve balance by using one colour for the embroidery throughout, white.
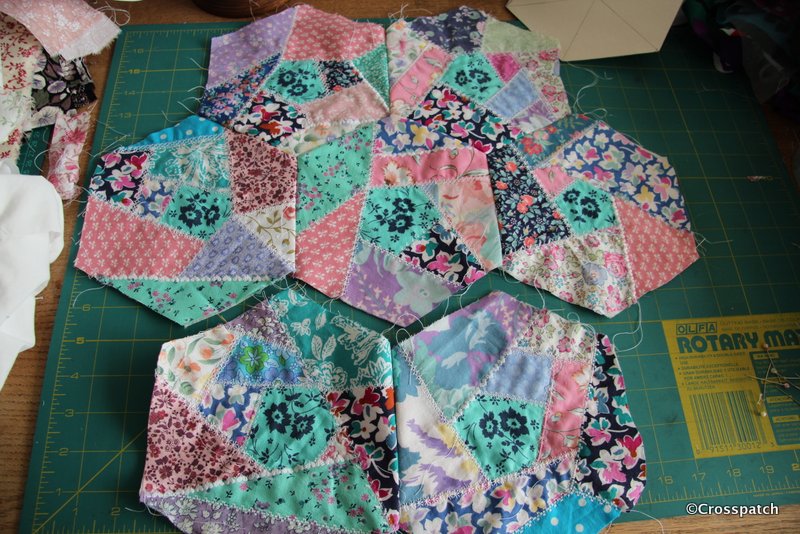
I need seven!
As I picked the embroidery stitches to decorate my scraps I made my next mistake (number three), I didn’t try out every stitch on scrap before I began, and there’s no unpicking it afterwards! Had I tried them out first I could have adjusted the length and width of stitch to get the optimum look of the embroidery stitch. I would have also realised that the thread I was using would not work well with some of the more open, spidery stitches leaving a barely visible embroidery, a bold thread would have worked better (mistake number four).
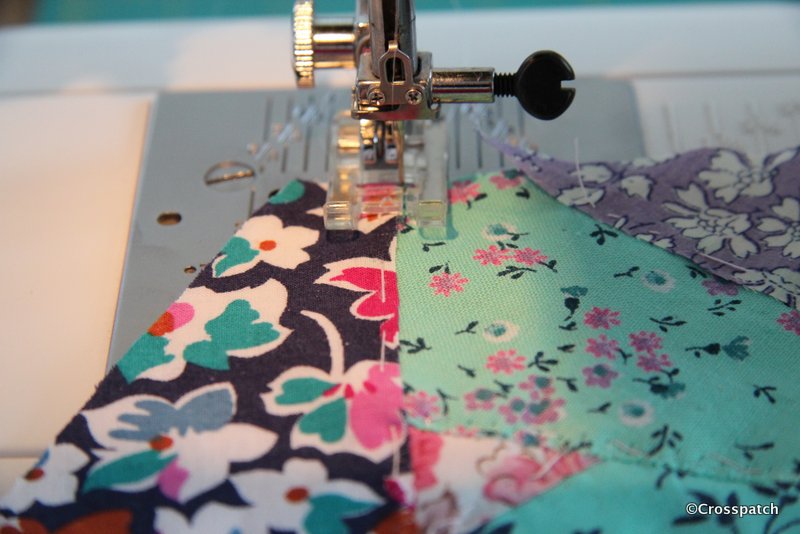
always a fiddly task.
Now comes the fiddly bit, piecing the hexagons by machine, stitching into acute corners requires some skill, the trick is not to stitch right to the edge , leave yourself a quarter inch of wiggle room, it doesn’t matter if you leave a little hole at the corner, you will be embroidering over it anyway.
and now for my next trick
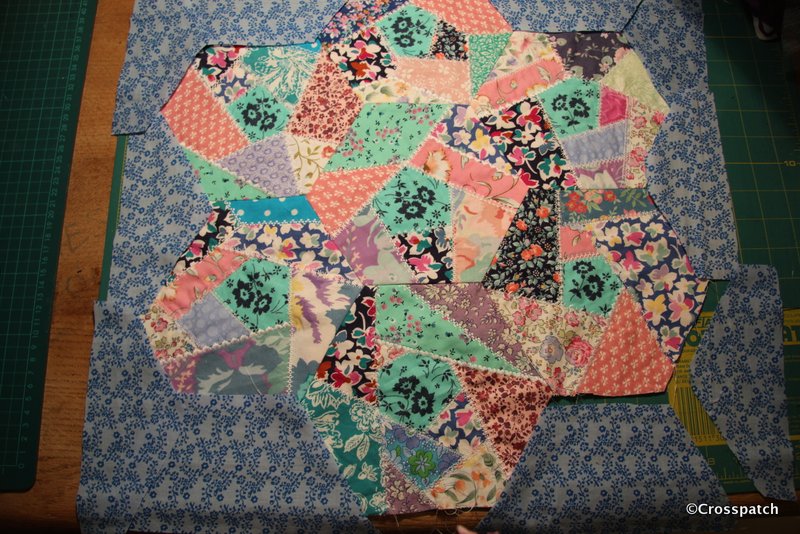
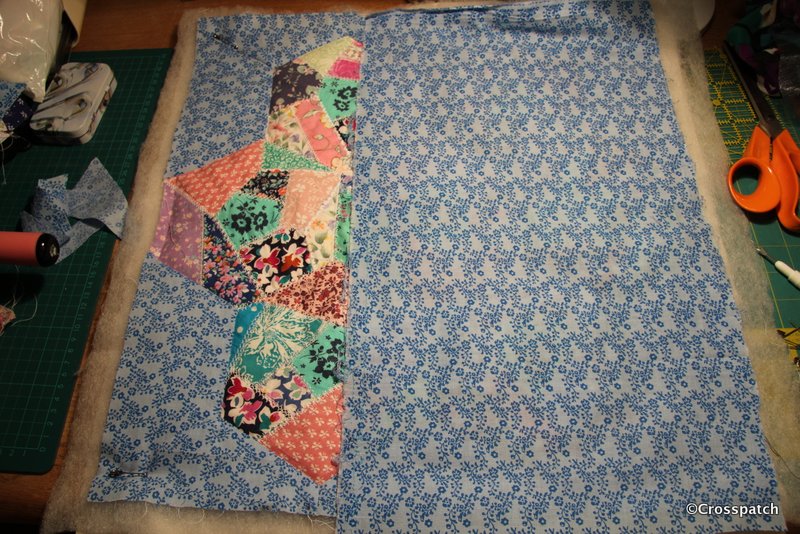
It’s at this time I discovered mistake number five, for some reason I can’t fathom I had only made 6 hexagons, and of course I needed 7, with only 48 hrs to go I didn’t have time to fiddle about with my previous method so I cut another hexagon in calico, grabbed some spray tack, sprayed liberally, cut up some scraps and dabbed them on in a haphazard way, forgot the filament zig-zag and completed with white embroidery. No mistakes and it turned out the best of the 7 hexies. Finally mistake number six , I then decided to piece the edge to create a square, all the blue sashing is made of part hexagons cut to fit around the edge, and pieced in. It would have been so much easier and quicker to applique to a straight piece of sashing. I dread to think how many times I pieced and unpicked that border, and every time it was wonky.
envelope back
Consequently I ran out of time to finish it properly, I should have put a zip into the back but I didn’t have one, nor time to buy one so I made an envelope back, which I don’t like and will replace, I stitched the final edge seam with a big stitch so I can unpick it easily, and the pieced sash edge has not been embroidered where it joins the crazy patches, so when I unpick it I’ll add more embroidery.
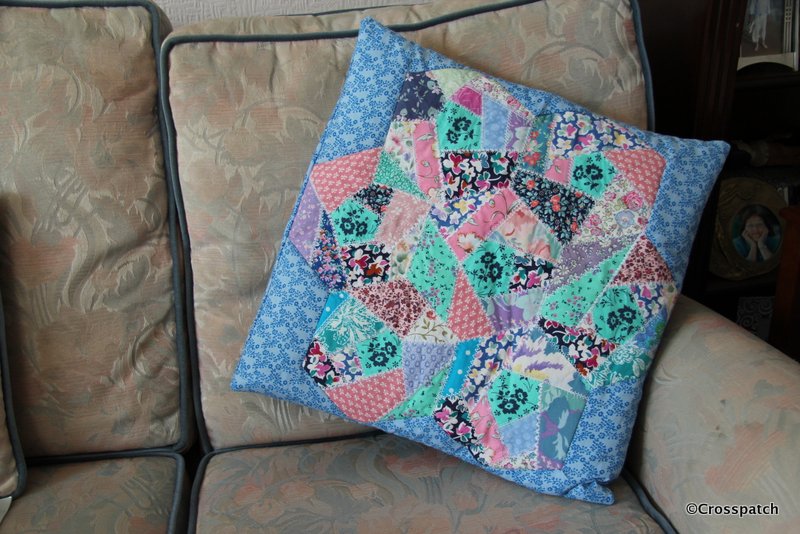
finished…ish
At least I managed to produce a “finished” piece of work to submit for the challenge, it didn’t win a prize. That’s ok ,I wouldn’t have quibbled with the judges decision and loved the crazy bag made by Anne Thistlethwaite which won. Well done Anne.
I love being able to mend and customise, fix my mistakes, and make something usable out of left over scraps from another project, retrieve the torn and damaged, create something usable out of what otherwise would be thrown away.
So what do you do when you have bought things for Christmas which turn out to be the wrong size? I recently had two such mistakes to solve, I bought my Dad a pair of soft jersey pants, which he finds comfortable to wear at leisure, but they had cuffs at the ankle and were too long, not a good look. Saggy grey cotton jersey doesn’t really suit anyone, no matter how old. I cut the cuffs off and finished the raw edge with an overlock stitch and double stitched hem. Problem solved, pants no longer sagging in the legs.
we need bigger slippers
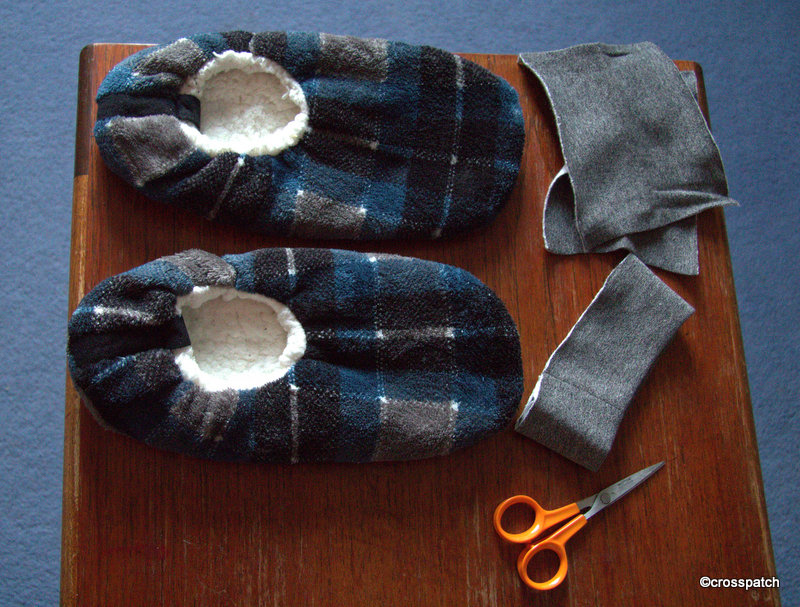
The next problem was a bit more difficult to solve, a pair of soft fleece slippers for the 14 year old. To me he’s still a boy, I keep forgetting how big he has grown, he is taller than me and his feet are larger than his dad’s, so how I managed to think Medium sized slippers would fit I don’t know! He likes his slippers, and wants to wear them but they are a tad too small, and although stretchy, not quite stretchy enough, so what to do? Make bigger slippers. Yes but what with? I was considering what I had which I could use to build an extension for the 14 year old’s toes, when I saw the cuffs I’d cut off Dad’s pants sitting on my sewing table, perfect colour, now how?
problem solved, bigger slippers.
I cut one cuff along the seam and then cut it in half, each half was stitched along the two short edges to create a little pocket, then I opened up the toe of the slipper peeled back the fluffy faux lamb’s wool lining and stitched the little grey jersey pockets to the outside fabric. The lining was then hand stitched back into place covering the seam allowance so the lining is held in place and the seam hopefully will sit under the toes, where the toes meet the ball of the foot, and won’t be too uncomfortable.
They may look rather silly, but it worked, it solved the problem and the 14 year old tells me they are comfortable and a much better fit, of course the acid test is, does he wear his Bigger Slippers? Yes he does. I thought asking him to model them was pushing my luck too far, he would probably have a fit if he saw this post, so Sshh.
I love sewing, I love being able to mend and customise, fix my mistakes, and make something usable out of left over scraps from another project, retrieve the torn and damaged, create something usable out of what otherwise would be thrown away.
Problem… he will creep into my bedroom and take my lovely feather pillow in crisp white linen, to sit on!
I have recently had a little problem which I hope to have solved, with a little judicious stitchery.
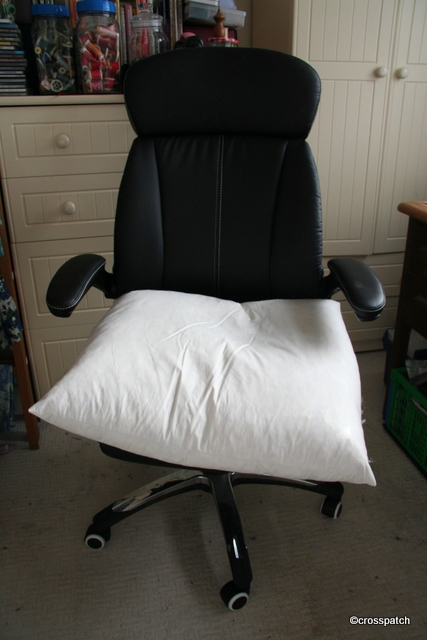
chair and unsullied cushion
The 13 year old is on holiday from school this week, when he isn’t at school or asleep he is generally in his room on his computer playing games either alone or with “virtual friends “ who might be anywhere in the waking world. He sits on a computer chair which he finds less than comfortable so he will creep into my bedroom and take my lovely feather pillow in crisp white linen, to sit on!
As you can imagine, I’m not impressed by having to sleep on a pillow which has been in close proximity to a 13 year old boy’s rarely washed, and flatulent nether regions only minutes before I retire to bed and for probably the preceding 12 hours.
shirt, pajamas, and shorts
My solution is a feather cushion of his very own to sit on. I had one in my stash, but no cover for it.
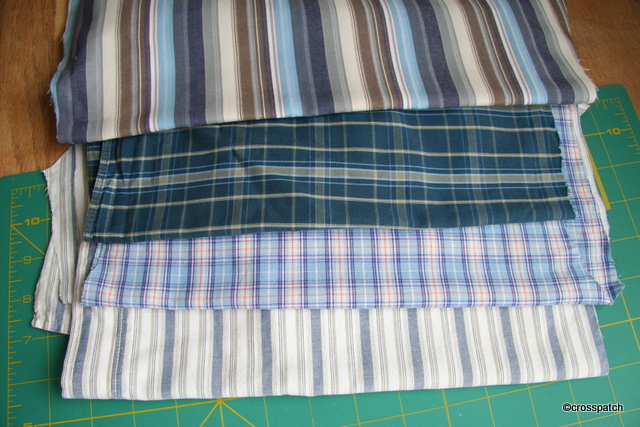
Looking in my fabric stash, apart from my check shirts which are not negotiable, I have very little which isn’t rather too girly for a boy who does not countenance anything which might blight the tender shoots of his pubescent masculinity.
I found a shirt in cream and blue stripes, one of my early mistakes when buying shirts, it is striped not checked; two pairs of his father’s pajama bottoms, worn out at the seat but still plenty of wear in the legs (what does that tell you about my Dearest?) and a pair of his father’s boxer shorts size small from when he used to smoke 60 a day and had the hips of a racing snake, long time past.
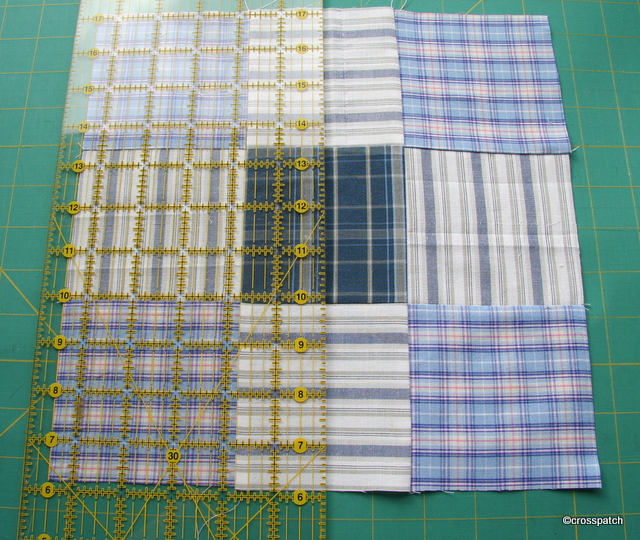
I had seen the disappearing nine patch block but had not yet had the opportunity to use it, given the proportion of fabrics I had ( 3;4;4;1) it seemed a good choice.
disappearing Nine patch
I used the darker check from the boxer shorts for the centre square I’d only need 8 4” squares. The cream shirt and blue checked PJ’s for the sides and corner squares, 32 of each, and the striped pair of PJ’s for the outer border.
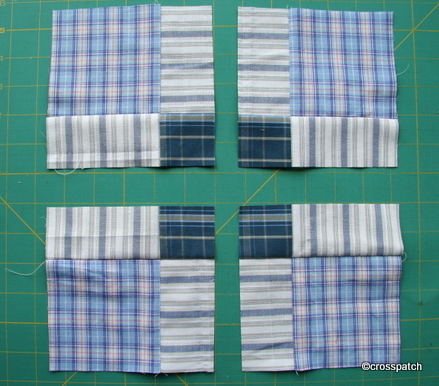
Make a nine patch, press it and slice it up again and across the centre in both directions to produce 4 blocks.
4 blocks from a nine patch
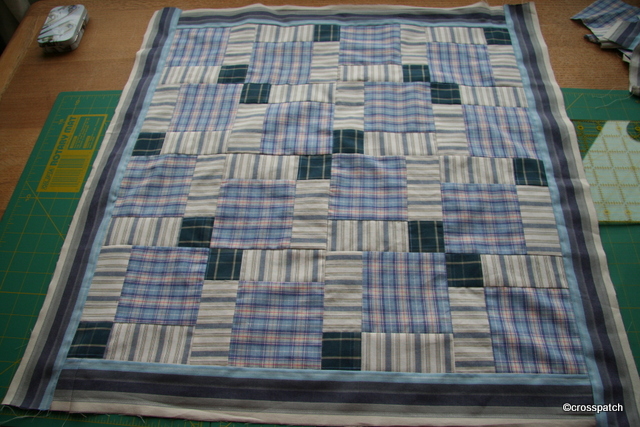
I tried two different placements of the resultant squares, so the two sides of the cushion are subtly different. It will need a zip, no doubt it will need washing frequently, and probably an inner cover to help keep the cushion clean. The 13 year old’s room is mainly blue and cream so this will blend in fairly well, by which I mean there is nothing here for him to take offence at, he may accept it without too much persuasion. We won’t need to consider “what people might think”, or any of those other concerns so particular to 13 year old’s.
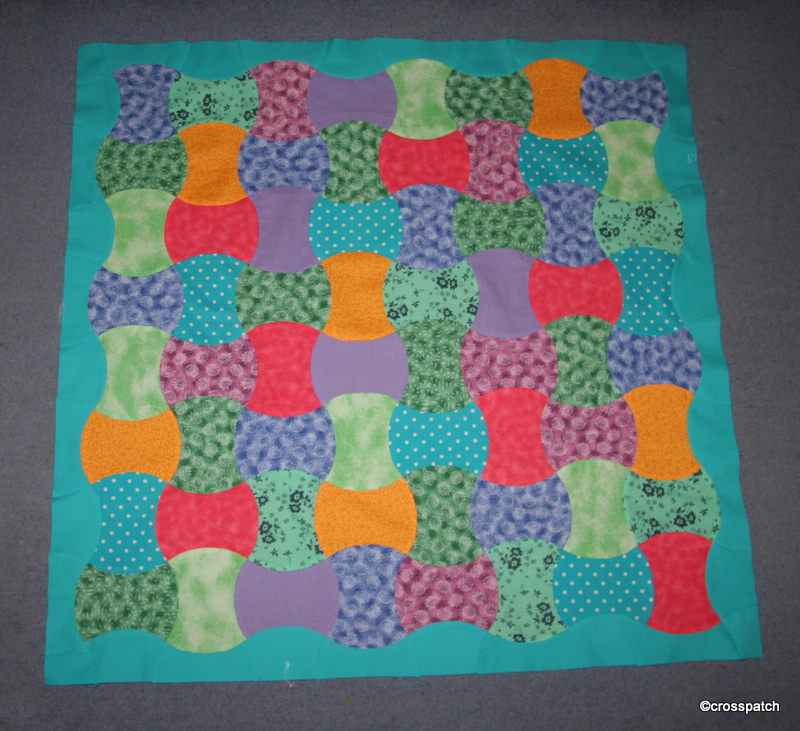
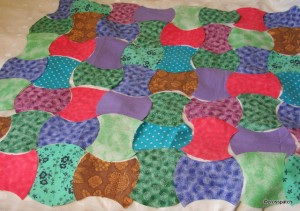
With a heavy heart I reached for the secret yellow stash, cut a couple of apple cores and threw them into the mix… presto! The whole thing started to come together.
Going back to the Sizzix Big shot, I have now solved my little dilemma, and indeed the dreaded yellow was the answer. I had spent a few nights trying to think how I might avoid using the dreaded yellow and came up with an idea that a lime or apple green might work but on looking again at what was already cut I found I had already introduced a pale apple green, so that would not work. With a heavy heart I reached for the secret yellow stash, cut a couple of apple cores and threw them into the mix… presto! The whole thing started to come together.
Then I went to my stash for a royal blue for the border but again…. it just wasn’t working, so off to the fabric shop I went,…..lavender blue? no, Airforce blue? no, Navy blue? no…..what about turquoise? Turquoise it is! I may even bind it in yellow too, but I’ve got time to ponder that while I do the quilting.
So next dilemma… how to quilt, and what to back it with?
I like the curvy line quilting because it’s easy to do and does not rely on the accuracy of the piecing, in fact if your piecing is not accurate curvy line quilting is very forgiving. That’s always a good thing.
What do you do if you don’t like the challenge block? Hide it.
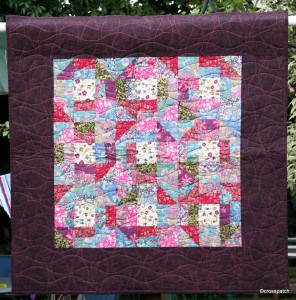
This Lap quilt is made using the Churn Dash block (or monkey wrench), I think it was the favourite block of our most venerated late member and the instigator of our quilt group’s challenge, Cecily. But I dislike it. I wanted to rise to the challenge as always but I find the block rather pedestrian, perhaps because I’ve only made it in co-ordinated colours and plain fabrics, so a decided to do it in heavily patterned fabrics and mix it up so that the pattern was lost and the fabric became the star of the piece rather than the block.
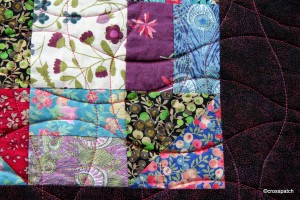
Good idea, but I think I took it too far, the pattern is completely lost and with it the sense of rhythm to the quilt top, as a consequence what stands out are the pale squares, rather than the fabric in general. All of the fabrics are Liberty scraps from the printer’s factory shop, I’m so lucky to live nearby; I call in occasionally to buy craft packs, but I can also buy off the roll if I have a big project in mind.
In other senses I’m happy with the quilt; it hangs beautifully flat and straight and is evenly quilted throughout. I created my own wavy line quilt guide using taped together strips of cereal packet, with a hand drawn wavy line. On one side the wavy edge has wide and fairly flat curves, on the other side they are closer together and therefore appear deeper. I used the flatter side, drew on the lines with an air dispersible pen, and chalk pencil taking the quilt pattern right out in a continuous line to the edge of the quilt.
I like the curvy line quilting because it’s easy to do and does not rely on the accuracy of the piecing, in fact if your piecing is not accurate curvy line quilting is very forgiving. That’s always a good thing.
I have pulled a few fabrics from my stash and cut them into apple cores but together they lack a certain something………maybe….. as it’s a scrap quilt I should just throw it all in and let it all hang out, wherever the fabrics fall… if you see what I mean, and pardon my clichés.
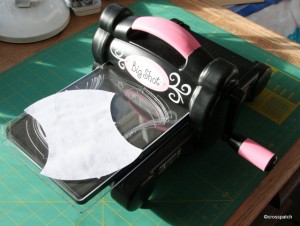
Santa brought me a Sizzix Big Shot, I’d seen apple core quilts on Pinterest and coveted them, so when I discovered how the pieces were cut I coveted the Sizzix machine as well, but I couldn’t justify buying one just to have a go at making a quilt. My Dearest however thought it would make an excellent gift this Christmas. I am delighted with it and have already begun cutting apple cores from my stash.
If you are not familiar with this piece of equipment it’s a die cutter, basically a miniature mangle, which presses dies (a shape cutting blade) onto whatever you want to cut the shape in, paper, card or fabric, mostly used by card makers and other crafty people. I have already worked out that I can use it for appliqué, with bondaweb, and to make other paper crafts as yet not crystalised but bubbling away at the back of my head ( no doubt you’ll be the first to know when I get round to trying out my as yet vague ideas)
I always find myself wondering how other quilters manage to make such well balanced colour coordinated Scrap quilts, I generally find I struggle to have the right amount of sufficient variation of colour and pattern to make a balanced quilt; do you think maybe they cheat? Maybe they go out and buy new fabrics to achieve the look they want and then just call it a scrap quilt? Surely not!
I have pulled a few fabrics from my stash and cut them into apple cores but together they lack a certain something, I’m not sure what exactly and don’t want to cut any more till I know what it is that’s missing; the dreaded yellow perhaps, or maybe greater variation of darks and lights, at the moment what I have cut are mainly mid shades. I shall need to pull out a great many more fabrics from my stash and throw them in a pile I think, then pare it back, pulling out the ones that don’t work, till I have the right mix.
Having said that I think one of my weaknesses is a need to control, perhaps, as it’s a scrap quilt I should just throw it all in and let it all hang out, wherever the fabrics fall… if you see what I mean, and pardon my clichés.
The truth is I didn’t pull out of my stash the fabrics I love, I pulled out the fabrics I could spare, the unloved and languishing bits, so it’s no wonder they aren’t yet making an inspiring mix. I need inspiration, one or two well chosen fabrics to pull it all together, or white, or navy? Oh Help! What I really need is a few days of free time in my studio to let this quilt come together.
One of my most used quilts, most washed and cuddly, the one that gets to sit on my knee when I’m ill is this one
One of my most used quilts, most washed and cuddly, the one that gets to sit on my knee when I’m ill is this one. It isn’t really a quilt as it has only two layers, the back being fleece. I based it on the Double Irish Chain, traditionally made in red and white. This one was made with my favourite hyacinth blue and a collection of my two inch scrap squares.
It is made up of two alternating blocks one block is made up of 25 two inch squares put together randomly apart from the centre square in each side which is the hyacinth blue fabric; the other block is a 4” square of the hyacinth fabric, surrounded by 4“ x 2” rectangles of hyacinth, topped and tailed with a random 2” scrap. When put together alternately the two blocks blend into squares and chains.
Sadly it has become rather faded over time, but still goes with us when we go camping and is a great comfort on chilly summer evenings. It sits on the back of the sofa in winter ready to go over a lap when a nod in the chair is needed, and even gets the occasional trip in the sports car if the roof is down and the weather less than perfect. I’m not precious about this one it’s just a comforter and a great comfort it has been, the epitome of what a quilt should be, bright and cheerful, soft and warm, always to hand when needed.
There in the middle is that fabric again, no show without Punch!
I think this was the last quilt I made which has a little of that old dress fabric in it.