The shirt off his back

I have yet to follow one down the street with covetous intent, but you never know….

Have you ever seen a person wearing a garment whose fabric you would happily have in your stash? I must admit until recently I hadn’t, but since I have been gathering checked shirt fabrics for a future project I have found myself studying passing gentlemen, many of the most unprepossessing type, and wishing I could have the shirts off their backs, only for my stash you understand. It has become a running joke with my Dearest, as I find my eye captured and held by men of all ages, sizes and types each wearing loud checks of all colours and design. I have yet to follow one down the street with covetous intent, but you never know….

almost a fat quarter

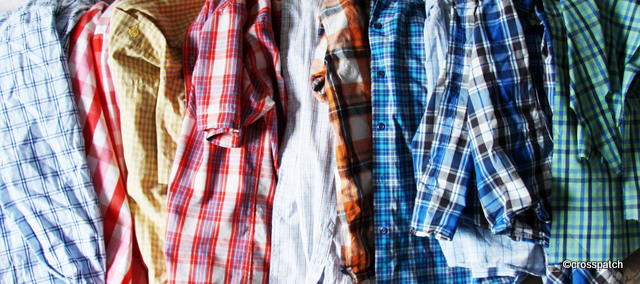
My passion for fabric outstrips my available fabric buying resources exponentially, so I am always on the lookout for ways of acquiring fabric for quilting with the least outlay of funds. Inspired by my love for recycling and by the plaid scrap quilts I have seen on Pinterest I began collecting checked shirts bought in charity shops. My local charity shop has been an almost weekly supplier of treasure, and each so far costing between £1 and £2.50.

shirt fronts another almost fat quarter

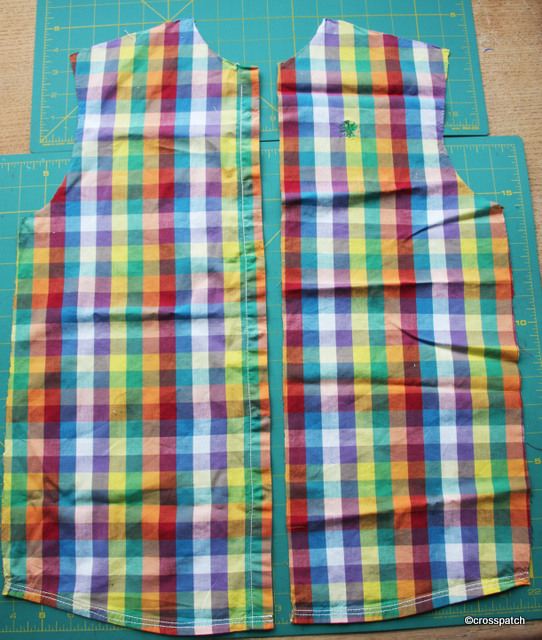
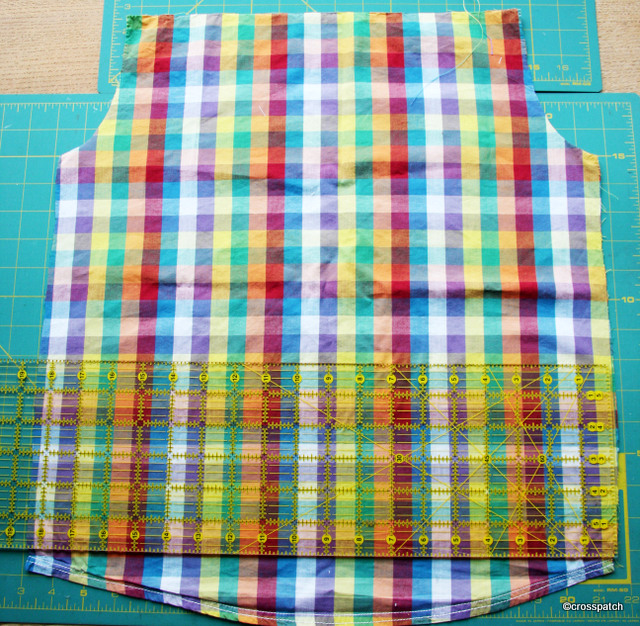
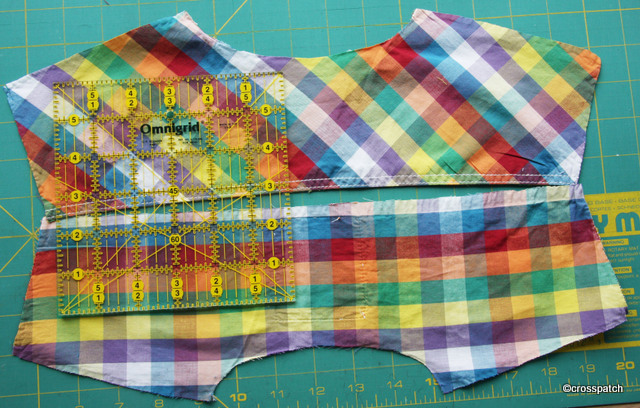
I find that a man’s “small” shirt will render the largest piece from the back measuring 21” by 25” measuring under the armholes and from yoke to tail, which is equal to a fat quarter, the front a similar amount of fabric in two halves, and then the sleeves although an odd shape will render at least as much as a fat quarter between them or less if short sleeves, but if I calculate each shirt to represent half a yard of fabric I don’t think I will be disappointed.

short sleeves, still would render two 5" squares each
short sleeves, still would render two 5″ squares each


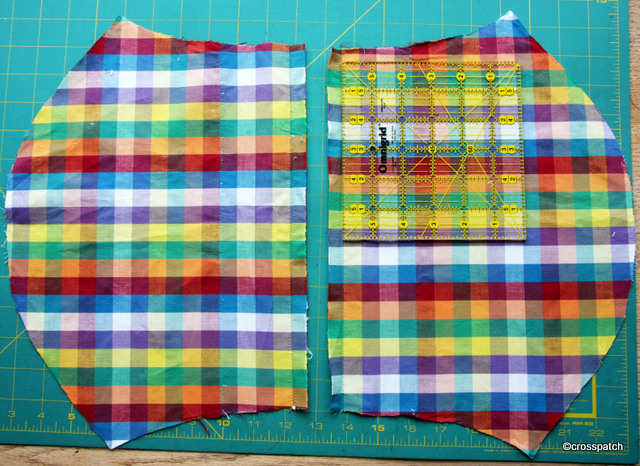
The smallest shirt I have bought for £1 (pictured) was age 11-12 and gave me a back measuring 18.5” by 22”, the biggest a 17.5” collar shirt from Boden which rendered a back measuring 31” by 30” but bizarrely was cut on the bias and looks like a table cloth, the sleeves were cut on the straight grain, so although large the shirt will similarly render only a half yard.
The inside of the Yoke is often cut on the bias which limits its use but two small squares could be cut from it for another scrap project, and the yoke will render squares or strings.

Yoke pieces one straight, one bias cut

My rule in choosing which shirts to buy is that they must be 100% cotton, not seersucker, must be bright not muddy colours, and must be checked not striped. Mostly the shirts I buy are unworn or barely worn and that can be discerned by looking at the labels for wash fatigue and collar for signs of wear. So far I have made only two mistakes, poplin is too crackly, and does not iron well. To achieve a good mix of colour and pattern I will need perhaps 30 to 40 shirts, but that will give me 15-20 yards of fabric which should be enough for more than one quilt, one large and maybe a couple of lap quilts.

Some of my shirt collection

My observations on charity shop shirt buying so far are:-the louder the shirt the more likely that it will be unworn, perhaps it’s a case of loud shirts having a limited use, or that they generally fall into the unwanted gift, or “seemed like a good idea at the time” category, which languished at the back of the wardrobe for a couple of years and then got edited out to the charity shop. And…. children’s clothes, particularly summer wear in Britain, unless passed down from oldest to youngest, probably only has an 8 to 10 week window of wear, before its back to school uniform in September, so many summer shirts have hardly seen a washing machine more than half a dozen times before they are put away to have been outgrown by the following summer, so a future life in a quilt is a greener alternative to another 8 to 10 weeks life in a different boy’s wardrobe.

Just another brick in the wall

As I recognise all the fabrics in the quilt as a collection of “yours and mine” this must have been a joint effort for mum and me

This is one of the quilts I photographed last summer in my rainy garden, such a simple design which would work well with jelly rolls or scraps. I can’t remember the dimensions but it looks as if the Bricks are 2 ½ “ by 4 ½ “; it would work larger or smaller so long as the width was half the length in the finished brick. The white and coloured bricks are then put together round a central square of white.

warm spicy brick quilt

I’m pretty sure this is one my mother made although I can see it was made of a pooled collection of scraps because some of them are from my stash. The block pattern was a block of the month challenge which I think I might have set for our quilting group. As I recognise all the fabrics in the quilt as a collection of “yours and mine” this must have been a joint effort for mum and me rather than of the group as a whole.
Much as I like this collection of earthy, spicy colours, they are not my colours and would not sit well in my home, which is why I guess it languishes at my mother’s house, unloved, unused. And yet I have just realised a use for it, My Dad may have to get used to being transported in a wheelchair at least over longer distances, as a retired Builder, what better than a “Brick” quilt to throw over his knees on colder days when out and about in his wheelchair.
I’m booked to take him to a hospital appointment next week, he’ll have to accept wheelchair transportation for the first time, now dare I introduce the quilt at the same time? Or should I let him get used to accepting the wheelchair first? One brick at a time I think.

A challenging challenge

I like the curvy line quilting because it’s easy to do and does not rely on the accuracy of the piecing, in fact if your piecing is not accurate curvy line quilting is very forgiving. That’s always a good thing.

What do you do if you don’t like the challenge block? Hide it.

Cecily's favourite churn dash block

This Lap quilt is made using the Churn Dash block (or monkey wrench), I think it was the favourite block of our most venerated late member and the instigator of our quilt group’s challenge, Cecily. But I dislike it. I wanted to rise to the challenge as always but I find the block rather pedestrian, perhaps because I’ve only made it in co-ordinated colours and plain fabrics, so a decided to do it in heavily patterned fabrics and mix it up so that the pattern was lost and the fabric became the star of the piece rather than the block.
Good idea, but I think I took it too far, the pattern is completely lost and with it the sense of rhythm to the quilt top, as a consequence what stands out are the pale squares, rather than the fabric in general. All of the fabrics are Liberty scraps from the printer’s factory shop, I’m so lucky to live nearby; I call in occasionally to buy craft packs, but I can also buy off the roll if I have a big project in mind.

Detail of quilting on Churn Dash quilt

In other senses I’m happy with the quilt; it hangs beautifully flat and straight and is evenly quilted throughout. I created my own wavy line quilt guide using taped together strips of cereal packet, with a hand drawn wavy line. On one side the wavy edge has wide and fairly flat curves, on the other side they are closer together and therefore appear deeper. I used the flatter side, drew on the lines with an air dispersible pen, and chalk pencil taking the quilt pattern right out in a continuous line to the edge of the quilt.
I like the curvy line quilting because it’s easy to do and does not rely on the accuracy of the piecing, in fact if your piecing is not accurate curvy line quilting is very forgiving. That’s always a good thing.

Scrap comforter

One of my most used quilts, most washed and cuddly, the one that gets to sit on my knee when I’m ill is this one

One of my most used quilts, most washed and cuddly, the one that gets to sit on my knee when I’m ill is this one. It isn’t really a quilt as it has only two layers, the back being fleece. I based it on the Double Irish Chain, traditionally made in red and white. This one was made with my favourite hyacinth blue and a collection of my two inch scrap squares.

It is made up of two alternating blocks one block is made up of 25 two inch squares put together randomly apart from the centre square in each side which is the hyacinth blue fabric; the other block is a 4” square of the hyacinth fabric, surrounded by 4“ x 2” rectangles of hyacinth, topped and tailed with a random 2” scrap. When put together alternately the two blocks blend into squares and chains.


Sadly it has become rather faded over time, but still goes with us when we go camping and is a great comfort on chilly summer evenings. It sits on the back of the sofa in winter ready to go over a lap when a nod in the chair is needed, and even gets the occasional trip in the sports car if the roof is down and the weather less than perfect. I’m not precious about this one it’s just a comforter and a great comfort it has been, the epitome of what a quilt should be, bright and cheerful, soft and warm, always to hand when needed.

There in the middle is that fabric again, no show without Punch!

I think this was the last quilt I made which has a little of that old dress fabric in it.

Pyramids Quilt

I took the pattern and volunteered to give it a trial run, to see if it would work as a group quilt

My quilt group have an exhibition biennially; we use it as an opportunity to raise money for charity and like to choose a small local charity rather than a large national charity. We don’t raise much but a little often goes a long way for a small charity, and makes a real and tangible difference. We always create a group quilt to raffle and to publicise the forthcoming exhibition.

This design was presented as a possible group project to create a quilt to raffle, as a member of the committee at the time I took the pattern and volunteered to give it a trial run, to see if it would work as a group quilt. There is one simple piece to cut, and to achieve an optical illusion similar to the tumbling blocks design, it’s necessary to chose fabrics in light, dark and medium tones, one of each tone is then sewn together to produce a triangle; placing the light, dark and medium in the same position in each block to give the effect of a pyramid viewed from above.It’s important always to have the three tones in the same position because the 3D effect of the pyramids only works if the light appears to be coming from the same angle across the whole surface of the quilt.

Although the triangles are put together in rows one pattern which also emerges is the hexagon; it was the hexagon I used as inspiration for my quilting design, as can be seen where it extends into the border.The design never made it as a group quilt, there were just too many possible variables, group quilts work best when the variables are kept to a minimum, this pattern required hand drawing of pieces round templates, cutting with scissors not rotary cutting, there would be fabric placement variables, seam allowance variables….. etc… etc. No there were just too many possible ways in which blocks made by many individuals would fail to go together neatly to produce a quality finished article.

Nevertheless I liked the finished article, so much so I began to make another quilt, from the same design but with a limited palette of just three fabrics, but somehow, somewhere I lost the template, and the impetus to finish, so for years I had a number of cut pieces and a bag of bits, but no template. The original pattern came from an Australian Quilt magazine, which didn’t belong to me, and I’m not sure who owns it. I have subsequently found another template for the same design in a quilting book I bought in (of all places) ALDI. Maybe I’ll get round to finishing that quilt, or maybe not, the thing is … the moment has passed.