
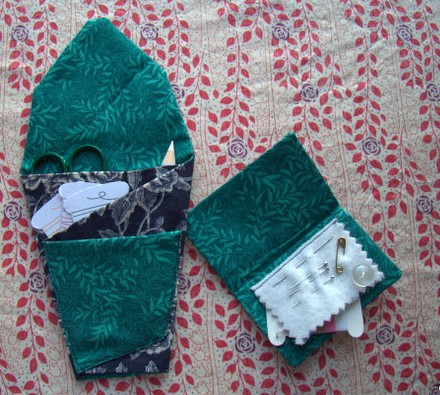
Look what I found on Pinterest! Having been asked to make something to put in the gift raffle for my quilt group’s exhibition I needed an idea, something simple to make that most folks would have a use for. This little sewing companion is ideal, small enough to tuck in a drawer, so it’s always to hand for quick repair jobs, and or to pack in suitcase so you have the essentials for hand sewing when travelling. So much better than those awful sewing kits found in hotels. (see http://www.popularpatchwork.com/news/article/simple-sewing-companion/210/ for the original article and Pattern)
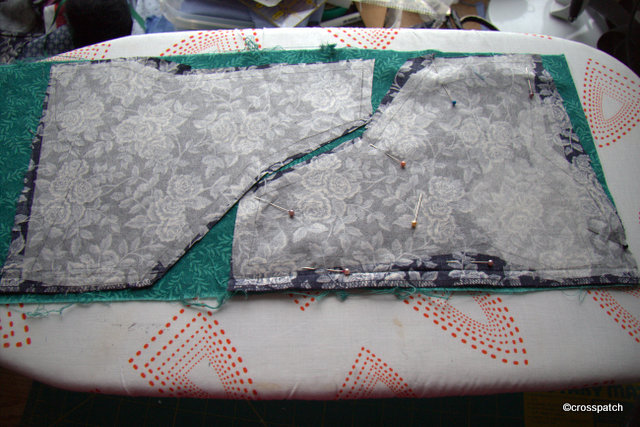
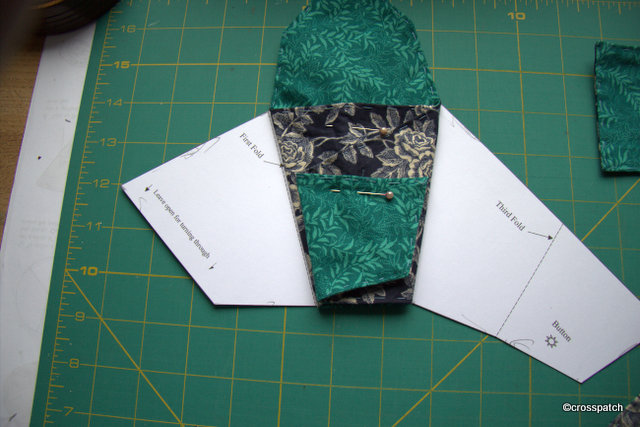
Despite looking complicated it was incredibly easy to make. First download your pattern and print it, on to card if you have it, it makes it easier to draw round. Put the pattern on to some light weight fusible interfacing, and draw round it, this line becomes the stitching line so cut the pattern out with a tad more than 1/4 ” seam allowance and iron to the wrong side of the fabric you have chosen for the outside of the sewing companion; cut out with a generous seam allowance, and place right side to right side of the second fabric for the lining.
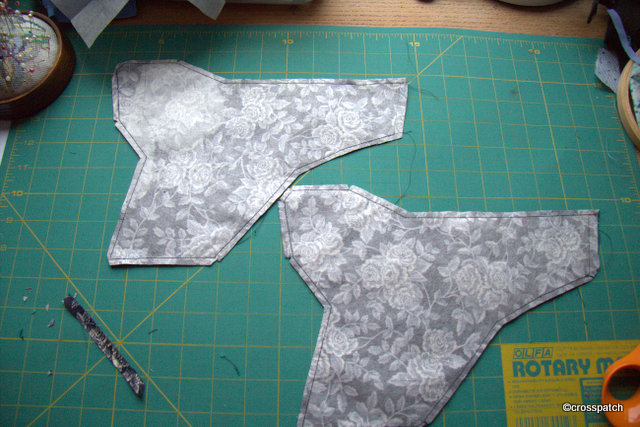
Stitch round along the stitching line leaving one side open so that you can turn it out, cut the seam allowance to a scant 1/4 “, and snip the corners before turning out. finally tuck the raw edges in and catch them in with a running stitch, it won’t show in the finished piece. I pressed the whole thing at this point, and considered top stitching to hold the edge firm but decided against, it wasn’t recommended in the Original.

Using the pattern to guide me I folded the flap from the left, and top stitched a V shape the left hand corner of the flap, to the bottom and up to the top and inch and a half from the right edge this makes a scissor pocket, and a small pocket to the side for a measuring tape or marking pencil.
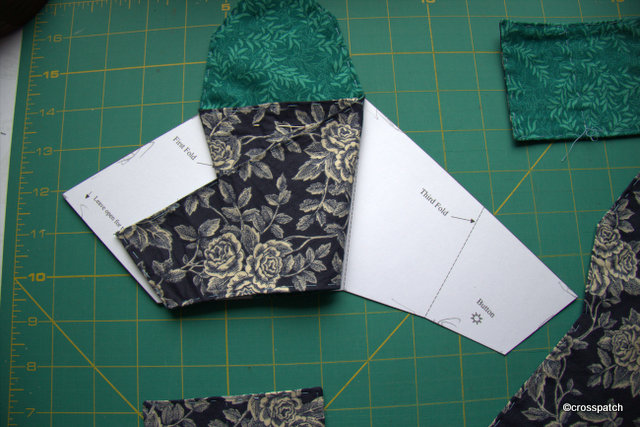
The second fold and then the third fold are completed together and then stitched down one side along the bottom and up the other side to hold the whole thing in place.
A needle case to match is made very neatly using a two piece lining which is not stitched completely accross the inner seam so you can stitch it inside out and turn it. the pattern recommends using flannel for the inner pages of the needle case, I had some lining from a silk tie that I had bought and deconstructed to use for crazy patchwork, but it was bulky so I only used one “page” and stitched the open seam closed under the spine of the “page”.
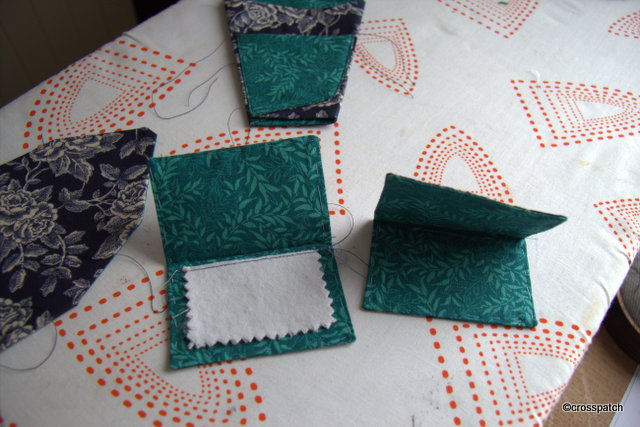
As I plan to make these into gifts I can hardly give them with all the tools missing, so I ordered a pair of needle work scissors on line, green handles to match the fabric, a set of 3 chalk pencils one for each and a spare; I ordered 3 tape measures, but when they came they were too bulky and pulled the sewing companion out of shape, so I rejected them. the original pattern showed embroidery silks tucked into the pockets, instead I downloaded some sweet little thread holders which can just be seen poking out, so that each owner can use threads colours which are most likely to be required. Into the needle case I put from my own stash, a needle, a safety pin, 3 pins, and a shirt button. I’m still waiting for the needle threaders to arrive. All I need to do now is add a press stud fastener and they are ready to go.
If you’d like to make one yourself the pattern and instructions are copyrighted; the intellectual property of Brenda Dean and can be found at http://www.quiltersinternational.co.uk/, Many thanks Brenda I really enjoyed making these and will be making more, for myself and as gifts for quilty friends.