Stash buster for a good cause

So I am really pleased to have found, and joined a community on Facebook called Quilts for Care leavers (Q4CL ) we make quilts and gift them to young people leaving care.

A lady never discusses the size of her stash !

It’s a well known joke among quilters, we all have a stash of fabric and it’s probably bigger than we know; it’s certainly bigger than our loved ones realise.  Who has not sneaked fabric into the house without admitting it to our other half?

Lately I have been thinking about my stash, I’ve been buying and setting aside fabric for years, and now in my 60’s I realise I will never have time to use all that fabric to make quilts or even have a purpose for them.

So I am really pleased to have found, and joined a community on Facebook called Quilts for Care leavers (Q4CL ) we make quilts and gift them to young people leaving care.  It means I can use my stash; piecing blocks to my heart’s content, and never have to make a complete quilt. If you would like to join us you can find us here: https://www.facebook.com/groups/QuiltsforCareLeaversMakers

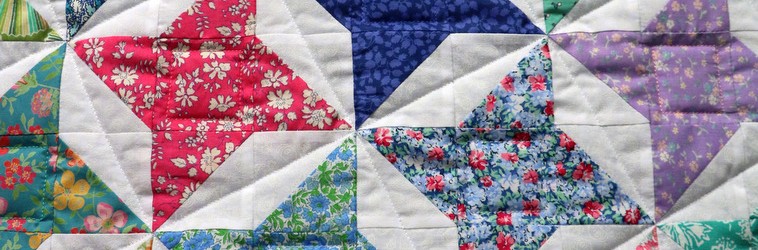
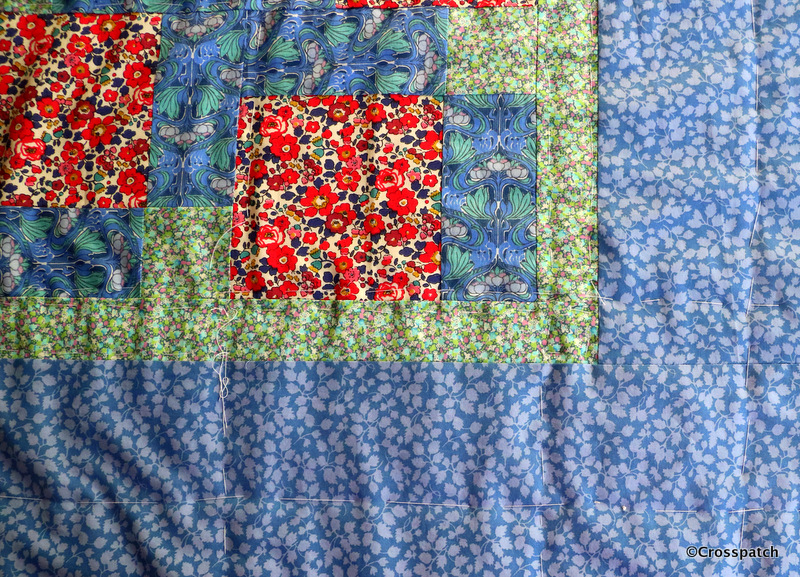
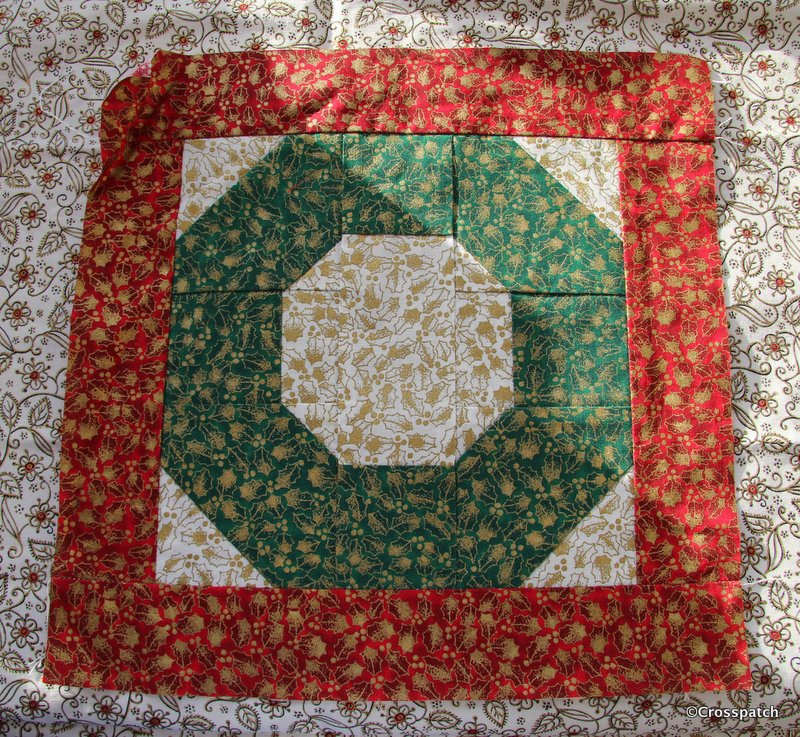
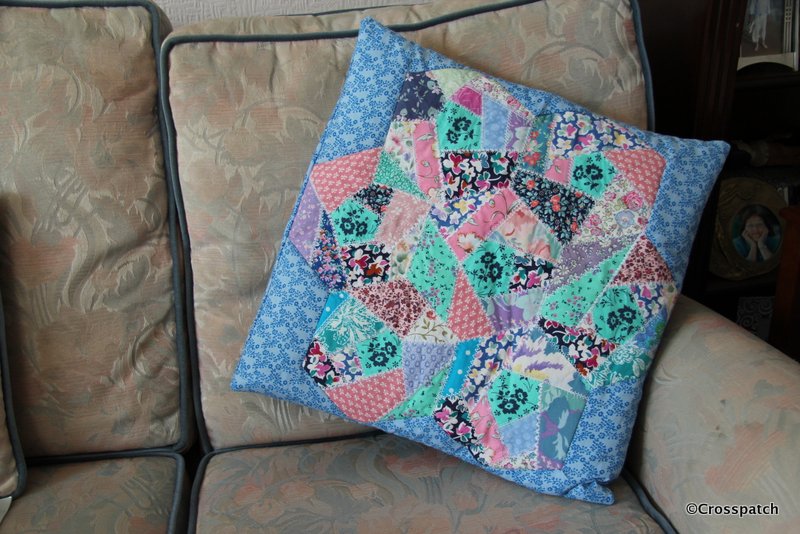
 The quilts made are called “hugs“; made longer than they are wide so they can be wrapped around the shoulders and worn without dragging on the floor. They are intended to be a means of warmth and comfort, perhaps even more necessary in these times of fuel poverty.

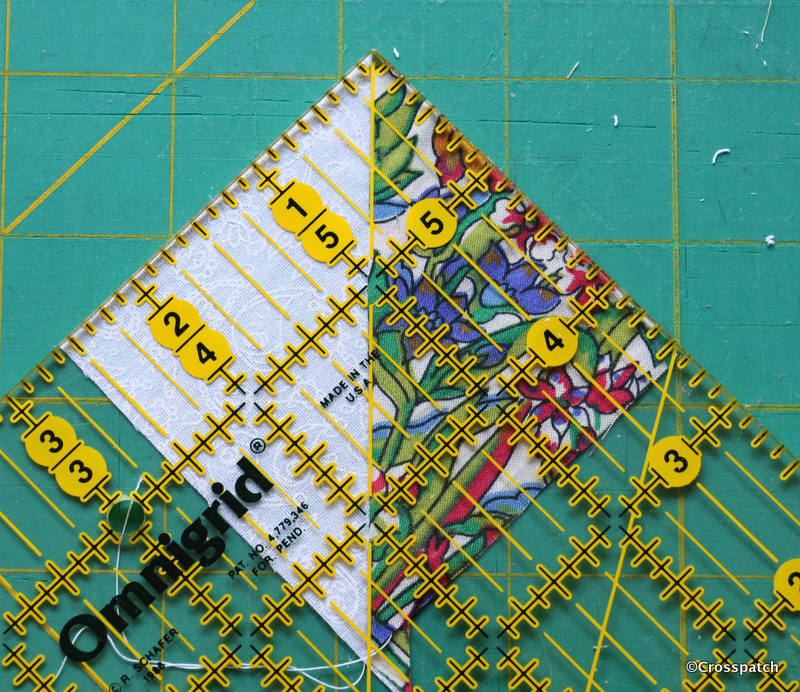
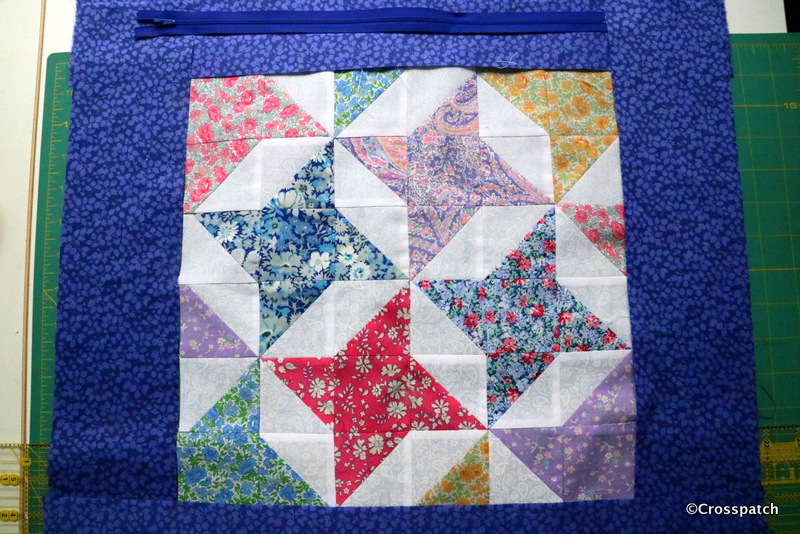
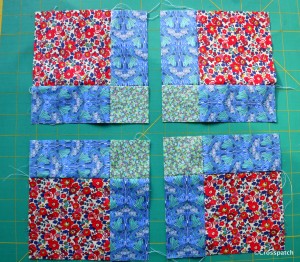
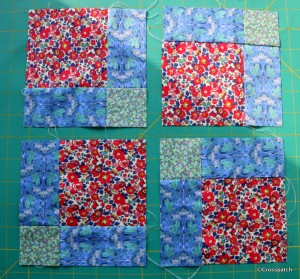
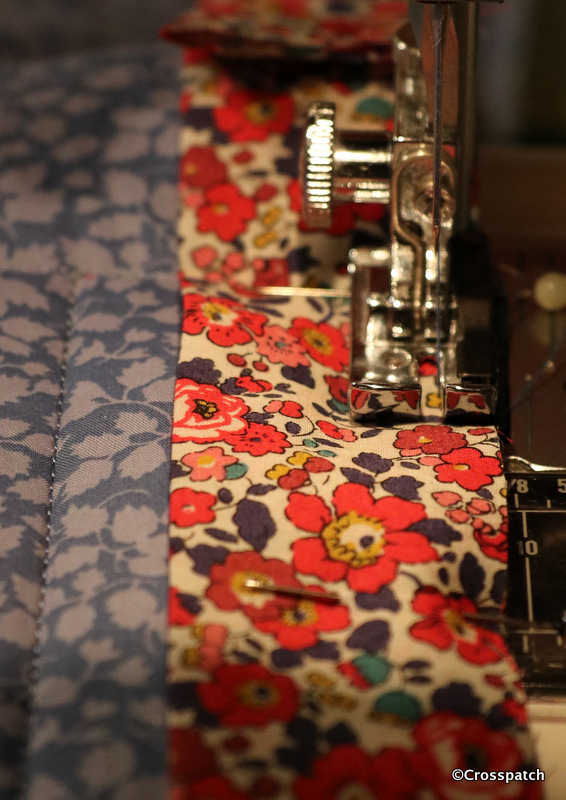
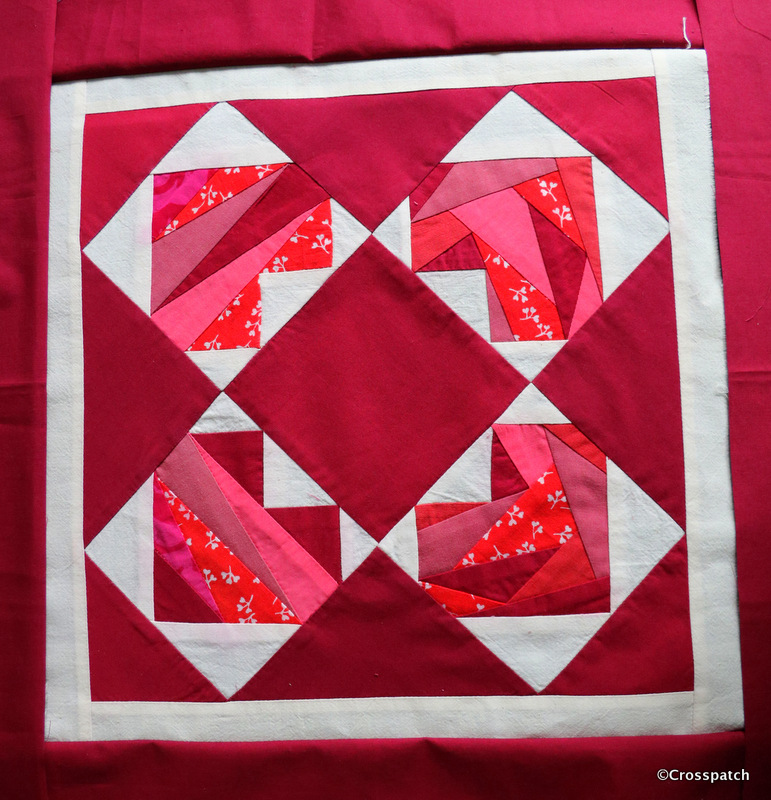
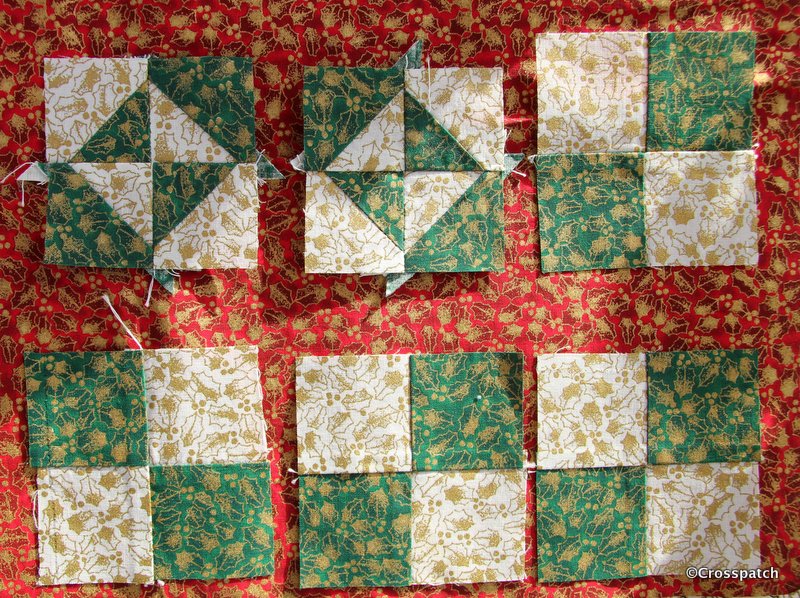
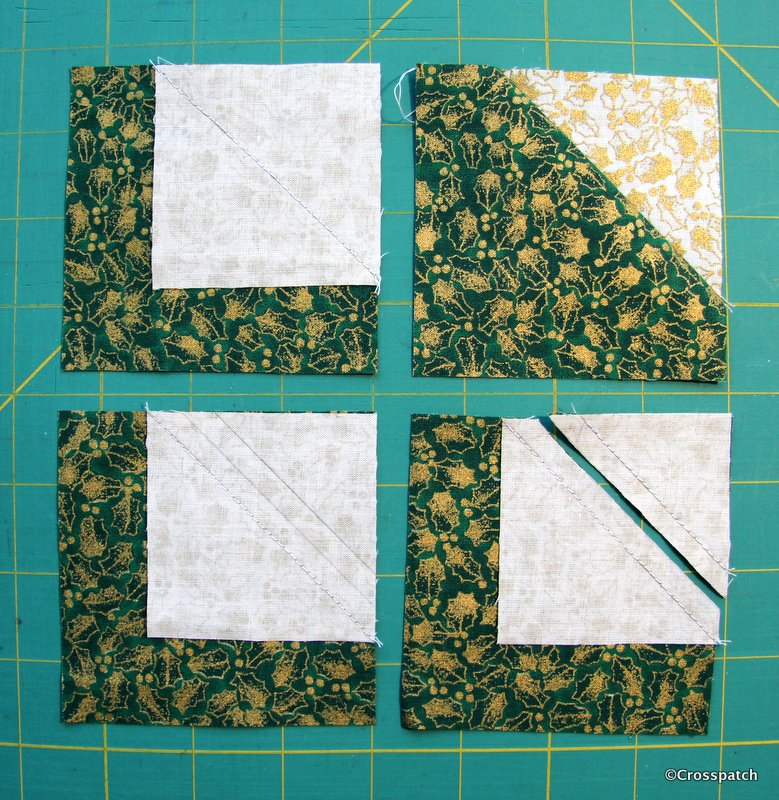
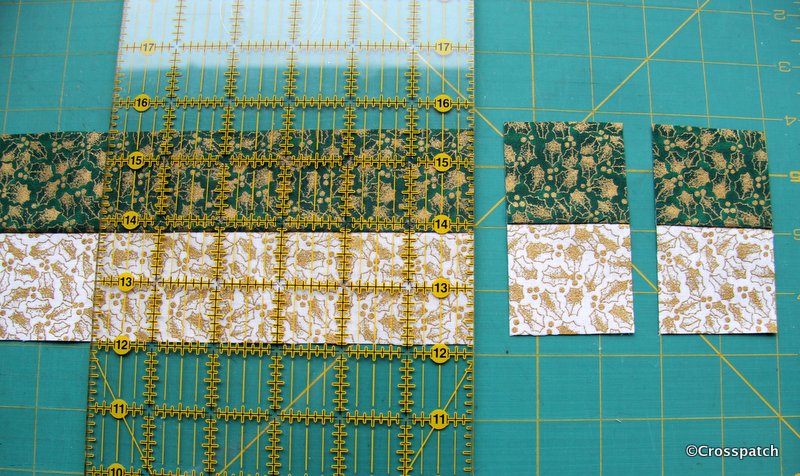
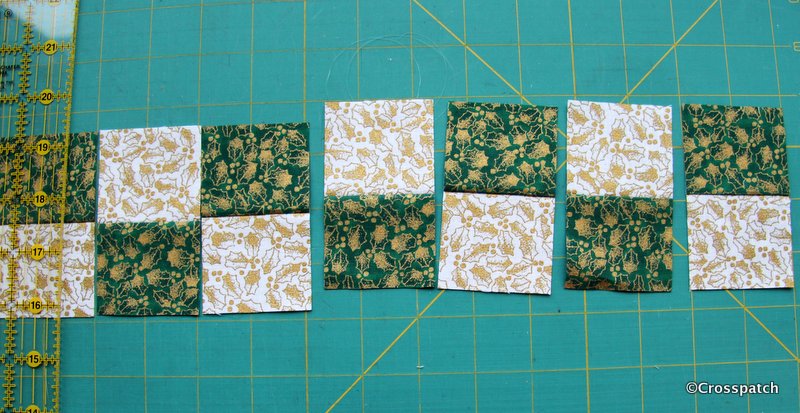
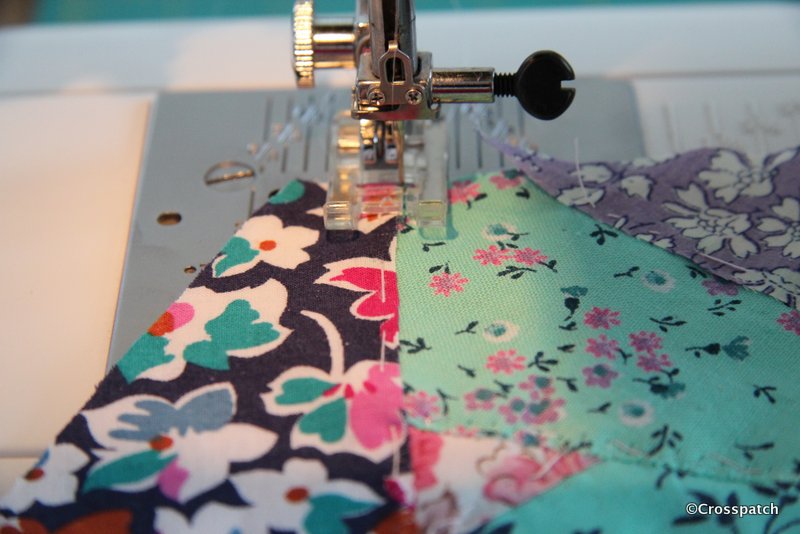
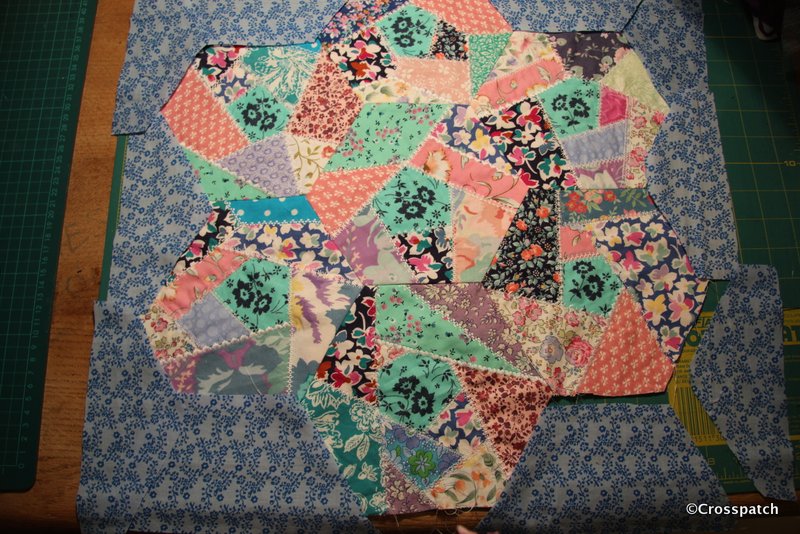
Each month a member will propose a “block of the month” (BOM) and set out the instructions for how to put together the fabrics and the size of the block, so that all the contributed blocks will fit together.  Each contributor can make as few or as many blocks as they choose, and send them to the organiser, the person who proposed the block.

 I don’t know if the organiser then puts the quilt tops together themselves, or whether there are teams of people waiting for the incoming blocks.  I’m not sure how the quilts are put together or quilted, no doubt all will become clear in time.

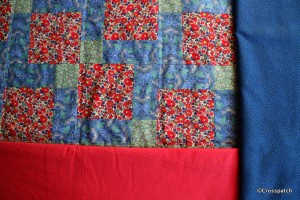
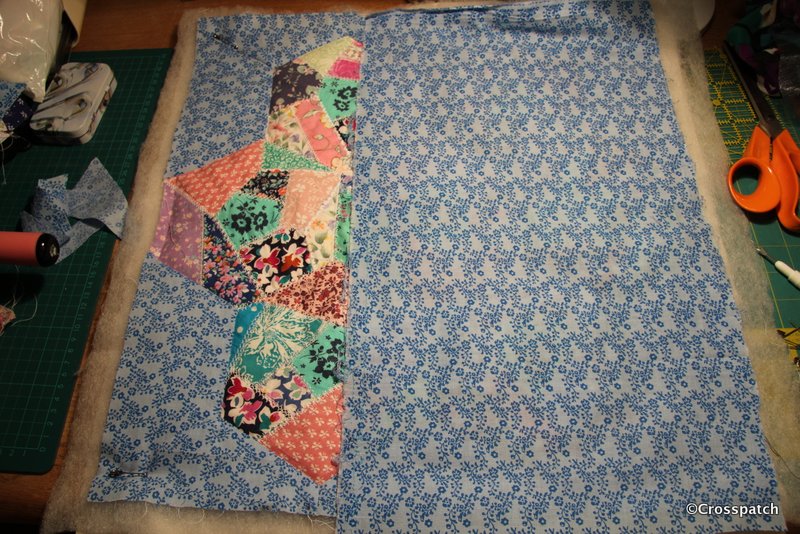
Group members can also create their own “hugs” either just the quilt top then donated to be made into a quilt or they can donate finished quilts.
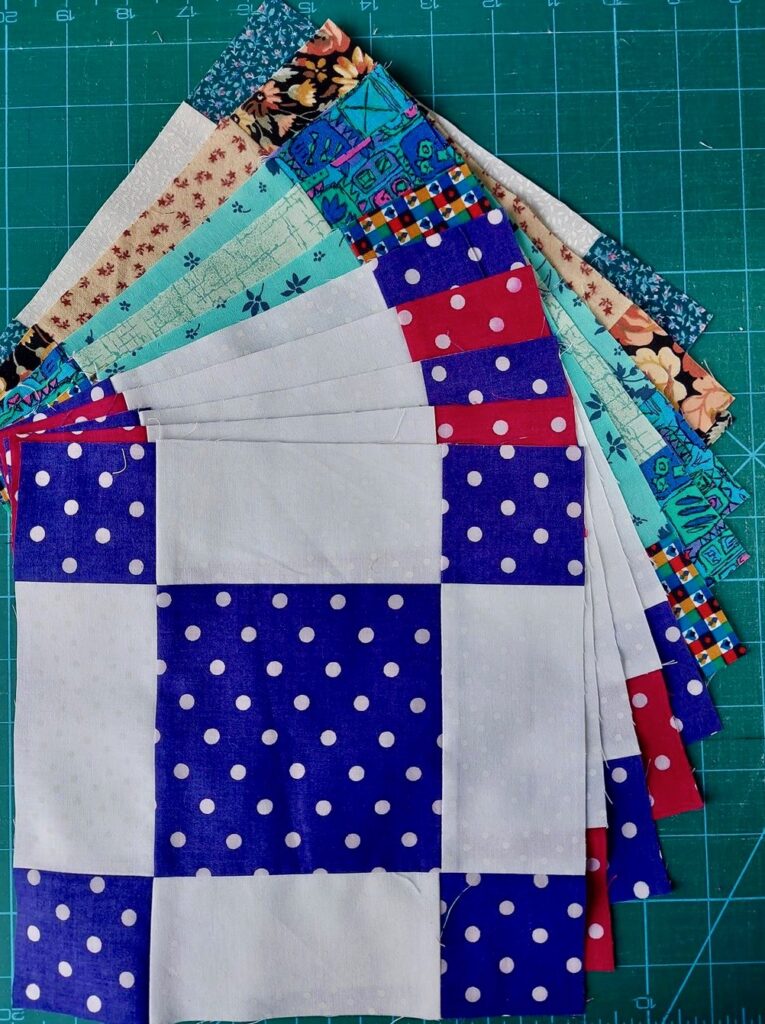
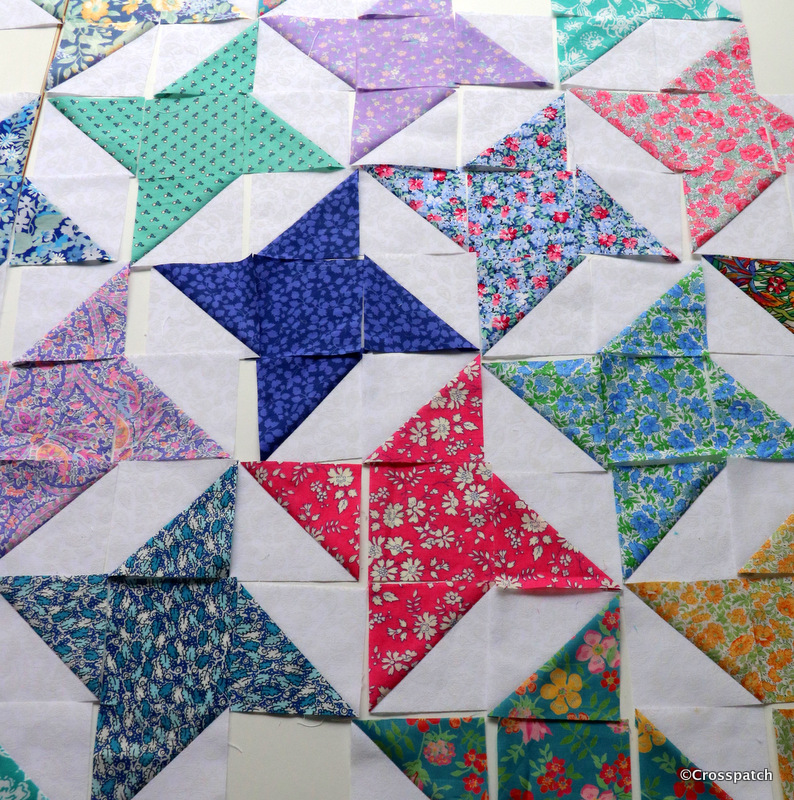
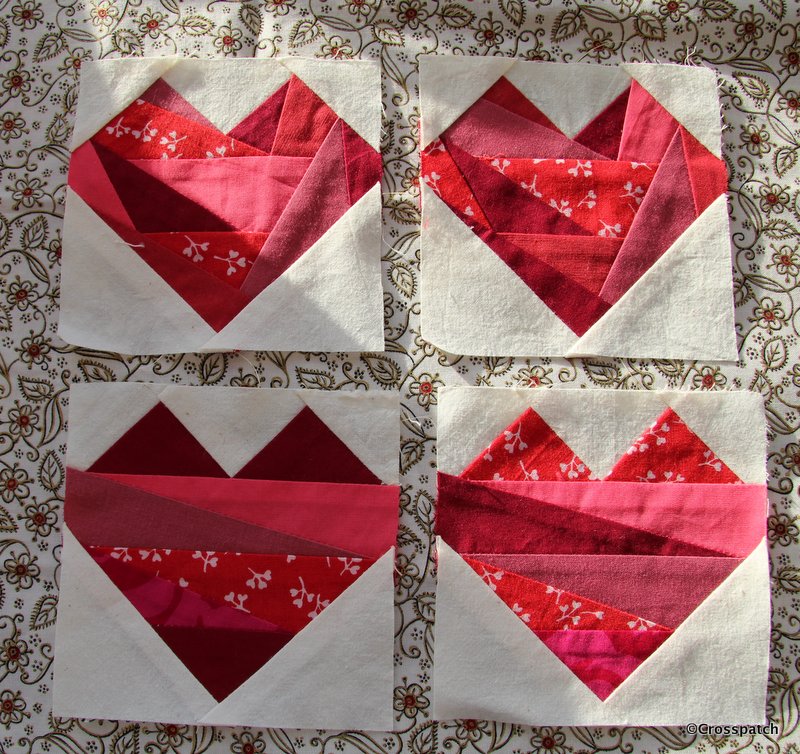
I contributed to the BOM for January 2022.  So far 4469 blocks contributed; 28 hugs made and counting.
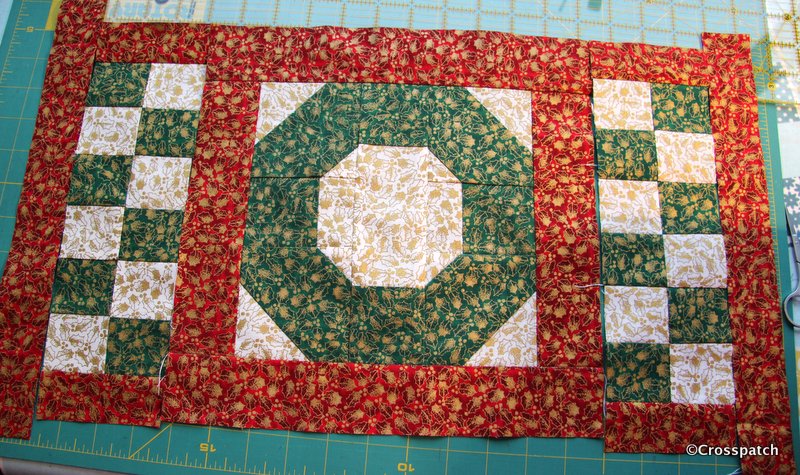
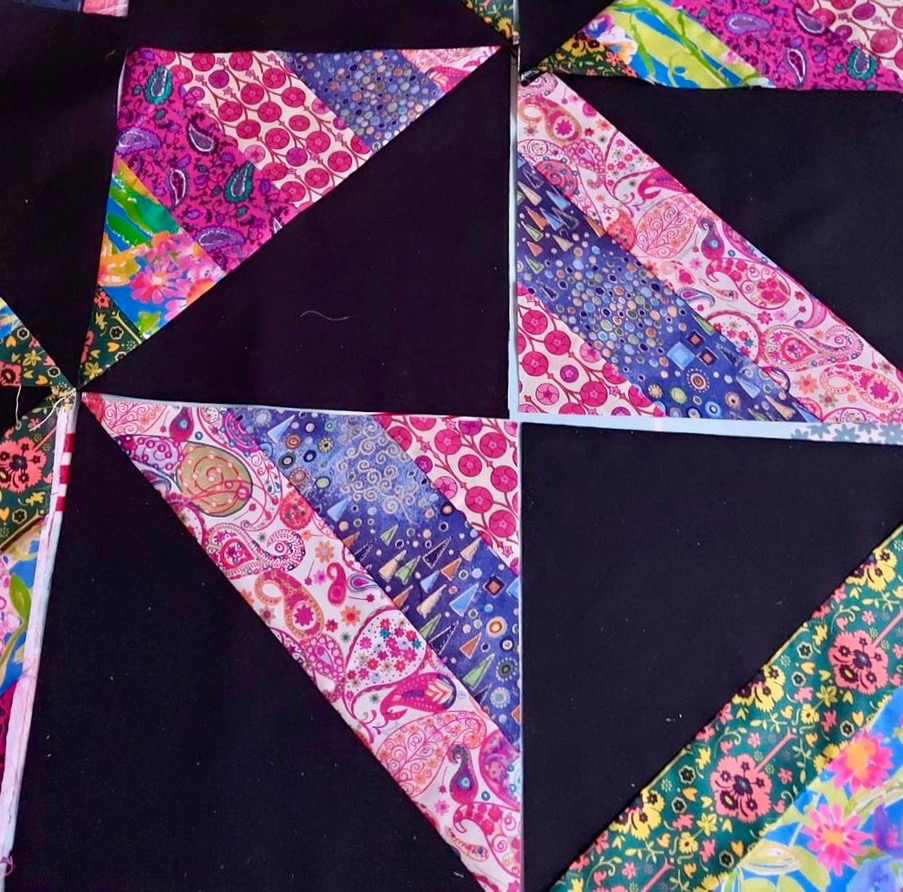
I contributed to the BOM for February 2022.  So far 3237 bocks contributed will make 34 Hugs.
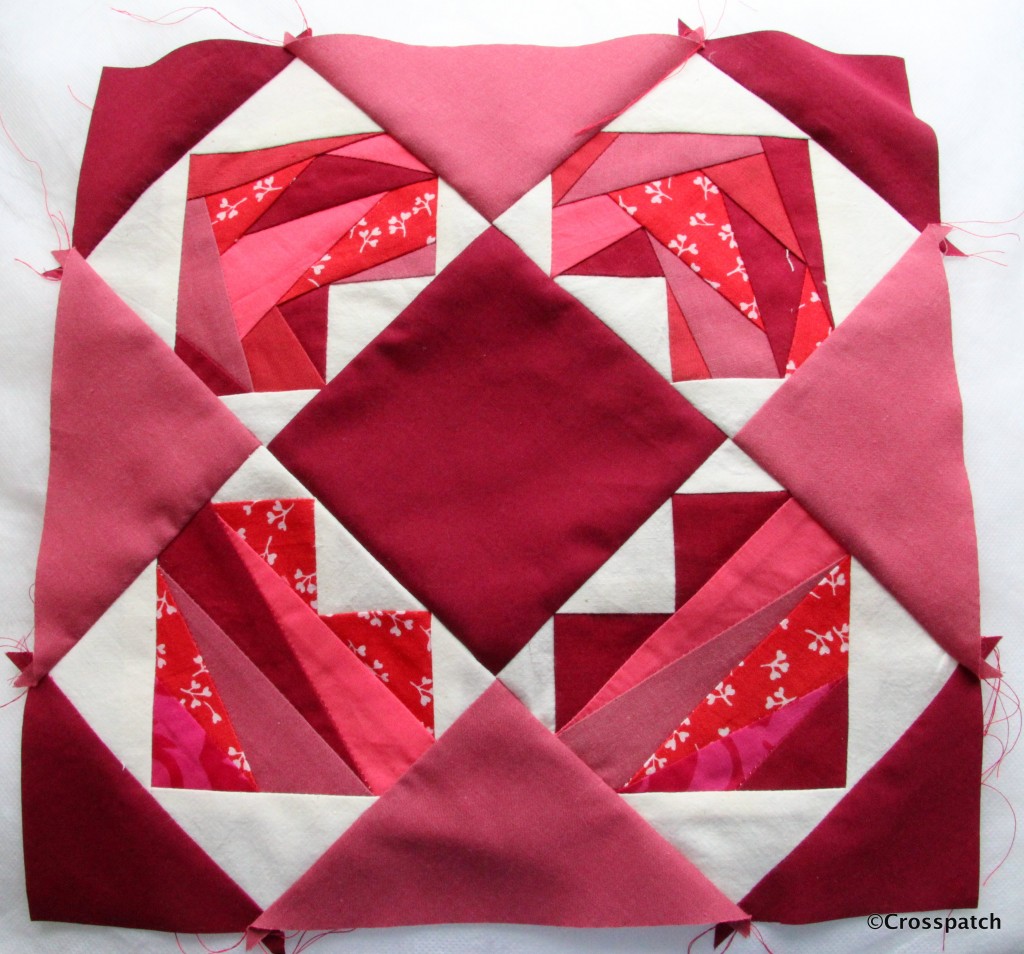
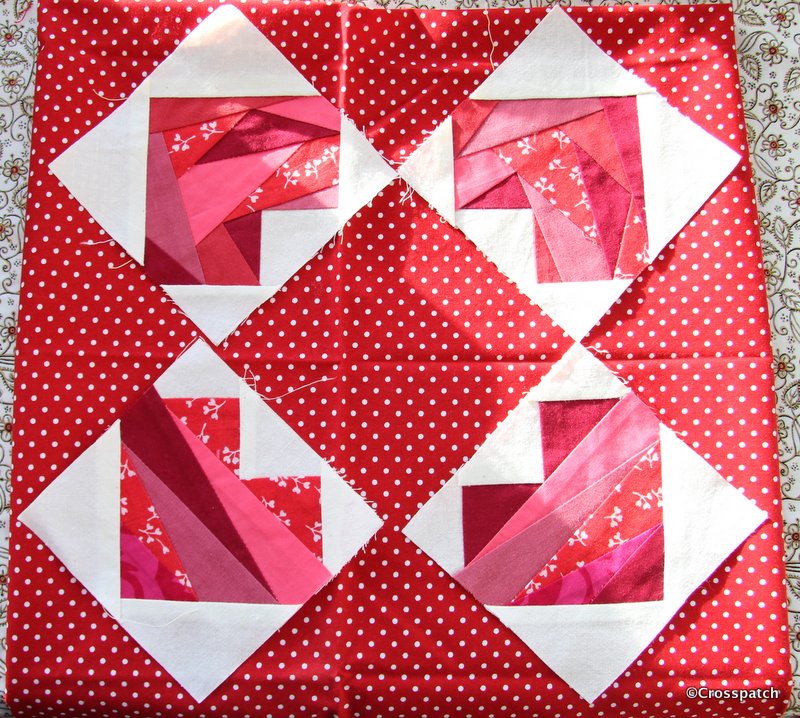
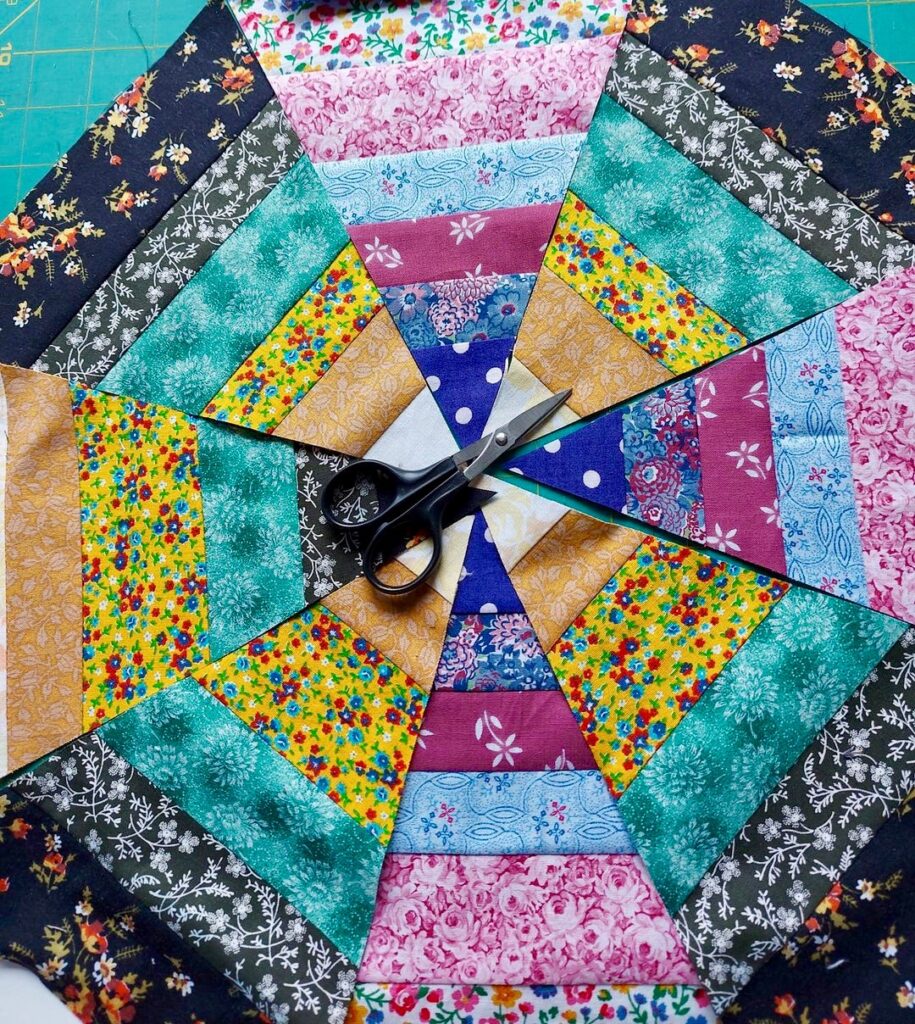
 And I contributed to the BOM for March 2022. Numbers not in yet.

I’m looking forward to the BOM for April,
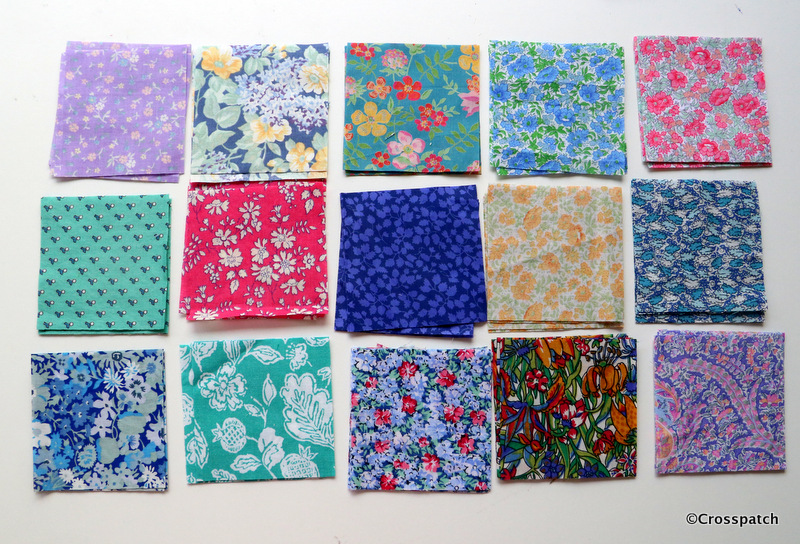
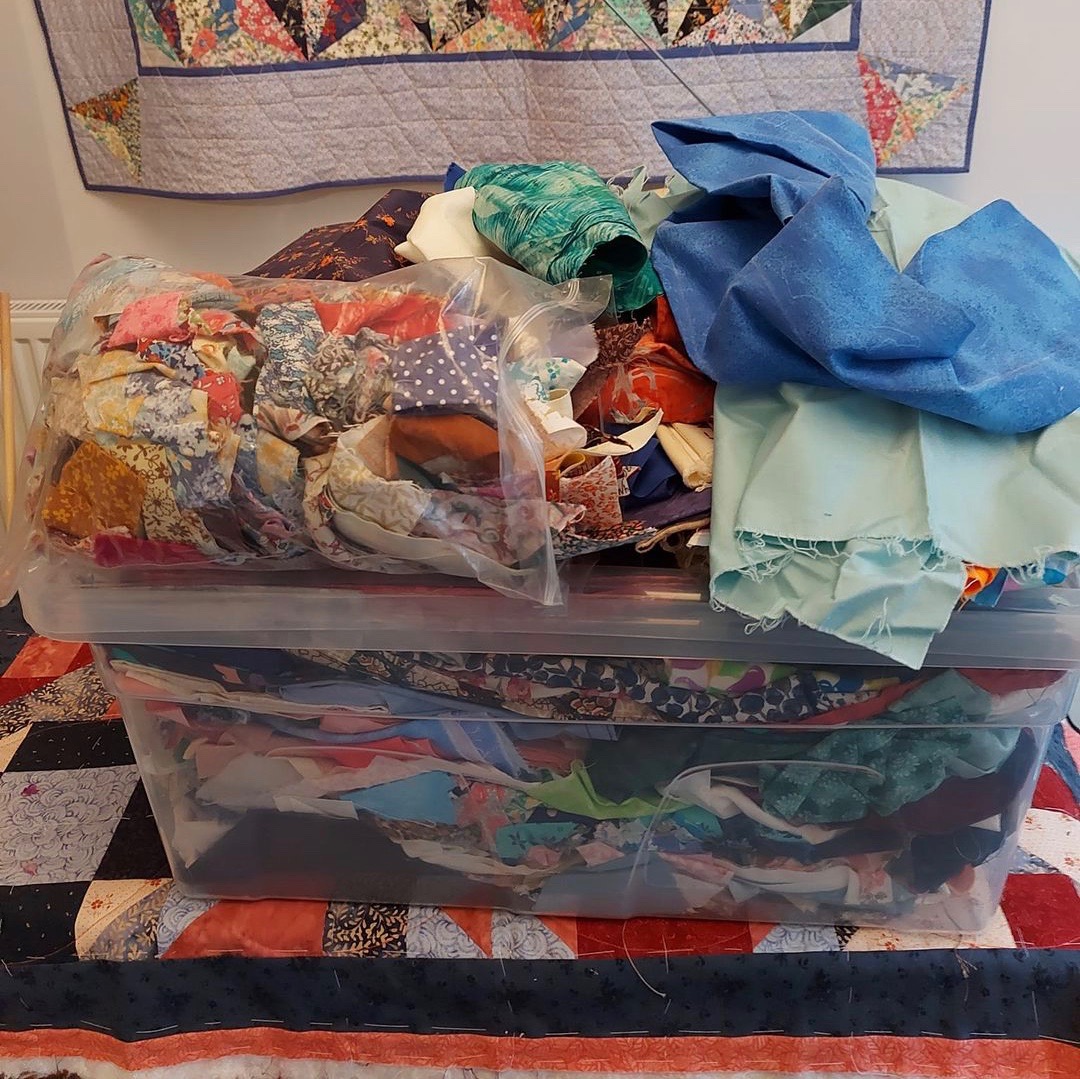
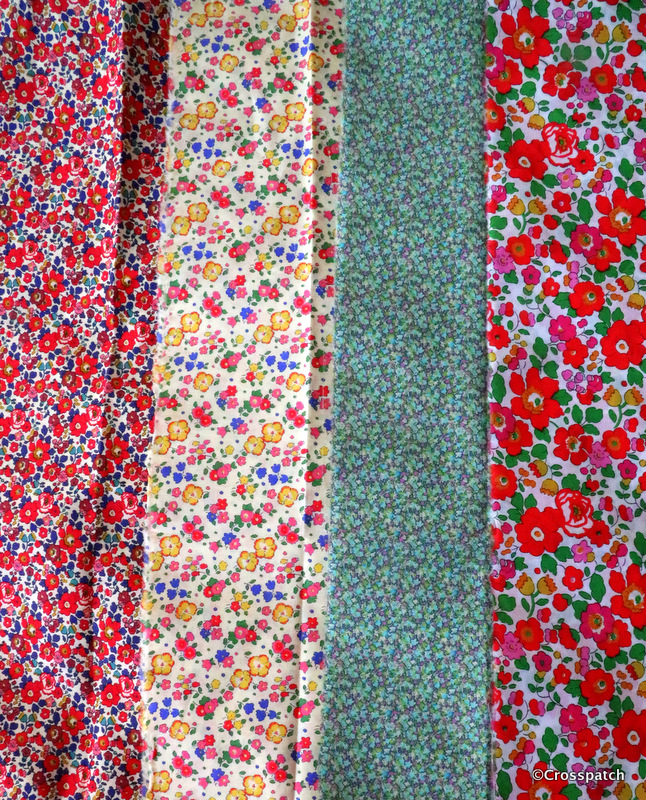
I’m still working from my scrap box, and picking out scraps from my mother’s stash; at 90yrs old, she doesn’t sew anymore, and she is happy for me to raid her stash whenever I want. Mum would be happy for me to take all of her stash, but where on earth would I put it?

I can’t say I’m having sleepless nights about the size of my stash…yet, but I don’t want to have to strengthen the rafters to take the weight of my mother’s stash, after all she was sewing before I was born, and her stash is impressive, even though she’s been retired for 30 years.  

My block for the Covid Commemorative Quilt

I wanted to give a clear shout out for Social Care, I knew that many contributions would be thanking the NHS, I was going to stand up for the many key workers in Social Care who also went above and beyond during the Pandemic.

What do you do when a planned week of leave is promised cold, wet weather?  I always have a wet weather plan. I spent calm, quiet mornings sewing. As a longstanding member of the Quilters’ Guild of the British Isles I was invited to contribute a block to the Covid Commemorative Quilt; a collaboration between the Quilters’ Guild and Bernina who make very fine sewing machines.

The remit was to “create a block which reflects your thoughts on the pandemic and the recovery from it… commemorate a loved one lost…the NHS…a key worker … (or) just be a ray of optimism as we emerge”

I wanted to give a clear shout out for Social Care, I knew that many contributions would be thanking the NHS, I was going to stand up for the many key workers in Social Care who also went above and beyond during the Pandemic.

Taking the ‘ Shout out for Social Work’ logo as my design, I resized and printed the logo so that it would fit the piece of calico provided. To ensure all the blocks contributed are the same size, and will go together effortlessly, the organisers very cleverly gave clear and strict instructions. My design must fit inside a 6 inch square centred on the 8 inch calico square provided and must use somewhere in the design a piece of the small 4 inch square of print fabric provided.  Spotty mustard print, its not my thing but the idea is that it will tie each block to its neighbours in the finished quilt.  

Holding the design and the calico up to the window allowed me to check the size was right,  I traced each element of the design onto Bondaweb (it’s a kind of double sided iron on sticky tape for fabric) ; and ironed the elements of the design in place. First mistake, I ironed on the hand first then realised the thumb should be on top of another element. I had to carefully peel it off, just the thumb, and iron it again over the speech bubble.

 That mistake then decided the next step, as the quilt will be for display rather than use, I thought I might get away with raw edges, but having peeled back the thumb it looked a bit shaggy, so now I needed to embroider the edges to stop them fraying.  Thank goodness my sewing machine does a tiny and very neat blanket stitch.

The machine embroidery threads , I have dozens of them, which I bought in a big bag full for £5 in a local charity shop, I do love a bargain. The hand embroidery threads I’ve had tucked away for years, and the fabrics all came from my scrap box, so I didn’t spend anything putting this together, even the bondaweb was borrowed from Mum, she’s 90, and doesn’t sew anymore.

Finally the words are hand stitched, not because I have any skill in that respect, I just wanted to put something of myself into my block, rather than it all being the work of my sewing machine.

Each contributor is also encouraged to say a few words about their block, this is my explanation:-

The NHS received a great deal of well deserved praise for their herculean efforts during the Pandemic, but they weren’t the only group of people who worked tirelessly throughout to keep the country safe.

Being a Social Worker, I want to give a shout out for Social Care, and the people who worked in very difficult circumstances. Some working from their homes, isolated from their supportive community, with fewer and fewer resources to call upon.

 Others left their homes and isolated themselves from their own families, to support the most vulnerable.

These were dark days; so for everyone in social care who spent the time of Pandemic trying to keep vulnerable people safe, supported and out of hospital, a heartfelt Thank You. “

Charitable donations are welcomed to the BERNINA fund-raise for NHS Charities Together , you can do so here www.justgiving.com/covid-quilt

Advent Calendar

Traditionally, (I’m talking about my childhood in the 1960’s), Advent Calendars were a just paper, or card, the little windows had no chocolate or treats behind them, only a little picture and I remember the excitement of seeing what might be behind the little door each day.

I finished this in January of this year; I’d found the Advent Calendar panel, bought years ago, in amongst some Christmas fabrics when I was looking for something else.  I decided that although I’d not get it done for Christmas, Advent was almost half way through, I’d start and plan to finish it, a stitch in time, so that I could hang it for Advent 2021.

It’s just a panel, which has the printed background and a strip of pockets, which are to be cut out and applied to the same image on the background fabric.

 Each pocket was cut, the raw edges turned and I tacked the edge down so that I could see the slim gold line at the edge. The plan was to topstitch the pockets onto the backing with a gold thread, but I didn’t like the effect, so I unpicked the ones I’d done and topstitched in a matching thread. 

 I also considered topstitching in various thread colours to match the colour of the pocket numbers, but that was beginning to look messy, that didn’t work either.

Once the pockets were sewn on, there needed to be more quilting to reduce the puffiness where the pocket were not placed.  I just picked out motifs in the same matching cream thread. Mostly these were hand stitched, because they were fiddly and in some cases too near the pockets for the machine foot to sew without pushing and pulling the fabric.

 I was determined not to buy any more fabric for this Advent Calendar project.  Seriously I have enough fabric to sink a ship. So I found a piece of ivory fabric with a gold and black motif in the Christmas box, which was not quite wide enough, and added green borders to make it fit the back. 

 The reason I chose green, (I’d rather have used red) was so that the edge at the front would match the edge on the back and any wobbliness or misalignment would be less apparent.  It worked and I’m happy with it. There was also enough of the green to make a hanging sleeve.

So the Advent Calendar was finished… well almost.  Traditionally, (I’m talking about my childhood in the 1960’s), Advent Calendars were a just paper, or card, the little windows had no chocolate or treats behind them, only a little picture and I remember the excitement of seeing what might be behind the little door each day.

 I didn’t want to just drop a sweet or wrapped chocolate in each pocket, I don’t need the calories anyway, and I couldn’t guarantee to have the self -discipline not to go chocolate rustling late at night, nor trust the beloved not to do so either. So what to put in the pockets?

As I took down my Christmas cards at Epiphany I began thinking about those little pictures behind the doors on my childhood Advent Calendars.  Would an image on its own be enough?  I cut a number of cardboard squares, small enough to fit into the pockets, each with a Christmassy image, Robins seem to be well represented, but then I like Robins.

That’s where I left it, the Advent Calendar with a temporary hanging cane and a string to hang it by and the pockets full of little squares of Christmas card.

Last month I rooted out the Advent Calendar from its resting place and began thinking about how it should be finished.  I wanted a wellbeing theme, something positive to think about each day, something maybe to do for my wellbeing.  My Niece has an Advent Calendar, which she made from downloaded materials from Calm Moment you can find it here, (https://www.calmmoment.com/mindfulness/mindful-christmas-advent-calendar/ )

 I printed the 24 wellbeing suggestions from the Calm Moment Advent Calendar cut them approximately square and folded each one diagonally twice, tucking it into the pockets on the Advent Calendar. I also searched Pinterest for Christmassy quotes, printed those very small and glued one to each of my little squares of Christmas card.

 Through Advent I will have a Christmas affirming quote and a wellbeing suggestion for every day and not a calorie in sight.

The only thing is… The hanging arrangements still don’t work for me, I need a metre or so of gold cord, and a stick  (with knobs on,) that I can paint gold., and tie the gold cord to. Inevitably even with my best efforts, it wasn’t ready in time for Advent. Shoot me! I’m still working full time and looking after my old Ma, and we have to keep a sense of proportion.  I’ll go into town on Saturday and buy gold cord, the stick I have, knobs are on order, (wooden beads actually) and all will be complete before Advent is over, honestly!  

Making Miriam’s cushion

I wanted to give Miriam a leaving gift that was personal from me to her, no shop bought gift , it had to be hand made.

Recently one of my staff team handed in her notice, I was very sad to see her go because she is a great practitioner and a lovely human being, but I was happy to see her progress in her career.

Naturally I wanted to give Miriam a leaving gift that was personal from me to her, no shop bought gift , it had to be hand made.  A cushion was all I had time to achieve, so this is the tale of Miriam’s cushion.

Miriam's cushion
Finished!


I decided all would be made from my fabric stash, and wanted something very pretty, so Liberty prints seemed to fit the bill.

I wondered if perhaps there was a block called Miriam, well there is but it isn’t particularly pretty, and its also known as Crazy Susan, so that wouldn’t go down well. Stars was my second thought. Pinterest supplied this idea, Miriam’s cushion was going to be Fab.

Miriam's cushion
Liberty prints


15 different fabrics were picked out of my stash, and a new white on white fabric was bought to tie them all together, there was nothing suitable in my stash.

Miriam's Cushion
trimming down to 2.5 “


From each fabric one 2 ½ “ square and four 2⅞ “   triangles were required.  I found it easier to cut 2 x 3 “ squares from each fabric and the same from the white to make 4 half square triangle units by putting a Liberty fabric square right sides to right sides with a white square, sewing two lines half an inch apart across the diagonal and cutting them apart, pressing to the dark side, then cutting down to 2 ½ “.


Half square triangle units are traditionally made by marking a fine pencil line diagonally across the paler fabric, so that it can easily be seen, and sewing a ¼“ from either side of the line.  We press the seam allowance towards the darker fabric so as not to allow the darker fabric to show through the paler, it also helps to nest seams for a flatter, neater end result.

Miriam's Cushion
placing fabrics


Once I had 15 sets of square and triangles, I had to decide on placement of the fabrics, with this pattern there are no blocks which can be made up and colour placement decided later, each fabric interlocks with its neighbours row on row , so the whole design must be laid out in advance.  Thank goodness it was only a cushion, I don’t have space to lay out an entire quilt in this way.

Miriam's cushion


Numbering the rows so that I didn’t get myself in a tangle I stitched each row individually, then pressed the odd rows in one direction and the even rows in the other direction so that the seams would nest neatly.


I was under time pressure, so as I worked I considered how to finish Miriam’s cushion, I wanted to finish the edge with a binding which would look like piping without the faff of having to use piping. But that left me with a problem of how to close the cushion cover.


A Zipper looks better than an envelope back, which I always think looks baggy and unfinished, but I couldn’t figure out how to put a zipper in a bound edge. So rather than make a matching back I had to make a smaller version of the front for back with a sashing to insert a zipper and leave a raw edge to bind.

Miriam's cushion
cushion back with zipper


Each side was sandwiched with a 2oz wadding bought specially at Abakhan    (https://www.abakhan.co.uk/stores) in Preston; and quilted simply with diagonal lines, happily because the wadding was quite chunky, it didn’t need a lot of close quilting.

Miriam's cushion
quilting Miriam’s cushion

I sewed the front to the back wrong sides together with the raw edges on the outside, a ¼ “ seam allowance.


Finally I cut and stitched the binding ; I cut a 2 ¼ “ binding and folded  it in half lengthways, right sides out, sewing it to the front of the cushion just a smidge wider than  ¼ “ so that the first seam isn’t showing.  It also stabilises and strengthens the seam around the edge being stitched round a second time.  Then rolling the binding over the raw edge by hand, because I have folded the binding I now have a folded edge to hand stitch along the seam line on the reverse side.

Miriam's cushion
Finished!


I used the same fabric for the binding as the sashing so that any wobbliness of the binding or the hand stitching would be less obvious on that side. I was burning the midnight oil by this time; Miriam’s cushion had to be finished, she was leaving the following day.


I wanted to label the cushion, but not for it to be seen  announcing myself constantly, so I made a label and stitched it inside the cushion, just under the zipper.  It simply says it was made for  Miriam, it is Miriam’s cushion.


When I gave Miriam’s Cushion to her, I pointed out my two errors, the zipper isn’t centrally placed, can’t figure out how that happened, but I didn’t have time to fix it, and the far corner fabric isn’t quite “right”, but I left it in because, as all quilters know, “only God is Perfect”.


There was one final flourish that I had planned to add but I ran out of time. It was a bible quotation I sought out especially For Miriam, a committed Christian, as she was leaving us for another job nearer to her home. I had planned it to be sewn inside like the label.


So here it is :-


To enjoy your work and accept your lot in life—this is indeed a gift from God. (Ecclesiastes 5:19)


It’s more than simply Miriam’s cushion it is a gift to express fond appreciation of the person she is.  Thank you Miriam for passing through my life however briefly, it has been a pleasure to know you, to work with you, to see you develop and flourish in your profession.


How to disappear a nine patch

only to find I was a week too early. Curses! Well at least I now have time to stitch that binding on, and take it back next week.

nine patch
Little winner

We all deserve a little luck occasionally; this quilt was made from a little bit of mine.
I’m lucky enough to live near a company called Standfast and Barracks, they print fabric for Liberty and Designers Guild amongst others. They have a factory shop where these fabrics can be bought in small amounts for discounted prices. You won’t be surprised that I shop there often. They also have a facebook page. (https://www.facebook.com/search/top/q=standfast%20%26%20barracks%20fabric%20factory%20shop ) and some time ago they ran a little competition to win some fabrics … guess who won?

nine patch
lucky Me

I won… Four lovely pieces of Liberty Tana Lawn; now what to make?

I decided to make a disappearing nine patch, I had only used that block once before but I knew it would go together quite quickly, and I liked it, you don’t need a better reason, do you?

nine patch
3 of the 4

I fiddled around for a while trying to work out the placement of the fabrics and came to the conclusion that I needed more contrast, a different colour. I dug out my enormous stash of Liberty Tana lawn remnants from Standfast and Barracks, and found a blue which I thought would work.

nine patch
2 and a contrast

Thinking about the balance of your fabrics in simple terms, the fabric you want to use the most of or to be the dominant fabric should go in the corners of the nine patch block .

nine patch block
nine patch block

The next fabric or fabrics should go on the four sides of the nine patch , you could use all one colour as I did or you could alternate two colours which would create a completely different look.

NB , if you use a fabric with a directional pattern, as I did the pattern should not be placed the same way up, but directed from the sides to the middle of the nine patch block, otherwise when you cut it up and try to put it together again, you’ll find the pattern going every which way. It won’t work.

nine patch
Disappearing nine patch

Finally the fabric you have least of if you are using scraps, or you like least, or would dominate the quilt if used in greater amounts, goes in the centre of the nine patch block. The disappearing nine patch block has a balance of fabrics which is expressed by 4, 2, 2, 1 . The largest patch is 4 times bigger than the smallest and the middle sized patches are half of the larger, if you see what I mean?

nine patch
180 degrees

Having put together the nine patch I cut it into 4 quarters and put it back together having turned two of the quarters 180 degrees. All the blue patches are aligned in the same direction. If two patches had the pattern aligned along the length, and the other two along the width, it would be visually distracting.

nine patch
neither works for me


Nine nine patch blocks gave me a 30” quilt top and used up all of the flowered and the blue fabrics, to make it big enough for a lap quilt usually 40 -45 “ square, borders were needed. First I considered a darkish blue… too dark, then a bright watermelon pink… too bright. I thought it would dominate and make my pieced disappearing nine patch centre look dull.

nine patch
blue and green work together

I added a narrow green border to separate the pieced top from the outer border, using the green helped to balance the colour across the quilt and use the green up too. Finally I took my centre back to Standfast and Barracks, draped it over the rolls of fabric for sale in the shop. I found another blue that worked for the border. I also bought a piece of the flowered fabric big enough to back and bind the edge, leaving enough left over for the hanging sleeve too.

nine patch
simple quilting

I planned to submit this to my quilt group’s exhibition; the third of my three items, and thinking it needed to be handed in in a few days time I was in a hurry to finish it. The last time I had used this disappearing nine patch block I used a circular quilting to balance the very square pattern, I began to mark out the circles, but my disappearing pen was dried up and useless, pencil was too laborious, I had to do something simple.
It’s stitched in the ditch, just outlining each quarter block, and the border follows the pattern of the disappearing nine patch block in a simplified form.

nine patch
burning the midnight oil, less than 24 hrs to go

The binding was stitched onto the front, rolled over and tacked down over the stitch line on the back, almost ready but time was up. I drove out to the village where my Quilt group meet to hand it over, only to find I was a week too early.

nine patch
how neat is that?

Curses! Well at least I now have time to stitch that binding on, and take it back next week.

In case you are wondering I have a plan for the other two fabrics not used in this quilt, with the addition of that bright watermelon pink, I think I’ll make a disappearing four patch… watch this space.

Little Hearts pieced Cushion

It makes for a nice plump cushion, and was finished with a fortnight to go before it needs to be handed in. Result!

little hearts
foundation pieced little hearts

18 months ago I found 4 little hearts foundation pieced blocks in red fabrics. I had a fine idea that I could make them into a finished piece in time to submit them to my quilt group’s annual challenge. (See the original blog post here http://www.mycrosspatch.com/blog/2015/12/23/four-little-hearts

little hearts
two plains

I found two plain fabrics and cut pieces to put the 4 little Hearts together to make a cushion front, but there was something not quite right. I couldn’t put my finger on it so I put it aside to think about it before going any further.

As predicted I had to pack up all my belongings and move out of the lovely newly redecorated room in order to make way for the then 16 year old who I had to admit had outgrown the box room which was his bedroom. He was beginning his important sixth form years and would need a proper study space.

All my sewing materials had to be packed up and moved into what was the box room ( we now call it Harry Potter’s room, the cupboard over the stairs) so the little hearts were packed up and moved (buried). The challenge came and went without me submitting my piece. It was only when I realised our quilt group’s exhibition was due in a couple of months that I dug out my little hearts and some other half finished pieces in the hope I could produce something to show.

little hearts
looking much better

The first step was to work out what was wrong with it. I realised the colours didn’t work together; the dull pink at the sides was just too dull, so I took it apart and replaced the dull pink with the darker burgundy colour. Sorted!


little hearts
zip and backing from my stash

I wanted to make an 18” cushion and would have had barely enough of the burgundy to achieve that. A 1” sashing of the cream calico, added a pretty frame to my 4 little hearts block and allowed me to achieve that 18+” square I needed for the cushion top.
I really wanted to complete this cushion completely from my stash, and no cheating. So the backing was a found item, from my stash, it’s quite an old piece, a remnant left over, I think, from a skirt or dress from the 1980s. Happily it has finally found its purpose. The zip came from another stash, a lucky find in a charity shop, a whole carrier bag full of zips, over a hundred zips for £5.

little hearts
Finished at last

Finally when I had put the cushion together it measured just shy of 18.5’’ and the 18’’ cushion pad was a little loose in the cover, so a quarter inch top stitching round the edge gave a good finish to the edge, a little definition and pulled in the cushion size to just under 18”, it makes for a nice plump cushion, and was finished with a fortnight to go before it needs to be handed in. Result!

Christmas Wreath placemat to complete.

I copied the quilt pattern from a hand bill advert I found, it was a tiny but simple holly leaf with berries, which I had to scale up and transfer to cardboard, machine stitched with gold thread for a little Christmas sparkle.

Christmas wreath
finished article

Here’s another thing I found when searching through my Christmas fabric box, a placemat I made years ago, and the makings of another one. Which is great because I can show you how I made it without having to make another! If only I can remember how it went together.

Christmas wreath
start with snowball block

The centre block, the Christmas wreath, is a “kind of” nine patch, made up of a centre strip 2 green squares 2.5 inches and a white rectangle 2.5″ by 3.5″. the corner squares are 3.5″. The red border is 2 inches, can’t think why. The chequerboard border is made up of 2.5 inch squares too.

Christmas wreath
just little squares

The little square in square blocks I think must have been made up of the bits left over when I made the corner blocks.

christmas wreath
corner block

I used the stitch and flip method, place a small square on the larger square at the corner, stitch diagonally corner to corner, then cut off all but the seam allowance, and flip over to create a new corner to the block, this block uses that method twice with two different size smaller squares on diagonally opposite corners.  I took the opportunity to sew together the two bits I would cut off, simply because it’s easier to sew fiddly little bits while they are still attached to the larger piece.

Christmas wreath
a little gold sparkle

I copied the holly leaf quilting pattern from a hand bill advert I found, it was a tiny but simple line drawing of a holly leaf with berries, which I had to scale up and transfer to cardboard,cereal box card. I drew round the pattern with a disapearing pen, and machine stitched with gold thread for a little Christmas sparkle. Finally the Christmas wreath block, which is supposed to be a holly wreath is embellished with little red buttons, they are too big to be berries, but smaller ones would have been difficult to source, and I would have needed very many of them to get the balance of colour right.

subsequently I’ve cut some more chequerboard squares and made another Christmas wreath placemat… well I’ve got the top done. The wadding backing and quilting will have to wait till I can get to a shop that sells wadding.

christmas wreath
easy squares

Christmas Wreath
easy peasy

Christmas wreath
putting it together.

I’m also making something bigger, I’m not sure yet what it will look like, possibly a table runner to go the length of the table or maybe just something for the middle of the table to hide all the table mats, and protect my snowy white table cloths. Watch this space, but don’t hold your breath, it might be ready for next Christmas.

Four Little Hearts, foundation style.

I just have to use these little squares, waste not want not. My first thought was to just put them together , on a red background, or maybe add some applique.

hearts
foundation pieced hearts

What do you do with your unfinished projects, I don’t remember making these scrappy hearts blocks, who knows how long they have a lain unloved in the bottom of a box? While searching for some star templates to finish another project I found another UFO (Un-finished Object) four little red hearts foundation pieced from scraps of red fabric on cream calico. Well what can I do with those? Looking at the fabrics I don’t think I have any left, I don’t recognise them at all, but no matter, I think I can finish them into a usable size by introducing another red fabric.

hearts
maybe like this?

Co-incidentally, my quilting group’s annual challenge this year is “call it red“. I just have to use these little squares, waste not want not. My first thought was to just put them together as in the picture, on a red background.
Or… I could add some applique hearts in Calico on red, with red stitchery… perhaps some more foundation pieced hearts in different reds… perhaps… anyway I have till July to figure it out.

I love red and white quilts and I had been planning to begin a red and white quilt for Cecily’s challenge , a feathered star in white on a red background, but if I’m honest it’s not likely to happen, not unless I find an eighth day in the week, or am in the happy position of being able to  retire before July. So I’m really pleased to have found these Hearts, I can get them made into something before July… surely.

I have recently redecorated and re-carpeted my Studio and am back in and free to sew again, but for one small problem, now the room is clean and warm and bright, a certain 15 year old who had denied any designs upon the space, now thinks his own room is way too small for him and perhaps my playroom will suit him better. In the summer when I have redecorated the living room, I will have to think about decamping to what is currently the dining room, so hopefully I can get my little red hearts quilt completed before then.

Christmas stocking, finished at last…

I’m celebrating finally finishing two Christmas stockings I began 8 years ago.

Christmas stockings
finished at last

I’m celebrating finally finishing two Christmas stockings I began 8 years ago. The children for whom I began making them were 7 and 11, are now 15 and 19. If you want the whole story check out my archive for December 2012and January 2013. Suffice to say Christmas is always a busy time and sometimes you just have to prioritise, Sewing takes second place to shopping, cooking and cleaning only once a year, at Christmas.

Christmas stocking
both finished

So beginning where I left off, one of the stockings was quilted and ready to be made up, the other was not. I wanted them to be the same and I had lost the quilting templates, 5 little cardboard stars in graduated sizes which I created using cookie cutters, which I had also subsequently lost, and to this day have not turned up… I suspect foul play.

Thankfully the templates did turn up, and this Christmas I was determined to finish what I’d started. I used a disappearing pen, (which for some reason isn’t disappearing) and drew the stars on the lining of the stocking, then putting the gold thread in the spool and a transparent thread on the top I quilted from the back stars in different sizes to fill the spaces round the motif in the centre of the stocking leg, and in the foot of the stocking.

Christmas stockings
final finishing touches

Putting the right sides together I stitched the two halves around the edge with a generous 3/8ths seam allowance to make it easier to neaten the edges. To finish the seams on the inside I cut away the wadding, and hand stitched the lining closed over the raw edges down to the bottom of the leg. Beyond there the foot still has raw edges showing, well not showing, but that’s the point, you can’t see it so I’m not going to worry about it, I may overlock the raw edges with a machine stitch…when I have a minute.

christmas stocking
another mistake

Next, I had to make the swing tags for each stocking, cutting two squares of fabric for each tag, and applying a gold letter to the green side of each. I worried that the gold letter might eventually peel off having been applied with Bondaweb, so I used my gold thread again and stitched around the edge with a machine blanket stitch, not very accurately I have to say, but I wasn’t about to unpick and start again.

Right sides together again, with a little wadding on the back, I made another mistake; if you leave the hole to turn the fabric at a corner you’ll never achieve a neat closure… unpicked and did it again, this time with the turning gap amidships.

christmas stocking
better, all 4 corners stitched and clipped.

Having snipped the corners and turned each tag right ways out, I neatly closed the open edge by hand. Then I topstitched a gold border using another fancy machine stitch like the one I used on the stocking motifs.

Christmas Stocking
ribbon loop


Finally a loop of ribbon was attached to the back of each tag, these ribbons tend to get ragged over time so rather than stitch it into the seam I’ve just tacked it to the back. The 15 year old is a Millennium baby, born in 2000, and when I first knew him at 7 he couldn’t say Millennium, he would a say Millellium, or Minnellium, it has always been a thing I could tease him with, so I used some ribbon I had tucked away since the Millennium, it has “Marking the Millennium” printed on it. Maybe if he keeps and treasures his stocking, it may make him smile every Christmas…long after my day.

christmas stocking
millennium ribbon

And so they are completed and hung up ready for Christmas… now all I have to do is help the 19 year old make a wall hanging, and start the wrapping, with only 3 days left till Christmas.

Christmas stocking
and here’s a few I made earlier


Crazy

I dread to think how many times I pieced and unpicked that border, and every time it was wonky.

scraps for crazy patchwork
30 years of scraps

This year’s challenge from my Quilt group, was Crazy, put simply anything made from crazy patchwork, fill your boots. My plan was to collect silk ties to cut up, and I did buy a few from my favourite charity shop, but I soon realised that I would need a lot of ties, to have enough variety of colours and patterns, so back to the stash.

not scraps for crazy patchwork
rejected scraps

I found a bag of scraps, (well three actually), sorted it into three piles, blue and white Laura Ashley scraps dating back to 1977, (of which more later), a pile of pastels some Laura Ashley of the same vintage and some from the 80’s, and a reject pile the colours of which would not meet the criteria for my piece, brown orange, cream etc.

geometry for crazy patchwork
always knew Geometry would come in one day

I wanted to work on small pieces which could be joined together in a larger piece, and had seen a number of crazy patchwork studies created as large hexagons, all I needed was a large hexie pattern. So out came the cereal packet, compass and ruler, not difficult, simply draw a circle, divide into 6 equal parts (60 degrees), and draw a line from radius to radius, where the circle intersects, to create a hexagon. The size of the hexagon was determined by the size of the cereal packet.

making crazy mistakes
big mistake

Initially I followed the advice in my only Crazy patchwork book, (big mistake, but excellent lessons) I cut and laid the pieces on a backing fabric cut from cotton calico (lesson one backing layer too thick). I overlaid the pieces by a eighth of an inch and then stitched them down with a fine zig-zag stitch using transparent filament, (mistake two, this is nasty scratchy stuff and leaves a ridge of stitching which then causes drag when using machine embroidery stitching on top).

crazy machine embroidery
seen from the back

Running out of time (72 hours and counting) I realised using differing coloured threads to embroider the patches would take time I didn’t have and possibly require threads I didn’t have, so I decided I could pull the whole thing together and achieve balance by using one colour for the embroidery throughout, white.

7 crazy hexagons
I need seven!

As I picked the embroidery stitches to decorate my scraps I made my next mistake (number three), I didn’t try out every stitch on scrap before I began, and there’s no unpicking it afterwards! Had I tried them out first I could have adjusted the length and width of stitch to get the optimum look of the embroidery stitch. I would have also realised that the thread I was using would not work well with some of the more open, spidery stitches leaving a barely visible embroidery, a bold thread would have worked better (mistake number four).

 crazy hexagons
always a fiddly task.

Now comes the fiddly bit, piecing the hexagons by machine, stitching into acute corners requires some skill, the trick is not to stitch right to the edge , leave yourself a quarter inch of wiggle room, it doesn’t matter if you leave a little hole at the corner, you will be embroidering over it anyway.

7 crazy hexies
and now for my next trick

It’s at this time I discovered mistake number five, for some reason I can’t fathom I had only made 6 hexagons, and of course I needed 7, with only 48 hrs to go I didn’t have time to fiddle about with my previous method so I cut another hexagon in calico, grabbed some spray tack, sprayed liberally, cut up some scraps and dabbed them on in a haphazard way, forgot the filament zig-zag and completed with white embroidery. No mistakes and it turned out the best of the 7 hexies. Finally mistake number six , I then decided to piece the edge to create a square, all the blue sashing is made of part hexagons cut to fit around the edge, and pieced in. It would have been so much easier and quicker to applique to a straight piece of sashing. I dread to think how many times I pieced and unpicked that border, and every time it was wonky.

making a crazy cushion
envelope back

Consequently I ran out of time to finish it properly, I should have put a zip into the back but I didn’t have one, nor time to buy one so I made an envelope back, which I don’t like and will replace, I stitched the final edge seam with a big stitch so I can unpick it easily, and the pieced sash edge has not been embroidered where it joins the crazy patches, so when I unpick it I’ll add more embroidery.

crazy cushion finished...ish
finished…ish

At least I managed to produce a “finished” piece of work to submit for the challenge, it didn’t win a prize. That’s ok ,I wouldn’t have quibbled with the judges decision and loved the crazy bag made by Anne Thistlethwaite which won. Well done Anne.