Little Hearts pieced Cushion

It makes for a nice plump cushion, and was finished with a fortnight to go before it needs to be handed in. Result!

little hearts
foundation pieced little hearts

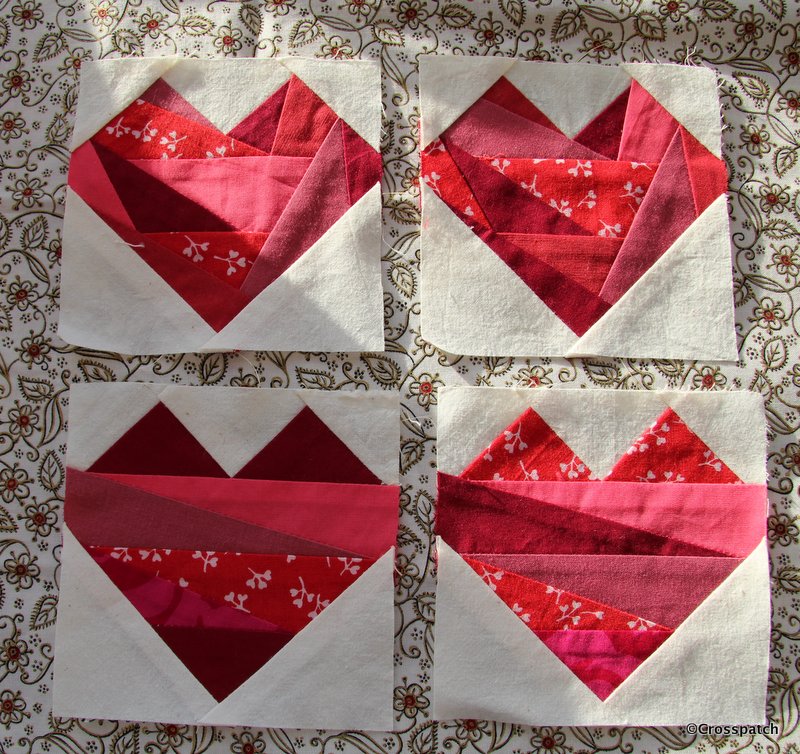
18 months ago I found 4 little hearts foundation pieced blocks in red fabrics. I had a fine idea that I could make them into a finished piece in time to submit them to my quilt group’s annual challenge. (See the original blog post here http://www.mycrosspatch.com/blog/2015/12/23/four-little-hearts

little hearts
two plains

I found two plain fabrics and cut pieces to put the 4 little Hearts together to make a cushion front, but there was something not quite right. I couldn’t put my finger on it so I put it aside to think about it before going any further.

As predicted I had to pack up all my belongings and move out of the lovely newly redecorated room in order to make way for the then 16 year old who I had to admit had outgrown the box room which was his bedroom. He was beginning his important sixth form years and would need a proper study space.

All my sewing materials had to be packed up and moved into what was the box room ( we now call it Harry Potter’s room, the cupboard over the stairs) so the little hearts were packed up and moved (buried). The challenge came and went without me submitting my piece. It was only when I realised our quilt group’s exhibition was due in a couple of months that I dug out my little hearts and some other half finished pieces in the hope I could produce something to show.

little hearts
looking much better

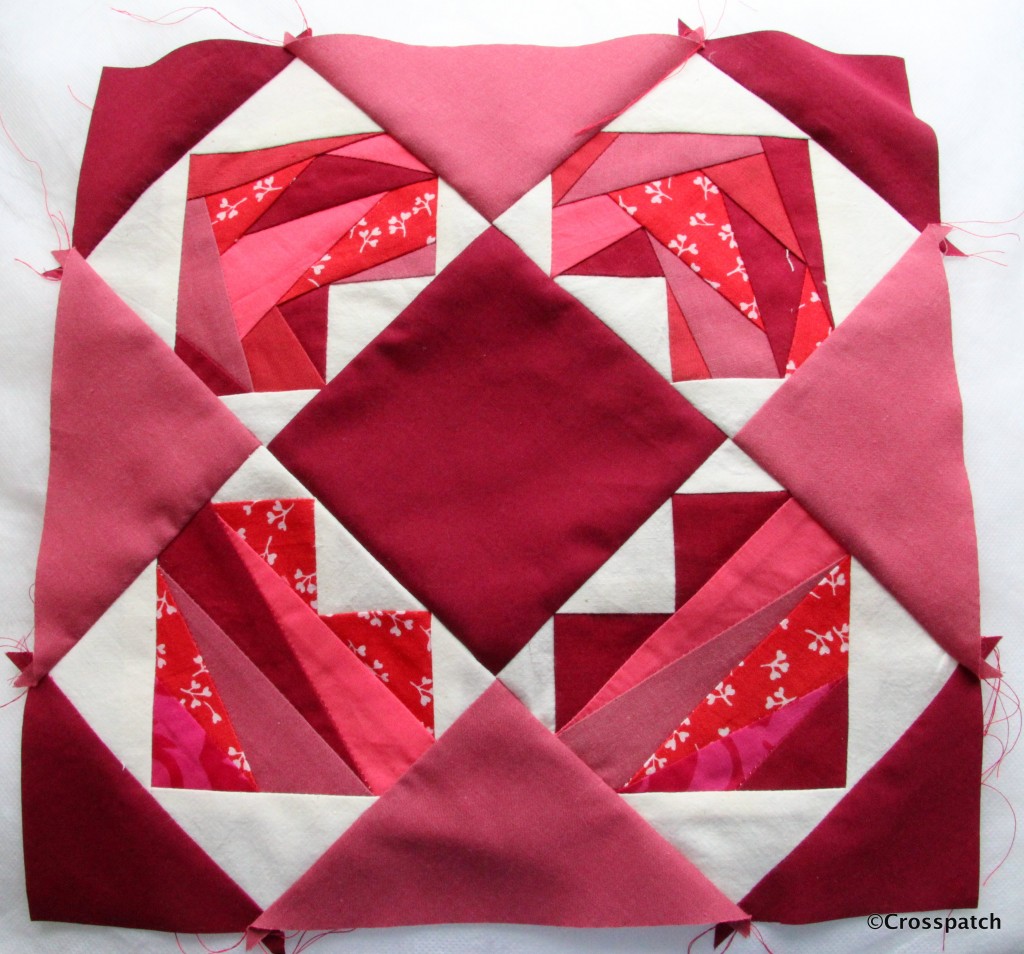
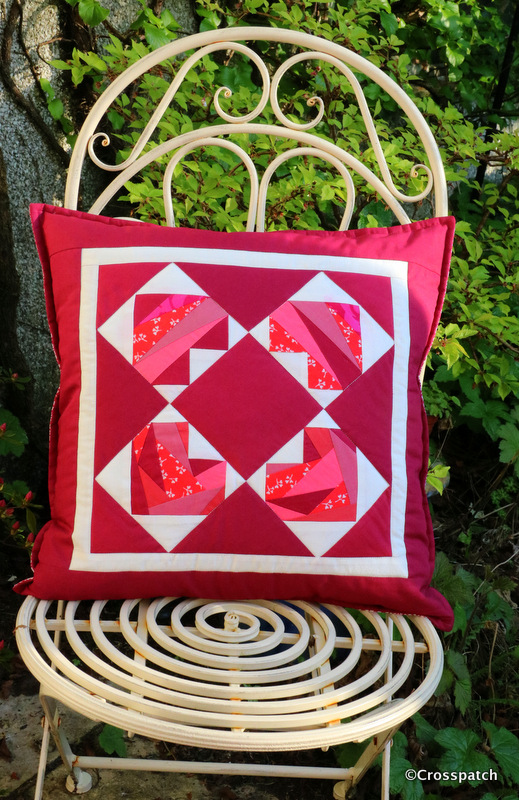
The first step was to work out what was wrong with it. I realised the colours didn’t work together; the dull pink at the sides was just too dull, so I took it apart and replaced the dull pink with the darker burgundy colour. Sorted!


little hearts
zip and backing from my stash

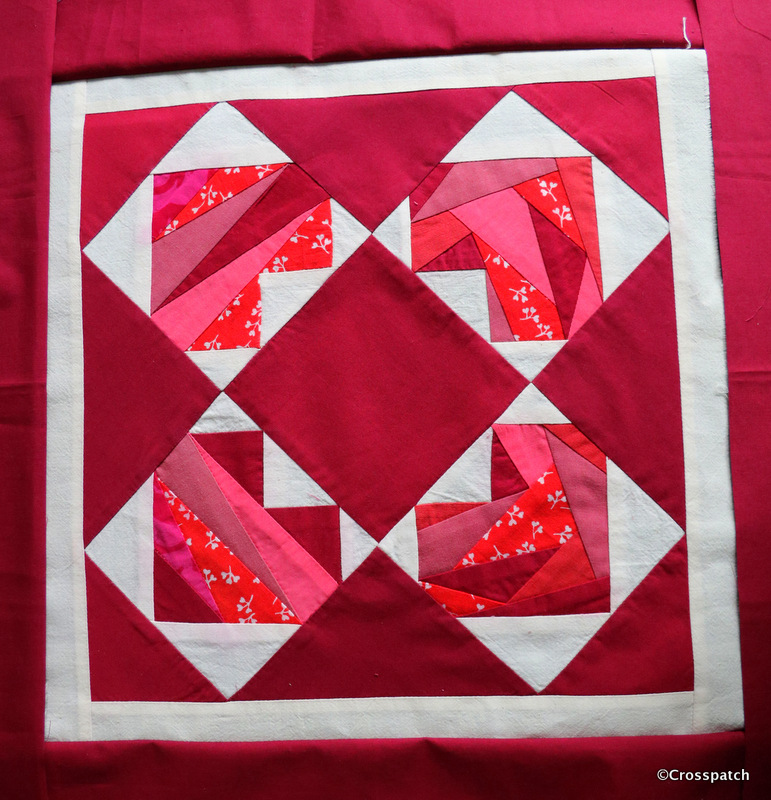
I wanted to make an 18” cushion and would have had barely enough of the burgundy to achieve that. A 1” sashing of the cream calico, added a pretty frame to my 4 little hearts block and allowed me to achieve that 18+” square I needed for the cushion top.
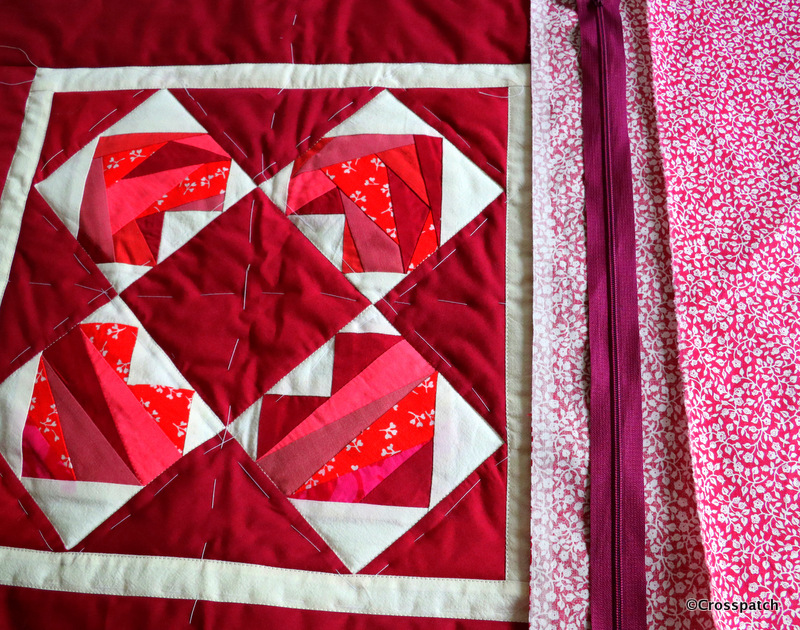
I really wanted to complete this cushion completely from my stash, and no cheating. So the backing was a found item, from my stash, it’s quite an old piece, a remnant left over, I think, from a skirt or dress from the 1980s. Happily it has finally found its purpose. The zip came from another stash, a lucky find in a charity shop, a whole carrier bag full of zips, over a hundred zips for £5.

little hearts
Finished at last

Finally when I had put the cushion together it measured just shy of 18.5’’ and the 18’’ cushion pad was a little loose in the cover, so a quarter inch top stitching round the edge gave a good finish to the edge, a little definition and pulled in the cushion size to just under 18”, it makes for a nice plump cushion, and was finished with a fortnight to go before it needs to be handed in. Result!

New Luggage and matching Slippers

I love Pinterest, you just search for a pattern and up comes exactly what you need. In this case a Butterick pattern for Slippers from 1955.

Last summer my Dearest decided that our youngest at 16 was old enough to be left at home overnight, while we went off for a single night away in a hotel, (Hallelujia, freedom at last.) We booked a night in a lovely Hotel in the Lake District, The Inn on the Lake, Glenridding, at a bargain price. But then the problems began, fancy hotel… what to wear? What to pack? No suitable PJ’s , no decent luggage,I don’t want to arrive looking like the poor relations. Since I plan to make weekends away a regular occurrence in my life I decided a weekend bag was a definite need for me, and my dearest, thought a suit carrier was also required, this night away was looking less of a bargain.

slippers
my gorgeous new weekend bag

Ebay supplied me with a beautifully supple red leather weekend bag, less than half the price of a new one, I was so pleased with it. I decided what would make it even better would be some matching shoe bags to keep my shoes separate from my clothes, and a pair of slippers too. And I was going to make them with as little money spent as possible.

slippers
which would you choose?

A quick look through my stash yielded a number of suitable red fabrics for my shoe bags and slippers, deciding which one to use was easy I just draped them over the lovely leather weekend bag in the garden. The Liberty Tana lawn in the middle? Yes.

slipers
slipper pattern

I love Pinterest, you just search for a pattern and up comes exactly what you need. In this case a Butterick pattern for Slippers from 1955. And Purlsoho.com for the shoe bags.

slippers
Cinderella will go to the ball

I rooted out those fancy evening shoes, the only decent heels I’ve got and cut the fabric to make two bags big enough to fit those shoes, my usual flats will fit if they do. Two simple bags, the tops turned down to make a tube for the drawstring , and ribbons for drawstrings.

slippers
Cut out and ready to quilt.

And so to the slippers, I printed out the pattern, and put my foot on it, to check the size, it looked a bit big but better that than too small. I could always trim it back once I started putting the slippers together.

Cut 4 soles, 2 left two right, and 4 tops, which are the same shape left and right.

The wadding is a piece of curtain lining with a needle punch wadding on one side, to line winter curtains. To stiffen the slipper sole I used iron on Pelmet Vilene, it comes in a handy width, just a tad less than the width of my slippers.The only thing I bought was the red bias binding. The pieces were put together and quilted with random lines of stitching, I was up against it time wise, needed to finish them before I began to pack , so I wasn’t too picky about the quilting, it just needed to hold the layers together. I just needed slippers to go in the bag.

slippers
The binding

I managed to stitch one slipper together before I had bound the raw edges of the slipper top…Doh! Un-pick and start again Alison. My only struggle with the slippers was with the bias binding, it wasn’t quite wide enough to stitch on the top and then ease over onto the back and catch down with topstitching, I had to top stitch 2 or 3 times to ensure I caught it all the way round. I think I should have trimmed the sole back more accurately before easing the binding over the raw edge.

slippers
slippers finished

Here you see my slippers, made for pennies, finished on time, bags packed and ready to go on holiday.

Rose Hip Syrup

My Beloved having been prickled and scratched, insisted we went home before we found ourselves benighted.

bright flame coloured rose hips

Following my recent successful forays into hedgerow gathering for wine I have been considering what else might be lurking in the undergrowth which I might make use of. Rose hips kept coming to mind and eye. I have noticed as I drive around the country roads that the wild dog roses which can be found flowering abundantly in the hedgerows in spring are currently sporting bright red and orange hips on almost naked stems, waving at me in the autumn sunshine.

red, orange, carnelian, crimson, so many different shades

Whilst the thought of making them into wine appealed, I have a vivid happy memory of rose hip syrup. When I was a very small girl, back in the far distant 1960’s my mother gave my sister and I a teaspoon of rose hip syrup occasionally, probably through the winter to ward off coughs and sneezes. Perhaps she had happy memories of rose hip syrup herself being a child of the war years when rose hip syrup was made from hedgerow pickings and given free to children, because it is an excellent source of Vitamin C,( 20 times as much as oranges) which would have been a scarce resource in war time when citrus fruits were unavailable and leafy vegetables seasonal.


1 kilo of rose Hips
1 kilo of rose Hips


Then a blog I follow, lovely greens did a blog post on making elderberry syrup, (Hmmmm)… decision made, Rose hip syrup it is! I waited a few days of windy and rainy evenings, till we were blessed with a calm clear day, and went off to my usual gathering spot; a cycle path on the Lune estuary near Glasson Dock. We found rose hips in abundance, but the sun was going down. We only managed to pick half of the amount I needed by the time the sun set at the mouth of the estuary. My Beloved having been prickled and scratched, insisted we went home before we found ourselves benighted. As we walked briskly back to the car, on our right towards the west the sky was lit up in shades of coral and gold by the sun, already set, while on our left the darkening sky was lit by a beautiful full moon rising over a copse of beech trees. I had my camera with me but was being rushed back to the car in case it went so dark we got lost!!!

Rose Hip Syrup
Rose Hip Syrup


As we drove away from the car park we were passed by my sister and niece, waving enthusiastically they were arriving for a leisurely stroll in the dusk, a moonlit walk, how lovely, Dearest! Do you think we should send out a search party or might they have found their way home?


So thanks for the idea Lovely Greens http://www.lovelygreens.com, and thanks for the recipe Girl interrupted eating http://girlinterruptedeating.wordpress.com


Rosehip Syrup Recipe
400g of rosehips
1 pint of water
100g of sugar
1. Simmer the rosehips in the water for 15 minutes, mash and return to a simmer for a further 15 minutes
2. Strain through muslin to remove the fruit pulp
3. Stir in the sugar and warm over a gentle heat
4. Pour into sterilised jars