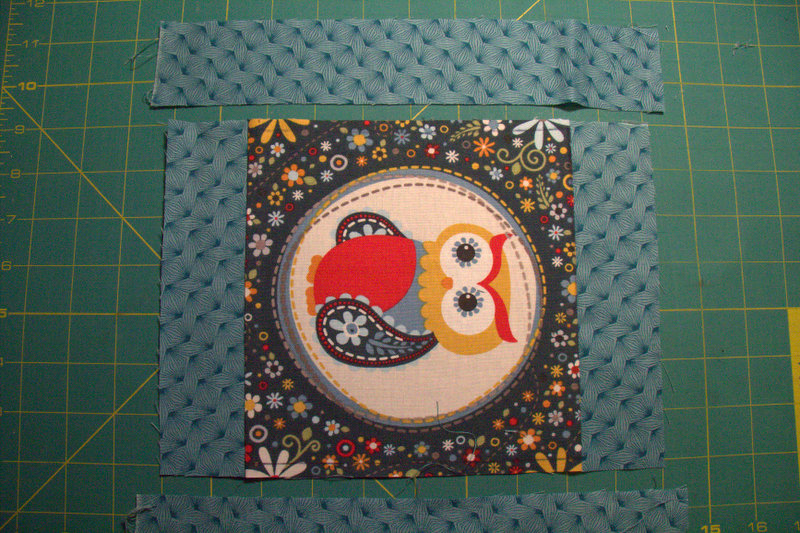
The technique for printing on fabric is really quite simple, cut a piece of freezer paper the same width as a piece of A4 printer paper, then cut a square of fabric and iron it to the freezer paper waxy side up, so the fabric is completely welded to the paper. I created a word document for each line of the poem, and tried to set the line in the centre of the printable area, bearing in mind the fabric is ironed to the top 7 inches of the paper.

Put the paper in the printer, face down and press print.Then Presto, out comes a piece of fabric neatly printed with a line of the poem, just about centrally placed. Peel the fabric from the freezer paper. Trim the piece of fabric down to the desired size making sure the printing remains centred, and press with a really hot iron, to fix the ink onto the surface.
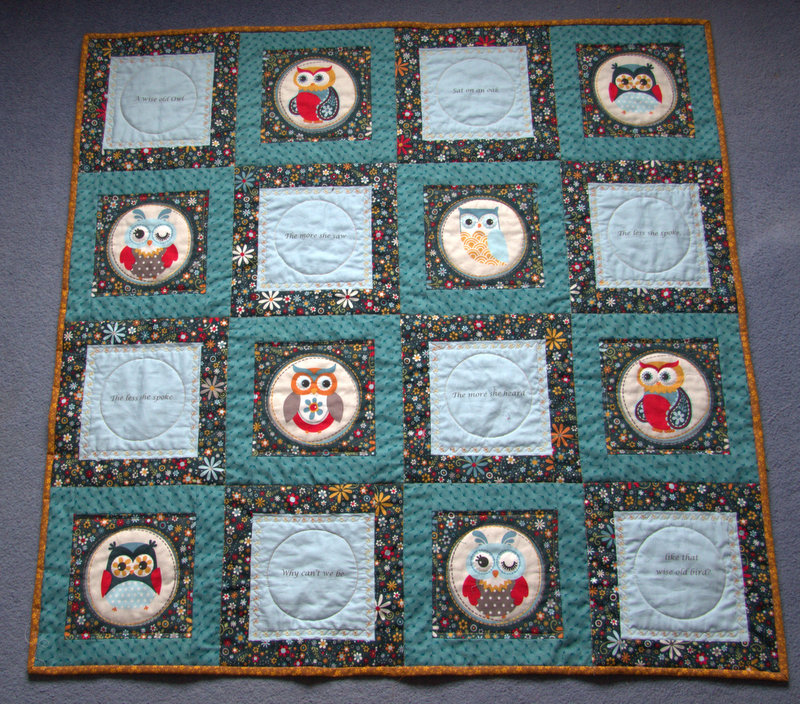
Challenge four, putting it all together. The sashing for the Owls came from my stash and was a perfect match, but I couldn’t find a fabric to sash the blue squares, nothing in my stash of fabrics was working, and I was running out of time. As you can see I tried various yellows, cream and taupe but it just wasn’t floating my boat and it looked too busy.
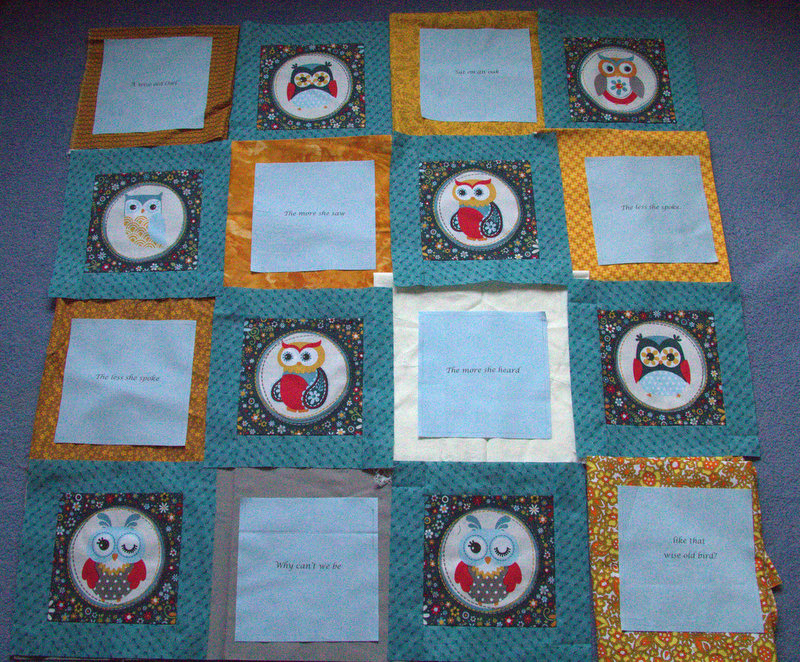
I decided the best option was to source some more fabric from the same range, the Internet was my only hope. I only had half a selvedge as a clue to what the fabric range was called and who made it. Nevertheless it only took me a few clicks of the mouse to trace it from the scrap I had, and find a supplier for the background fabric. I also found another fabric from the same range for the backing. Flashed the plastic, and the fabric arrived two days later, I love the Internet.

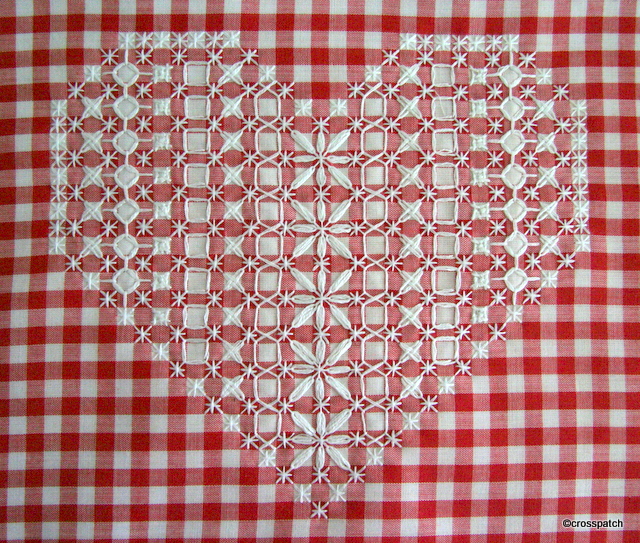
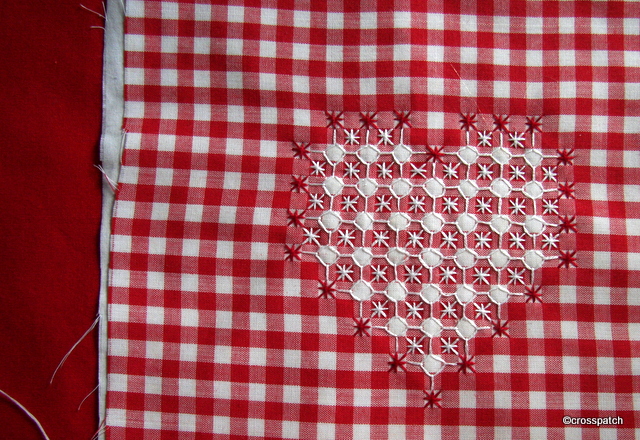
Challenge five, once I had the quilt top put together and the wadding and backing tacked in place I realised that the blue squares lacked something, there was too much plain space around the lettering, my first thought was to create a quilting template of an Owl and quilt the centre of the square but I wasn’t sure how that would work with the lettering. Maybe just a pair of Owl eyes, above the lettering, but that would be too asymmetric. I decided to keep it simple, a circle in the middle to echo the Owl medallions, and some flowers embroidered round the edge to echo the flowers on the background fabric, and to add colour. I used a space dyed thread, but I think a darker yellow or orange might have worked better.

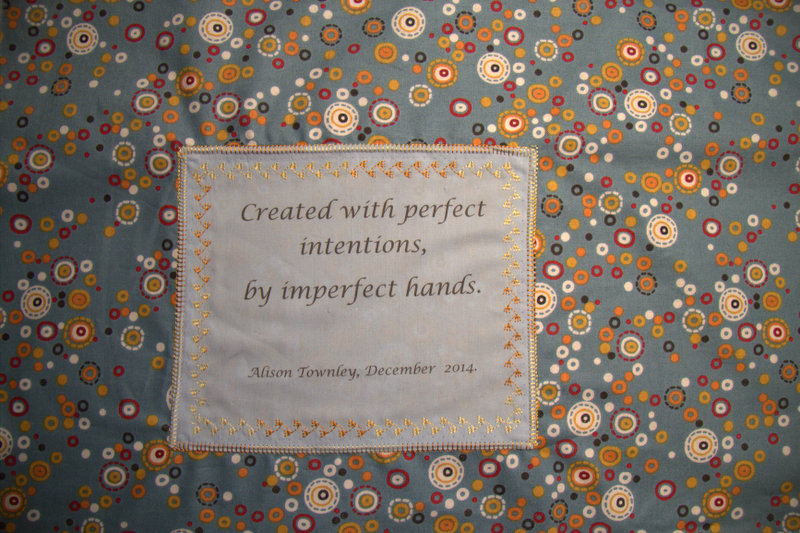
I used one of the rejected yellows I had auditioned earlier for the sashing of the blue squares to bind the edge of the quilt and to add a little contrast. It worked well with the backing fabric too. The label is a little wonky, but it matches the sentiment, made by imperfect hands.
And so, I managed this Christmas to complete a quilt in time to give it to my Dearest Friend, and even better my lovely Sister volunteered to make a detour from her day out with her daughter to a Spa to deliver it in person to my friend. It was the day before Christmas eve. I am so blessed in my Friend, and my Sister. Thank you both for being there for me.