Elderflower Vodka; how to make it

I encouraged some small creatures to depart, the ones who wouldn’t go got squashed.

Elderflower Vodka

I had been planning to make elderflower Vodka for weeks, since I saw the first Elderflower umbels begin to flower. I bought Vodka and waited for a lovely summers day to go out and gather some elderflowers. In came the rain, and the gales, and cold weather, Brrr, not going out in this!

Elderflower Vodka

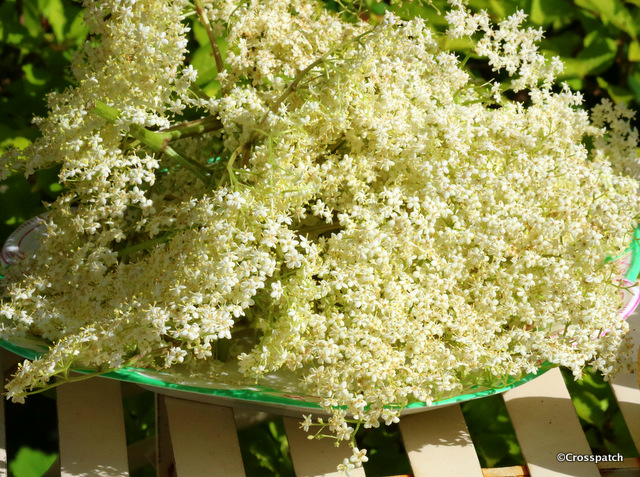
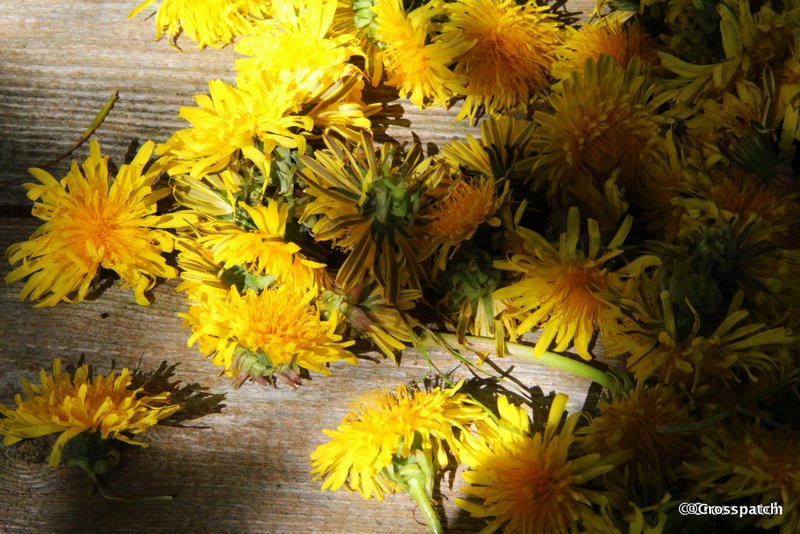
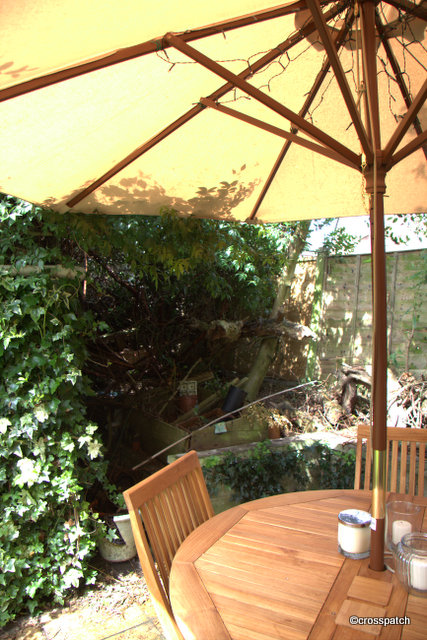
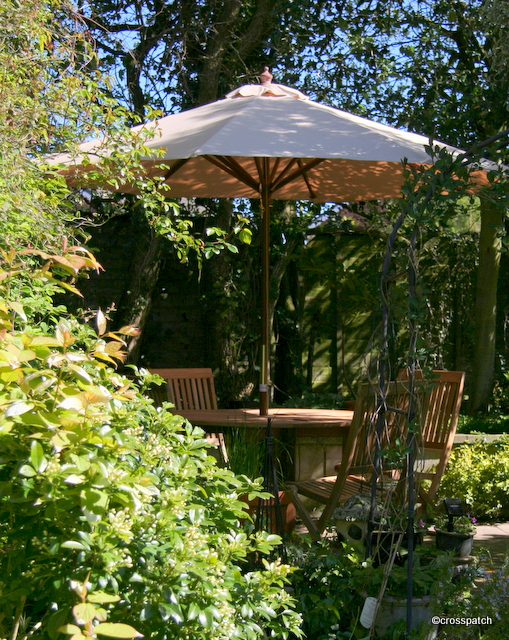
Yesterday I noticed that most of the elderflowers were already finished and decided today would have to be the day, or it was all over for another year, and no elderflower vodka. This morning it was sunny and still, a perfect day, and I only needed to walk a short way from my door to find a small elderflower bush with a shady side which was less advanced than I’d seen out and about yesterday. Ten or so Umbels picked and back to my suntrap back garden.

Elderflower Vodka

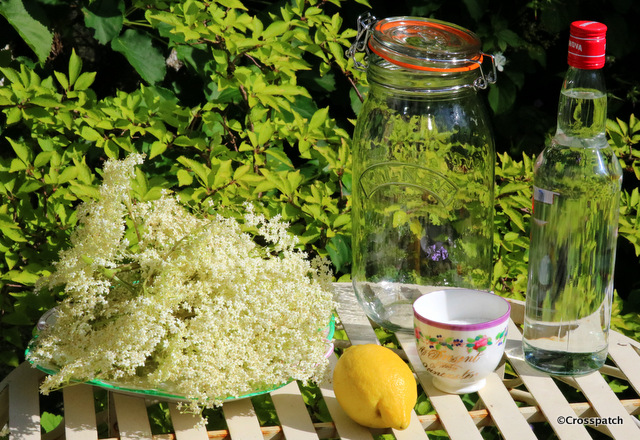
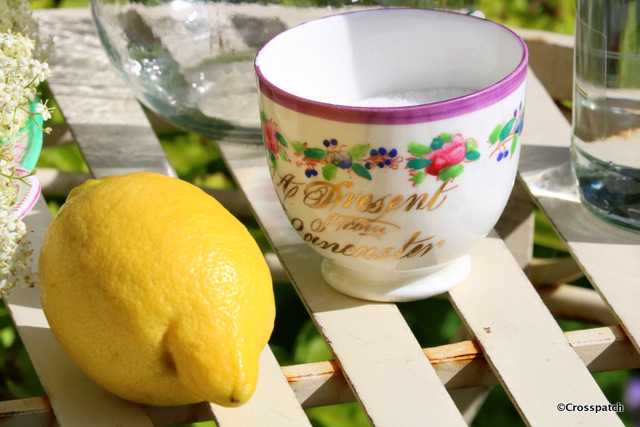
So what else do I need? a Lemon, and a bottle of Vodka, 100g of sugar, and a glass jar.Elderflower Vodka

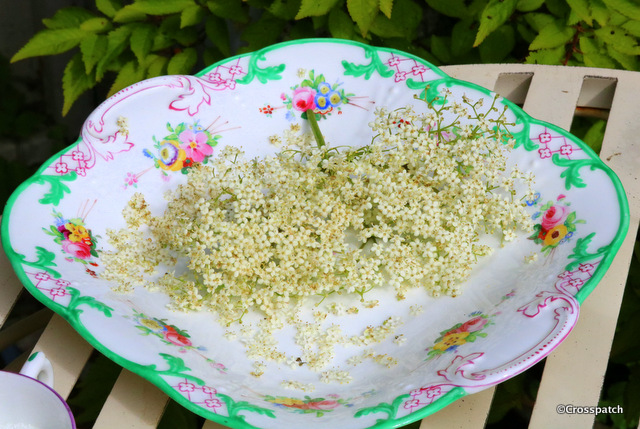
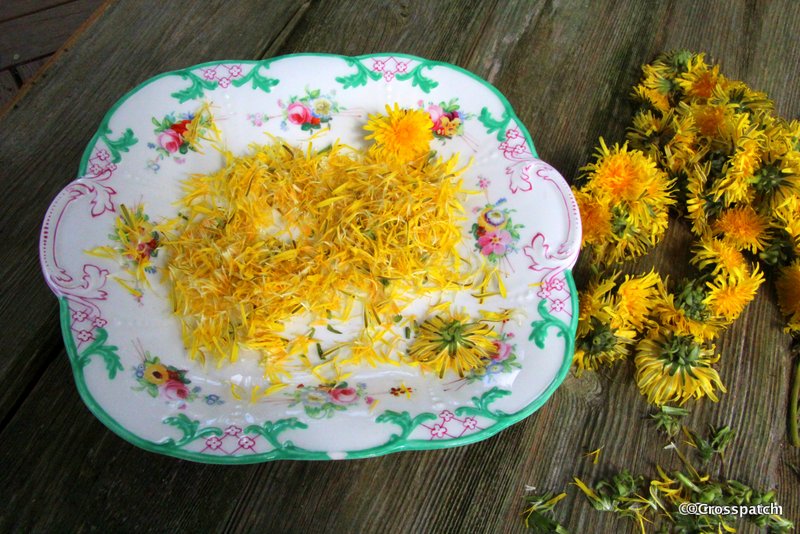
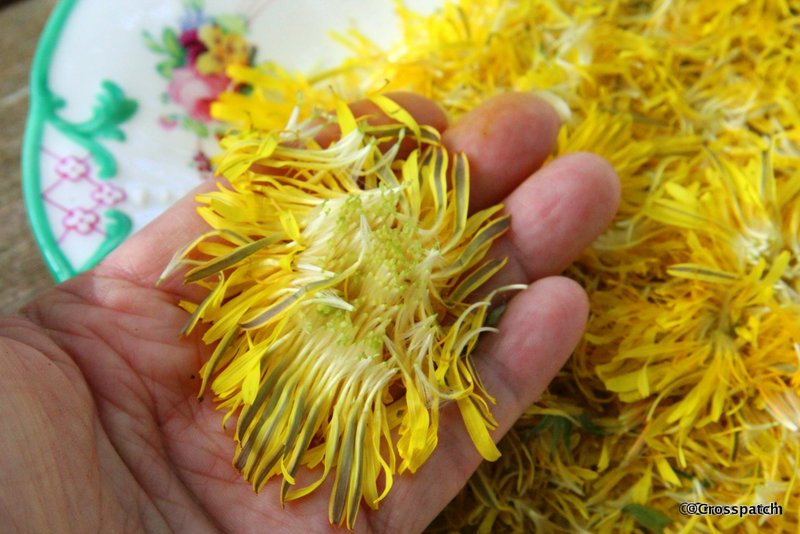
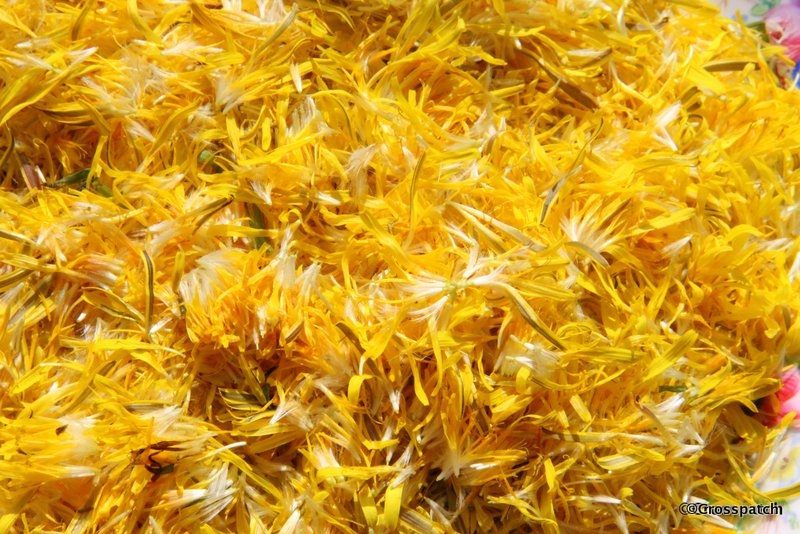
I gently removed the flower heads from the stems, Elderflowers aren’t toxic but the wood and stems are, I don’t think I would poison anyone if I’d left the stems on but you just never know. I de-stem the flowers over a plate so I can check for foreign bodies or small creatures, which can be encouraged away or squashed according to preference. I encouraged some small creatures to depart, the ones who wouldn’t go got squashed.

Elderflower Vodka
Lemon Zest

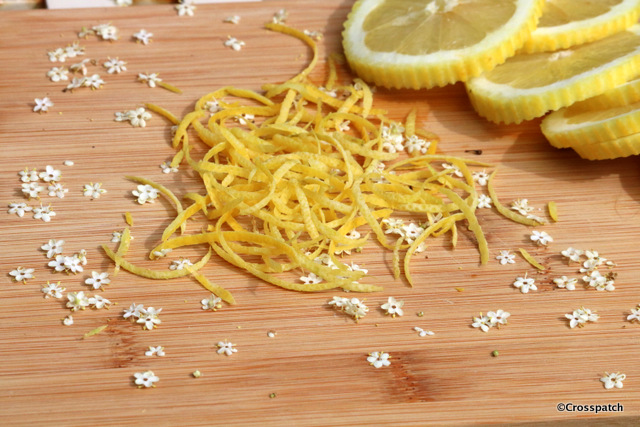
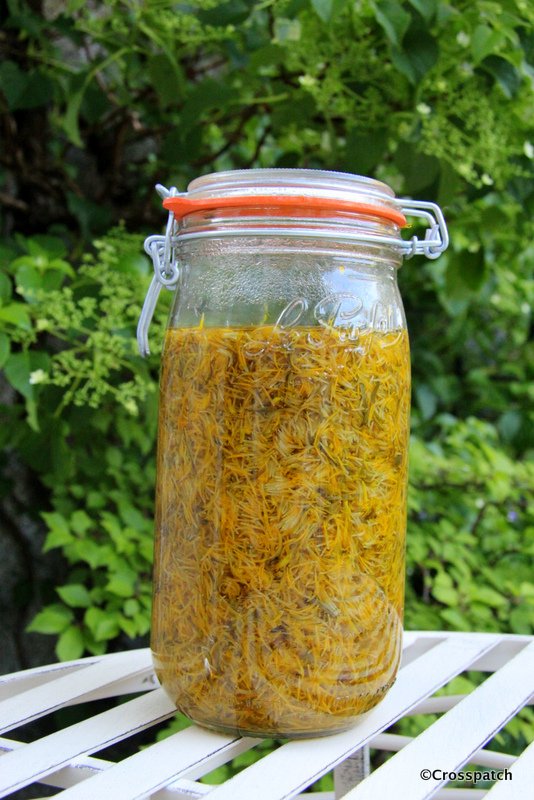
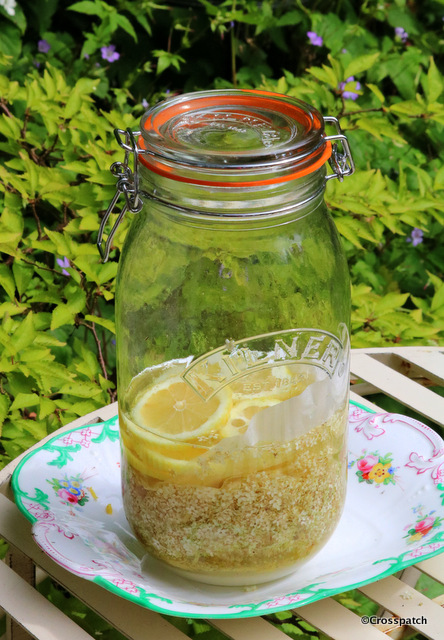
On top of the flowers went the zest of a lemon, and a 100 grams of sugar, and a 75cl bottle of Vodka, (it should have been a Ltr but I only had a 75cl bottle) So only 75 cls of Elderflower vodka this year.

Elderflower vodka
a little sugar

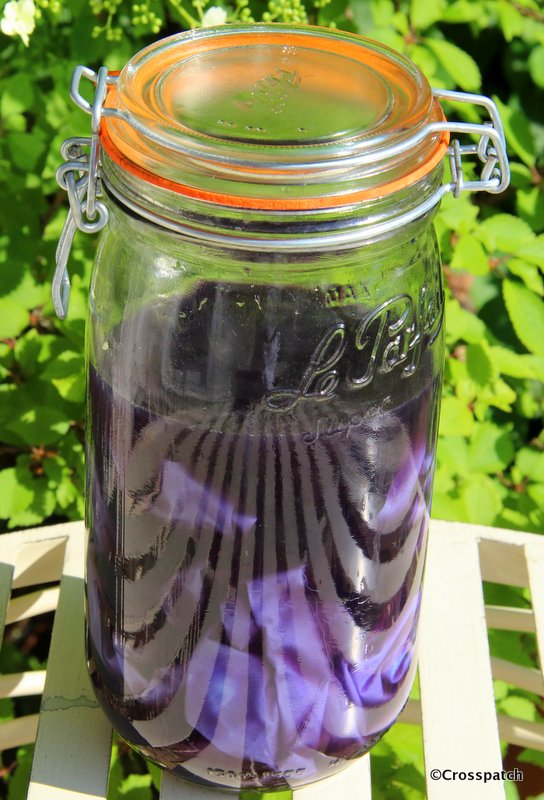
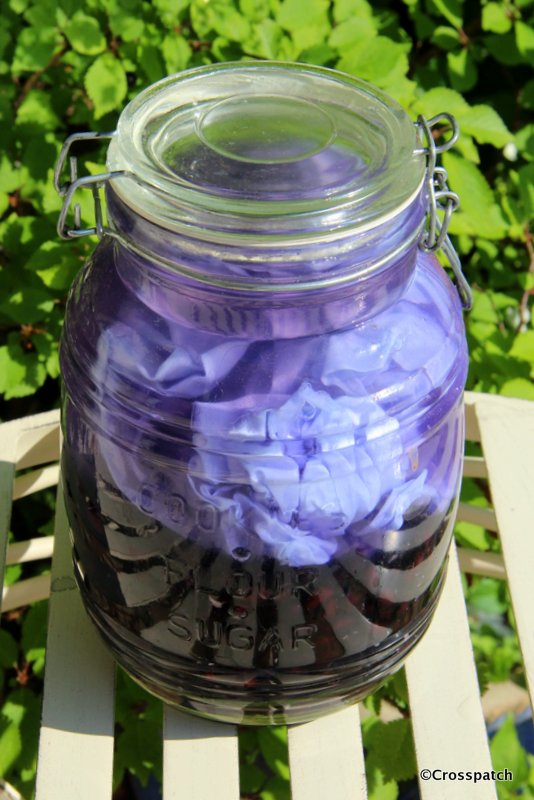
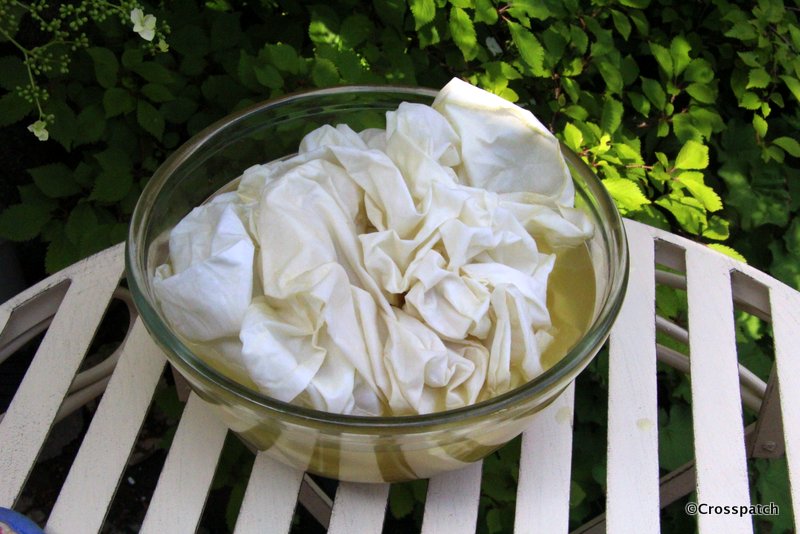
On top of the flowers I put 3 layers of greaseproof paper and the lemon slices, this is to hold the flowers under the vodka to stop them going brown and colouring the vodka.
I found the recipe at wild at heart foods, thanks and credit where it’s due.

note to self… next time cut the paper to fit the jar, 3 or 4 layers slightly offset, each tucked down the side of the jar slightly  will hold the flowers down better. Some of the lemon slices can go under the paper, all of them is too many. I have made elderflower liqueur before, see :- Elderflower liqueur

Natural dyes, experimenting with black beans

This is such an easy process, no heat, no chemicals, and if I hadn’t reused the beans as a dye stuff, I could have cooked and eaten the beans, so no waste either, and the colour is divine. I love it, love it, love it.

Last weekend I began experimenting with natural dyes, and had mixed success. I hoped to try onion skins next because I wanted a bright orange, but haven’t had time to gather together enough onion skins. Nevertheless I’ve got the bit between the teeth now, dying with natural dyes from plant materials is like alchemy.

I love that lavender blue colour I call Eeyore blue. I once saw a picture of some lace which had been dyed using black beans which was just that glorious colour and decided I was going to experiment with it myself. Black beans can be found with the chick peas and kidney beans on supermarket shelves.

natural dyes
black beans soaked in cold water

The black beans were soaked in cold water for 24 hours, they produce a rather gloomy, murky mauve coloured liquid. Not very promising I admit. But then comes the alchemy.

natural dyes
murky mauve

I drained off the soaking liquid from the beans, added a length of fabric which had previously soaked in Alum mordanted water and presto, the magic began… not mauve but a lovely purply blue began to develop.

natural dyes
magic

Just to test how strong the dye stuff was I put the beans back in another jar, topped up with more water and added more fabric. I left both jars soaking for a couple of days. The result was a lovely purply blue fabric, and a paler version with a rather more tie dye effect, caused by the lack of space in the jar for the beans, the liquid and the fabric.

natural dyes
second soaking

This is such an easy process, no heat, no chemicals, and if I hadn’t reused the beans as a dye stuff, I could have cooked and eaten the beans, so no waste either, and the colour is divine. I love it, love it, love it.

natural dyes
lovely lavender blues

natural dyes, dandelion

natural dyes
hedgerow treasure

Lately I’ve been thinking about trying to dye my own fabrics, but I wanted subtle shades, from natural dyes. I was drawn to the idea of solar dying but I was unsure if I wanted to invest time in a method which requires lengthy periods in the sunshine, a commodity not to be relied upon in the North of England, even in a good summer. I imagined a summer of hope followed by an autumn of disappointment as the solar dying technique failed to develop the results I hoped for. Nevertheless I fancied having a go at dyeing from natural materials.

natural dyes
hedgerow pickings

I found a recipe for dyeing using dandelion heads, well they are plentiful enough at this time of year, so on a Sunday morning stroll with my sister I gathered a bag full of dandelion heads from the hedgerows near the local University. That afternoon I picked the petals from their heads and put them in a jar, added boiling water and letting them steep.

natural dyes
petals like saffron stamens

I was really hopeful that I would get a good clear yellow. The strands of bright yellow made me think of saffron and stained my fingers bright yellow, surely this was going to work.

natural dyes
yellow stained fingers

Meanwhile I soaked some plain white cotton chintz (I just happened to have a whole bolt of it which had been hanging around in my studio for years) in warm water with a little Alum added, as a mordant ( to fix the dye).

natural dyes
just petals

The instructions were to strain off the steeping liquid, add the fabric and microwave, in 2 minute bursts.

natural dyes
Steep overnight in water

I did as I was instructed,  2 minutes, stir… 2 minutes, stir… 2 minutes… ad infinitum it seemed, but there was no discernible change in colour, well, what I had is not even the palest lemon yellow, a complete fail in my estimation.

Complete Fail ?
Complete Fail ?

Undeterred I turned to an old favourite amongst natural dyes, Turmeric and white Vinegar. In a pan of boiling water I emptied half a jar of Turmeric, and a good glugg of white vinegar, and dropped on a metre of the same Chintz. The glorious yellow colour is what I had hoped for with only a fraction of the effort I’d already expended on the dandelions to no avail.

natural dyes
turmeric yellow

So what to do with the very disappointing length of dandelion yellow? I threw it down on the lawn, and while still hot and wet I sprinkled over it the rest of the jar of turmeric in the hope of achieving a two tone and speckled effect. My plan was to leave it out all night, hoping it wouldn’t rain, but not too concerned if it did, to see what the outcome would be.

natural dyes
turmeric speckling

I was quite pleased with the result, a subtle speckling of yellow on a pale lemony background. Next stop-Orange, onion skins are the best natural option, only one slight problem, my Dearest hates onions, so we never buy them. Anyone spare their onion skins please?

Waiting for inspiration to arrive, making cushions

I don’t remember learning that trick or how to thread a needle or set a knot in thread with a twist and flick of finger and thumb, but I can.

I have to admit I still have not completed a project I began months ago, making cushions for my garden furniture.

easy cut to fit
easy cut to fit

Partly lack of time, partly lack of inspiration, the cushion I made for the bench looked a little plain, amateurish, I’m still not sure whether to button it to pull the fabric tight,give it more character and a more professional look or just leave well alone. If I do button it I will have to button the chair cushions too.

Bench cushion: easy envelope closure

I wanted to be able to fasten them in place with ties. Initially I was going to use the spare fabric to make ties but was worried the fabric was too thick, and would not be effective, I decided to use tape. Turquoise tape was my first thought but impossible to find, so I bought cream, on a market stall in Clitheroe, from a little girl helping out her Mother, or perhaps her grandmother during the school holidays. She didn’t understand measurement in yards, so I had to translate for her, and she didn’t know how to wind up the 6 yards of tape to put it in a bag. She began to wind it round her hand but then it got so tight she could not get it off and had to begin again. The stall holder and I both laughed at her struggles, and her nonplussed little face. I watched the stall holder show her how to wind the tape round her splayed fingers, and then close her fingers to simply slip the tape bundle off her hand and into the bag. It set me thinking about how many skills we have that we don’t even recognise as skills, which we do without thinking about and have no memory of ever learning. I don’t remember learning that trick or how to thread a needle or set a knot in thread with a twist and flick of finger and thumb, but I can.

cream tape for ties
cream tape for ties

I wanted the cushion covers to fit well and the cushions to look plump, To get a tight fit of the cover I decided rather than make the cover tight and then struggle to get the cushion in, I would make it loose, and then finish it with an “Oxford“ edge , two rows of top stitching round the edge, making the cushions appear wider, allowing for the slight raised edge of the chairs; while at the same time giving a neat tight fit and a plump appearance.

This cushion cover won’t come off to be washed, but I think I can put each in the washing machine as needed.
The fabric was cut on the generous side to allow about an inch of fabric all around. A narrow seam sewn on two sides with the tape caught in the seam close to the back on both sides, facing in, so that it is on the outside when complete. To close the back seam I tucked the raw edges in and tacked the opening closed, having put in the cushion pad. The top stitching would close the back opening. I tacked around the edge pulling the edges out and positioning the cushion pad at the same time so I had the same amount of spare fabric all round.

finished with an Oxford edge

Now comes the difficult part, using a zipper foot, because I would have a lot of bulk on one side, I stitched around once; at this point the cushion cover still wasn’t tight. Going round again a quarter inch closer required a lot of effort, the cushion pad had to be pressed flat with my fingers to allow the presser foot to run over the fabric so close to the pad, and my stitching is a bit wobbly, but the finished article looks OK. One down, three to go, making cushions is easy. I might have them done before the clocks go back at the end of British Summer Time.

Looks Dapper
Looks Dapper

I’m in love with an idea, I want a shed

I want a little summerhouse with roses round the door, a place I can sit and sew with the doors and windows open, garden smelling wonderfully, birds making their evening chorus, hedgepigs snuffling about in the undergrowth.

An idea has been bubbling away at the back of my mind, I want a shed. I’m loath to admit it, but I have shed envy.
Having seen many magazine articles and even TV programmes about people who have their own little outside space, garden room, beach hut, pavilion, Hobbit hole, garden shed, I have developed a yen for my own little space, another room to furnish and decorate without the need to move or build an extension. A space I can furnish on a shoestring, from charity shops and boot fairs, and use to sit in when I want to be outside but it’s not quite warm enough. That’s most evenings in a typical British summer.

this is what I want
this is what I want

I want a little summerhouse with roses round the door, a place I can sit and sew with the doors and windows open, garden smelling wonderfully, birds making their evening chorus, hedgepigs snuffling about in the undergrowth.
My only difficulty was where on earth to put it, my garden is lovely, but very small, any kind of wooden building would be intrusively large and would take up space where currently plants are flourishing. And why would I want to replace flowers with walls?

dirty little secret
dirty little secret

But I also have a dirty little secret, an overgrown patch behind the garage, where I have foolishly planted a rampant rambling rose which has grown way beyond its allotted space. I had intended it to grow through an old Elder tree in the corner of my plot, but one winter maybe 8 years ago the old tree fell, and the rose just kept on growing… and growing, it has grown into a tree in my neighbours garden, it has encroached upon two trees in my garden and it overhangs the garden of the folks on the other side of the fence. In fact last summer I spied them lift up the fence panel, climb into my garden and cut a whole bough from the rose, the cheek of it! I didn’t object, they took away the remains and disposed of it, and they would have been within their rights to throw the dead branch back over the fence. The rose has grown so high over the garage roof it must stand a metre higher than the roof line, and shades my garden. Despite romantic reminiscence of the Sleeping Beauty fairy tale; sadly it has to go.

Dead wood that needs to go

Despite the fact that it smells divinely in the spring, I have to cut it down. I’ve made a start but it’s a lot of work. When it has gone, and the fallen tree cleared, and a Holly tree too, I think I will be able to make a space big enough to accommodate my little garden shed. Of course I will be referring to it by some fancy name like “the garden room” but we all know in reality it will be a shed.

The old dead Elder tree

I’ve already been shopping for my shed, I think I know what I want, but I can consider it all winter while I get the site cleared, no rush, plenty to think about, …ship lap…log lap, tantalized or not… should it be painted…do I need to run electricity… what type of furniture, will it be insulated so I can use it in winter…how to heat it, safely. Curtains…rugs…comfy chair………bed? ( well that’s another story entirely)
I want a shed, my sewing room shed, my peaceful place.

lets hope this isn't the reality
lets hope this isn’t the reality

Another successful raid; charity shop bargains

I didn’t buy them to use but rather to asset strip.

Today was my regular trip to the hairdressers, for a cut and colour, as I was leaving we were all singing the praises of my favourite charity shop Wolfwood, which is just next door. I happened to mention that I am always on the lookout for nice glassware, when my Stylist remembered having seen some nice ones in there the day before. We went in together and found them, 4 lovely crystal wine glasses; £3. Not £3 each you understand £3 for all 4 of them, needless to say they came home with me.

4 crystal glasses
4 crystal glasses

Before I left I spotted two cushions, each in plain linen type fabric embellished with real shell buttons. two cushionsI snapped them up for £2 each. Now they are rather bland and beige for my taste but I didn’t buy them to use but rather to asset strip. Whilst walking home with my treasure I took a closer look, both cushions were sold by NEXT, and one still had its swing tag on, attached to the zip and tucked inside; whoever donated them paid £12 for that one. From the two cushions I have retrieved 1 cream zip, two cushion pads, 48 x 2.5cm natural shell buttons, which are quite thick and heavy , and 169 natural shell shirt buttons, plus two pieces of fabric suitable for backings once I’ve washed them. One is quite coarse, polyester /linen mix, the other a finer cotton/ linen mix.

169 shirt buttons
169 shirt buttons

Had I gone out to buy these materials the zip alone would have cost £4, the buttons I guess at least 5p each for the little ones and maybe 25-30p each for the bigger ones, say £30 worth of materials for £4.

can you believe it £2?

I don’t feel bad about taking them apart because they were badly designed, the buttons being shell are heavy and the fabric they were sewn to is too flimsy, so the whole cushion front sagged, the buttons dragging the fabric down, which is probably why they came to be in the charity shop, almost unused. I have plans for all the materials, of which later, possibly much later.

can't believe my luck
can’t believe my luck

Having had good luck so far, I decided to check out the charity shops in town, and scored a pair of unworn Boden ¾ length pants in a pistachio green, the swing tag and spare buttons still attached, for £6, and a scarf which feels like silk but probably isn’t from River island for 99p. All in all not a bad haul, for £14. I love a good charity shop, bargains like hidden treasure, waiting to be discovered, if only you have the patience to search.

Paradise is a garden

I have to say there is something wonderful about sitting in our garden in the summer rain.

Our Garden furniture has been looking rather tatty for a couple of years now so we decided to treat ourselves to new ones; a table, chairs and a parasol to afford shade or shelter according to the weather. Getting rid of the old ones presented a greater challenge than expected, we couldn’t get the table down the side path; too wide, and it wouldn’t go through the house either, same reason. The bolts too rusted to easily take apart we came up with a canny solution… wait till the neighbours went out, then passed the table over the fence, past the too narrow place, and back over the fence…shhhh, don’t tell. The new ones all fold up for easy storage, so we won’t have that problem again.

paradise in my own back yard

I’m not sure what we planned to buy when we began looking but we did shop around before we bought, did we want rattan… no, too likely to get dirty given the secluded position under trees, did we want glass and steel…Nope, too fancy and likely to rust in our damp climate. Wood then…hmm, maybe, maybe not, which wood? What about mosaic topped and painted metal? We finally decided on wood, but teak, not a cheaper alternative and something which could be easily stored indoors for the winter to extend its potential life. My Dearest insisted on an HUGE parasol, so that he can sit in the garden even when it’s raining and not get wet. I have to say there is something wonderful about sitting in our garden in the summer rain, paradise is a garden.

chair before teak oil

Being teak, I decided to give the furniture a coat of teak oil to help preserve it, my Dearest having determined to have nothing whatever to do with any noxious substances, said that was my job…as ever.
Next task making cushions to go on the furniture, we could have bought the cushions sold with the furniture, and I did like them very much, but I could not justify the expense, four small chair cushions and a bench cushion would have cost as much as 2 chairs! How much!!!

and after
and after

So off to town on Saturday for some upholstery foam, and to a local factory shop for suitable striped fabric, now all I need to do it cut the foam to fit, and cover with my chosen fabric.

yet another job for me

With what’s left of the fabric I may make some more bunting or some softer scatter cushions. All told I think I will have saved £40 or more, if I don’t cost in my time, but then I didn’t have anything else to spend my time on now did I?

easy cut to fit
easy cut to fit

One thing I did find time for, down at the bottom of my street runs a little stream, and on the bank the City Council has planted the most beautiful cherry tree which is in full bloom, so on Saturday when the sun shone all day in a clear blue sky, I took the time to walk down to the stream with my camera.

white cherry blossom

finished the embroidery… now what

I didn’t want to use the wrong red for the borders, it would niggle me, forever.

1-IMG_6189

So now I have finished the embroidery on this piece, I need to decide what to use it for, I have two embroideries each a different size. I think I want to make one cushion from the two pieces, so I need to size them up. Putting wider borders on the smaller piece and a narrower border on the larger piece, but a definite border on each.
I already had a piece of plain red, but it was a little too dark, not a good crimson like the gingham; having put so much effort onto the embroidery I didn’t want to use the wrong red for the borders, it would niggle me, forever.
So off we went to my local fabric shop hoping but not expecting to find a good match… I was in luck, not only did I find a fine crimson 100% cotton fabric which was an excellent match, I also found a bolt of 100% cotton blue and white gingham £2.99 a metre in the sale, I bought the lot, £15 for 5m of fabric, bargain!

see the border fabric to the left

That morning we had planned to go to the Lake District, on a recce to find suitable holiday accommodation , but we opened the curtains to sunshine and hailstones…big icy chips of frozen rain, so the trip was off. To cheer myself up and remind myself that spring really is just around the corner I took my camera out to the garden, to find a few spring flowers.

cherry blossom
cherry blossom

spring is going to be earlier this year than it was last, I hope.

Primroses
Primroses

Pass me the BIG glasses

I’m not sure what it says about him, or me for that matter

So yes he did make me some labels for my lovely luscious wine , I’m not sure what it says about him, or me for that matter,(I did not model for the label that I can assure you) but it’s bottled, and “cellared”. I may give it a try at Christmas, or perhaps I should leave it till after Lent, as I will be abstaining again in Lent next year.

put away till Easter, maybe

Harvest time

Having developed a yen for hedgerow harvesting; making good things out of my wild gatherings, I have begun another wine brew.

Having developed a yen for hedgerow harvesting; making good things out of my wild gatherings, I have begun another wine brew. A chance conversation with an expert brewer of wine set me off on a mission to brew a perfect red wine. Elderberry, blackberry and something else, a secret other berry, not strictly in season but easily available frozen, in various proportions to give perfume and body and tannins, will it be awful or perfect? It’s nearly ready to bottle now but it won’t be ready to drink till Easter, or maybe I’ll store it till next Christmas.

Picked in my garden, if only there was enough.

The first thing to gather were the elderberries, back to the spot where we picked the flowers in early summer, someone had been there before us so we struggled a little to find them plentiful and ripe, and equally not wanting to strip the trees bare we spent a little longer picking a few here and a few there. Washed and picked from the stems, they were frozen, with the intention that the freezing process would help break down the cell structure of the berries to release juice, colour and tannins.

Beautiful juicy Blackberries

Next were the blackberries, these took two days to pick, we went out to pick and were rained off, being a hardy Northern girl a little rain does not bother me, this was torrential rain, coming down like stair rods, the kind of rain which batters your head, runs through your hair and down your neck; even I admitted defeat.

straining the brewing liquid off the fruit.

The next day was bright and breezy, a perfect picking day, we still got scratched and nettled, but the berries were beautifully ripe and juicy.
The berries were briefly boiled to break down and sterilise, then soaked in a bucket with water overnight before the wine yeast, and nutrient were added and mashed for several days. Then the liquid was strained off the berries, the grape concentrate was added, and put in a demijohn to brew. The liquid fermented vigorously for a week but slowed to a gentle tick, and will be racked off the lees this weekend, cleared and bottled.

Another satisfactory brew

Perhaps my Dearest will make me a label for my bottles if I ask him nicely.