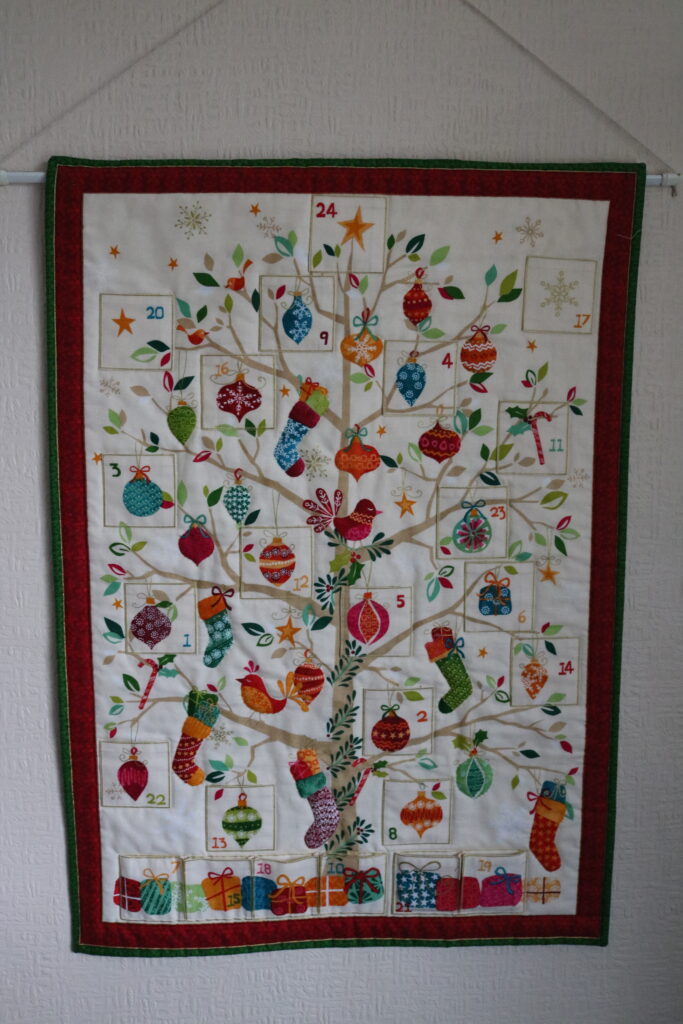
Advent Calendar

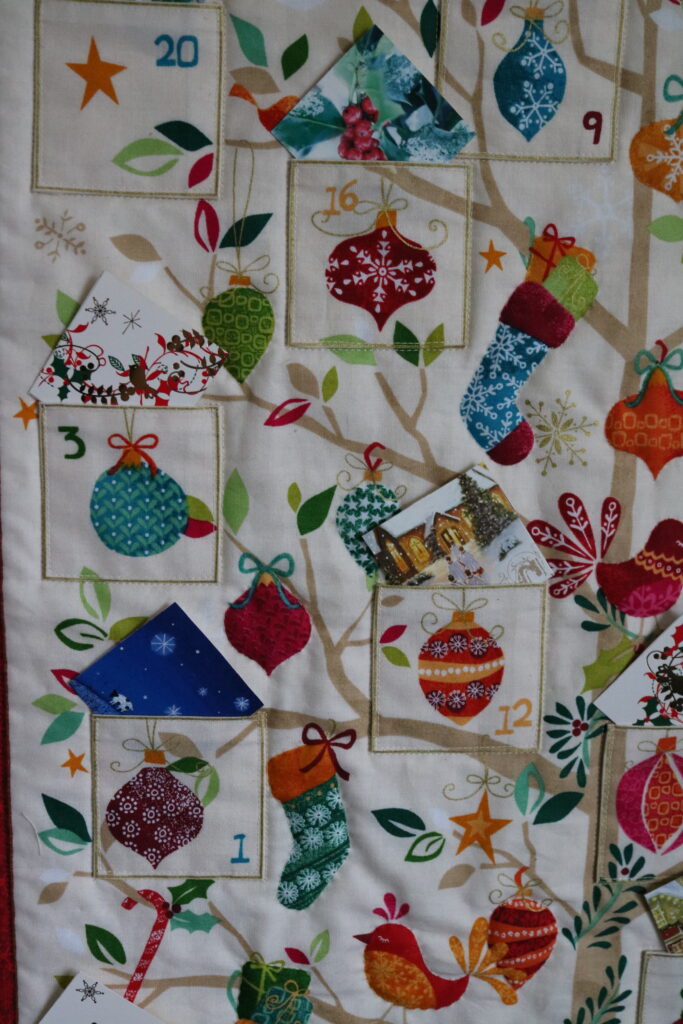
Traditionally, (I’m talking about my childhood in the 1960’s), Advent Calendars were a just paper, or card, the little windows had no chocolate or treats behind them, only a little picture and I remember the excitement of seeing what might be behind the little door each day.

I finished this in January of this year; I’d found the Advent Calendar panel, bought years ago, in amongst some Christmas fabrics when I was looking for something else.  I decided that although I’d not get it done for Christmas, Advent was almost half way through, I’d start and plan to finish it, a stitch in time, so that I could hang it for Advent 2021.

It’s just a panel, which has the printed background and a strip of pockets, which are to be cut out and applied to the same image on the background fabric.

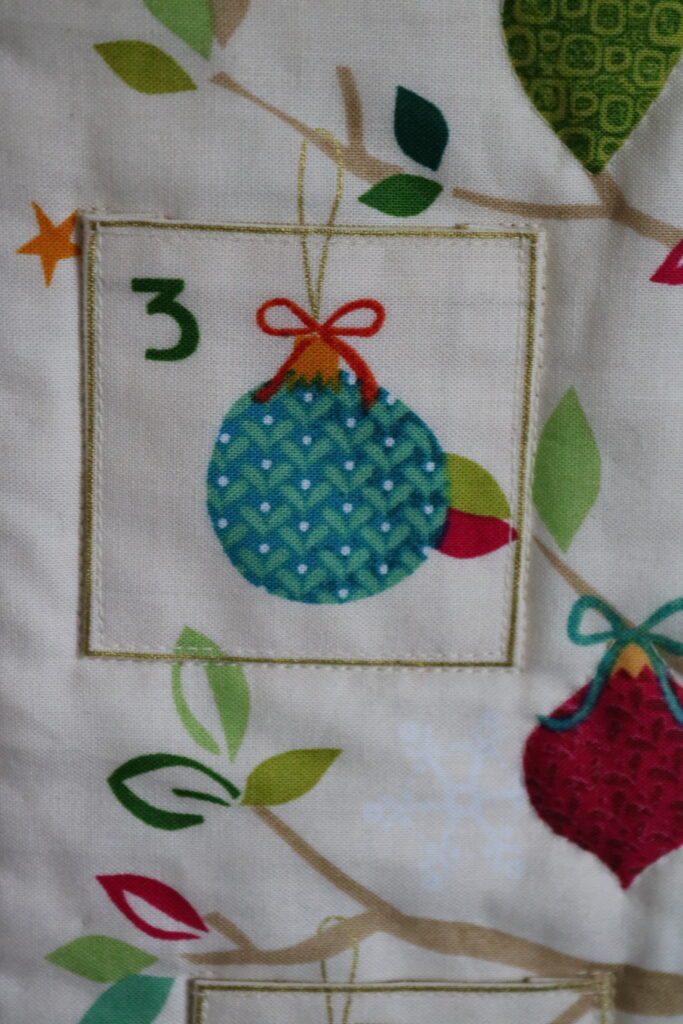
 Each pocket was cut, the raw edges turned and I tacked the edge down so that I could see the slim gold line at the edge. The plan was to topstitch the pockets onto the backing with a gold thread, but I didn’t like the effect, so I unpicked the ones I’d done and topstitched in a matching thread. 

 I also considered topstitching in various thread colours to match the colour of the pocket numbers, but that was beginning to look messy, that didn’t work either.

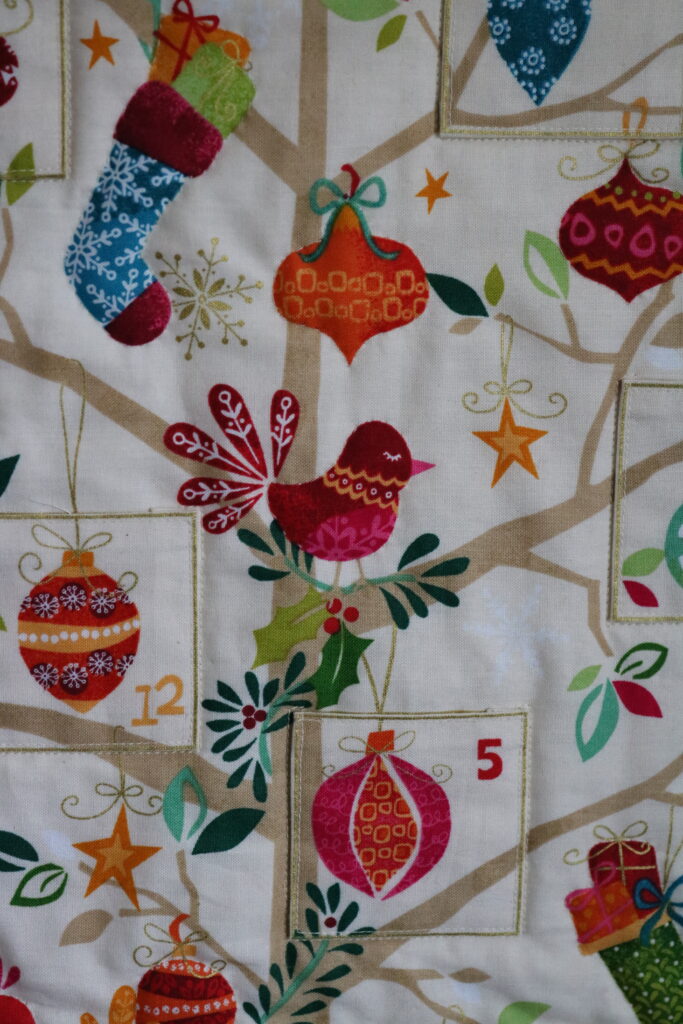
Once the pockets were sewn on, there needed to be more quilting to reduce the puffiness where the pocket were not placed.  I just picked out motifs in the same matching cream thread. Mostly these were hand stitched, because they were fiddly and in some cases too near the pockets for the machine foot to sew without pushing and pulling the fabric.

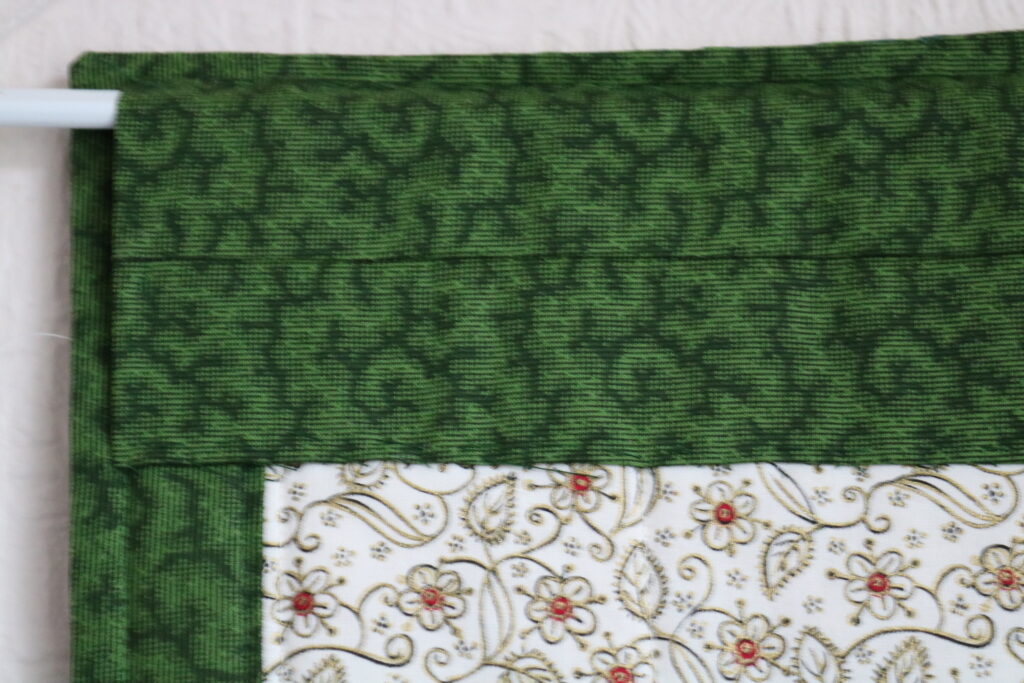
 I was determined not to buy any more fabric for this Advent Calendar project.  Seriously I have enough fabric to sink a ship. So I found a piece of ivory fabric with a gold and black motif in the Christmas box, which was not quite wide enough, and added green borders to make it fit the back. 

 The reason I chose green, (I’d rather have used red) was so that the edge at the front would match the edge on the back and any wobbliness or misalignment would be less apparent.  It worked and I’m happy with it. There was also enough of the green to make a hanging sleeve.

So the Advent Calendar was finished… well almost.  Traditionally, (I’m talking about my childhood in the 1960’s), Advent Calendars were a just paper, or card, the little windows had no chocolate or treats behind them, only a little picture and I remember the excitement of seeing what might be behind the little door each day.

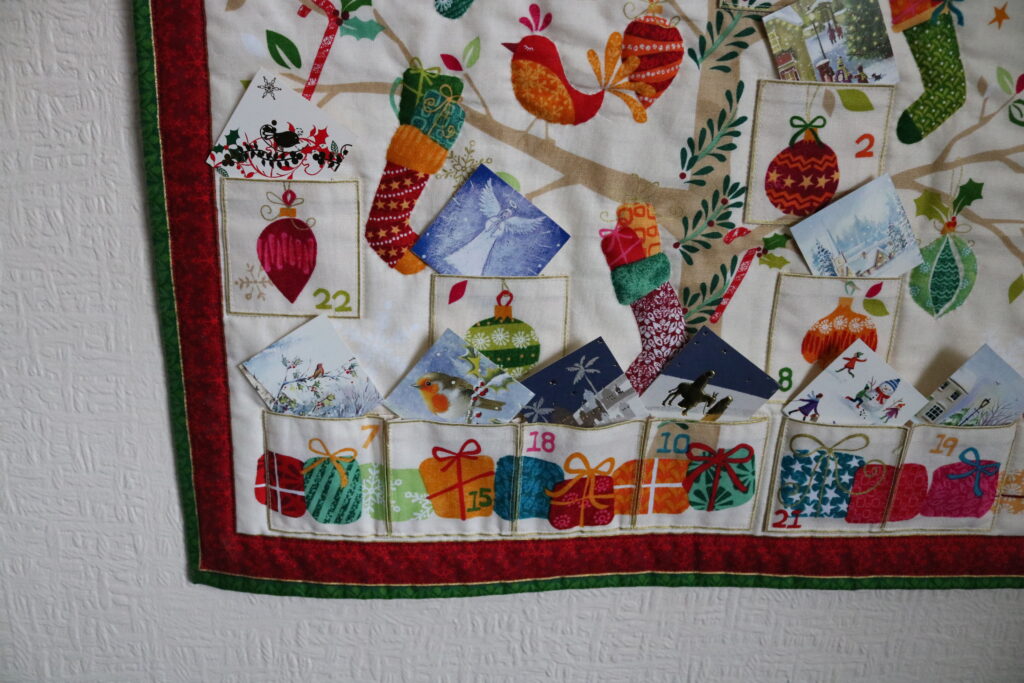
 I didn’t want to just drop a sweet or wrapped chocolate in each pocket, I don’t need the calories anyway, and I couldn’t guarantee to have the self -discipline not to go chocolate rustling late at night, nor trust the beloved not to do so either. So what to put in the pockets?

As I took down my Christmas cards at Epiphany I began thinking about those little pictures behind the doors on my childhood Advent Calendars.  Would an image on its own be enough?  I cut a number of cardboard squares, small enough to fit into the pockets, each with a Christmassy image, Robins seem to be well represented, but then I like Robins.

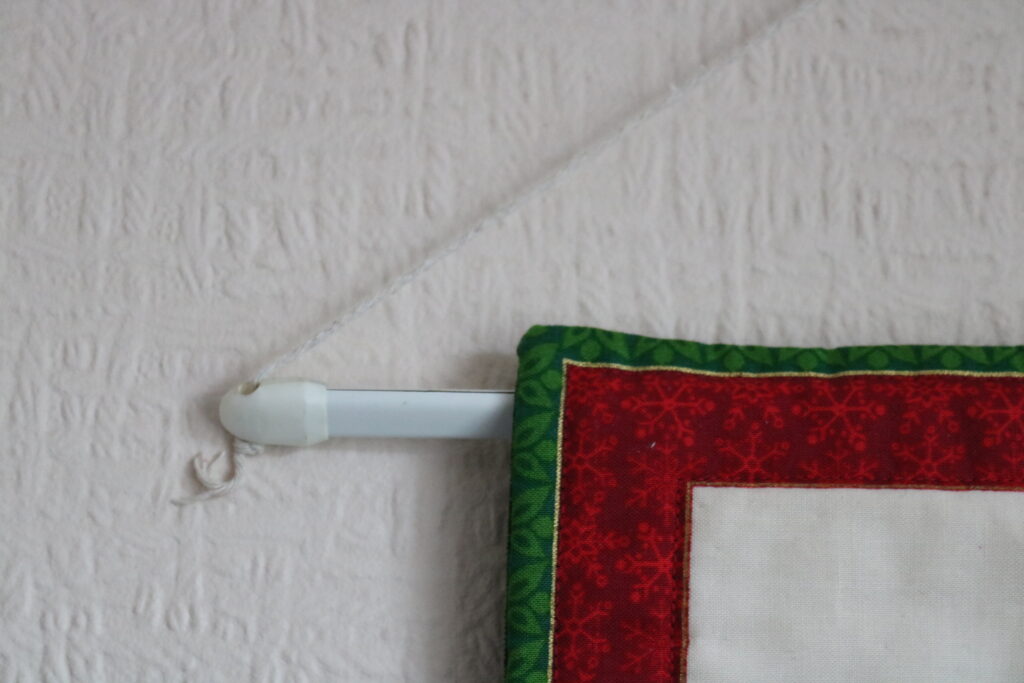
That’s where I left it, the Advent Calendar with a temporary hanging cane and a string to hang it by and the pockets full of little squares of Christmas card.

Last month I rooted out the Advent Calendar from its resting place and began thinking about how it should be finished.  I wanted a wellbeing theme, something positive to think about each day, something maybe to do for my wellbeing.  My Niece has an Advent Calendar, which she made from downloaded materials from Calm Moment you can find it here, (https://www.calmmoment.com/mindfulness/mindful-christmas-advent-calendar/ )

 I printed the 24 wellbeing suggestions from the Calm Moment Advent Calendar cut them approximately square and folded each one diagonally twice, tucking it into the pockets on the Advent Calendar. I also searched Pinterest for Christmassy quotes, printed those very small and glued one to each of my little squares of Christmas card.

 Through Advent I will have a Christmas affirming quote and a wellbeing suggestion for every day and not a calorie in sight.

The only thing is… The hanging arrangements still don’t work for me, I need a metre or so of gold cord, and a stick  (with knobs on,) that I can paint gold., and tie the gold cord to. Inevitably even with my best efforts, it wasn’t ready in time for Advent. Shoot me! I’m still working full time and looking after my old Ma, and we have to keep a sense of proportion.  I’ll go into town on Saturday and buy gold cord, the stick I have, knobs are on order, (wooden beads actually) and all will be complete before Advent is over, honestly!  

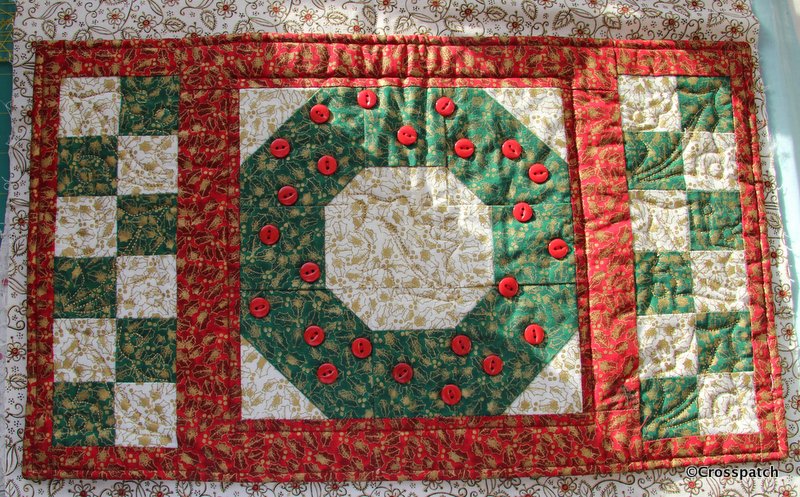
Christmas Wreath placemat to complete.

I copied the quilt pattern from a hand bill advert I found, it was a tiny but simple holly leaf with berries, which I had to scale up and transfer to cardboard, machine stitched with gold thread for a little Christmas sparkle.

Christmas wreath
finished article

Here’s another thing I found when searching through my Christmas fabric box, a placemat I made years ago, and the makings of another one. Which is great because I can show you how I made it without having to make another! If only I can remember how it went together.
Christmas wreath
start with snowball block

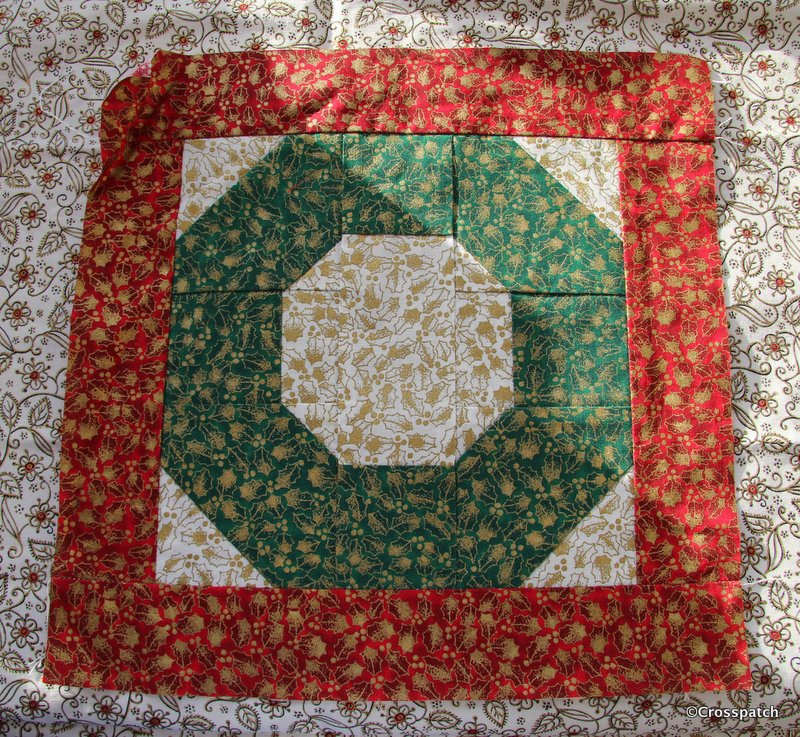
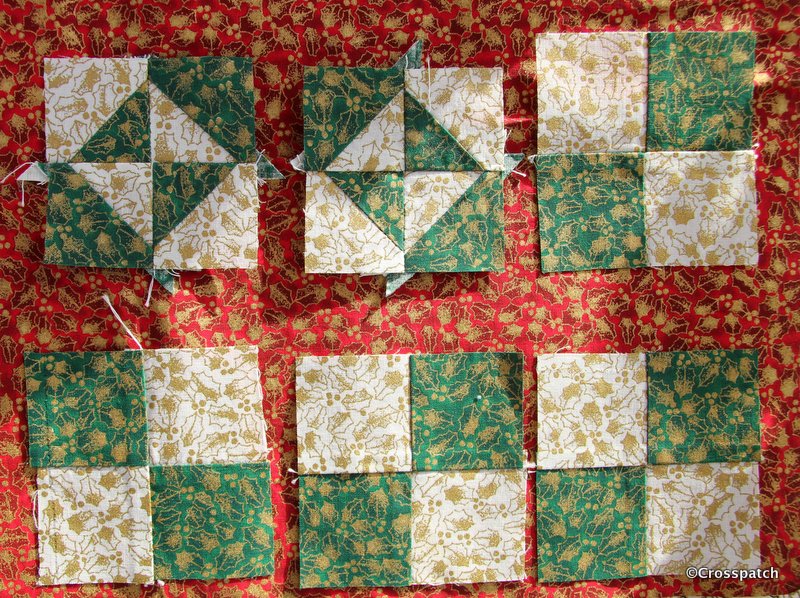
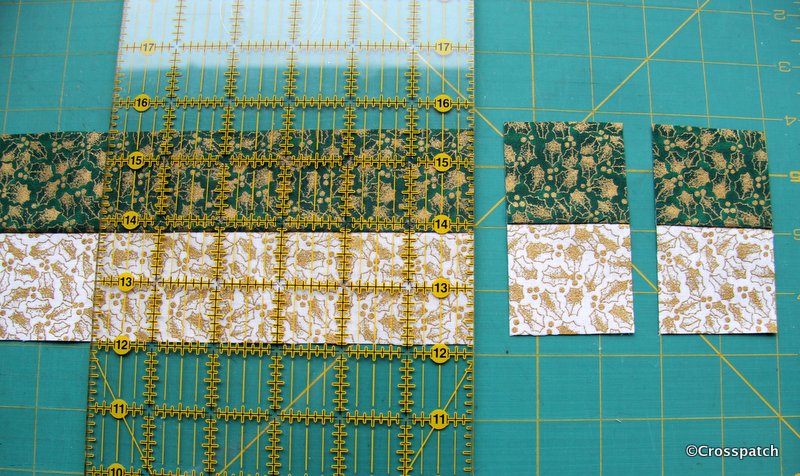
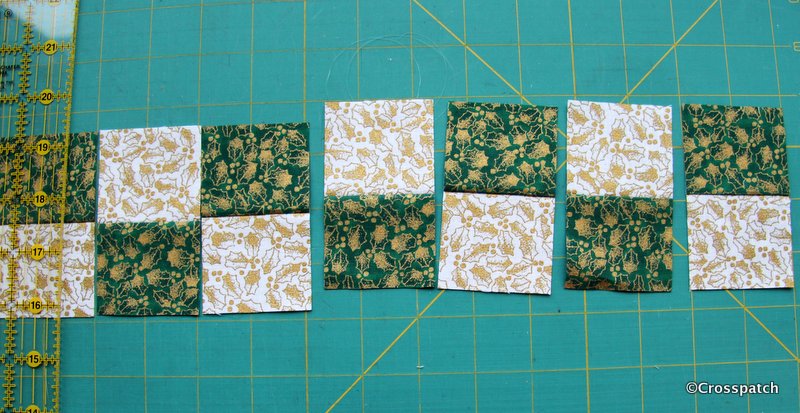
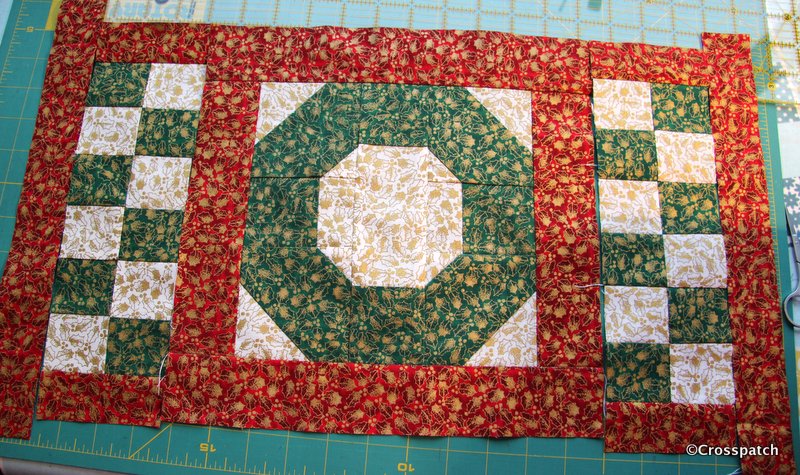
The centre block, the Christmas wreath, is a “kind of” nine patch, made up of a centre strip 2 green squares 2.5 inches and a white rectangle 2.5″ by 3.5″. the corner squares are 3.5″. The red border is 2 inches, can’t think why. The chequerboard border is made up of 2.5 inch squares too.

Christmas wreath
just little squares

The little square in square blocks I think must have been made up of the bits left over when I made the corner blocks.

christmas wreath
corner block

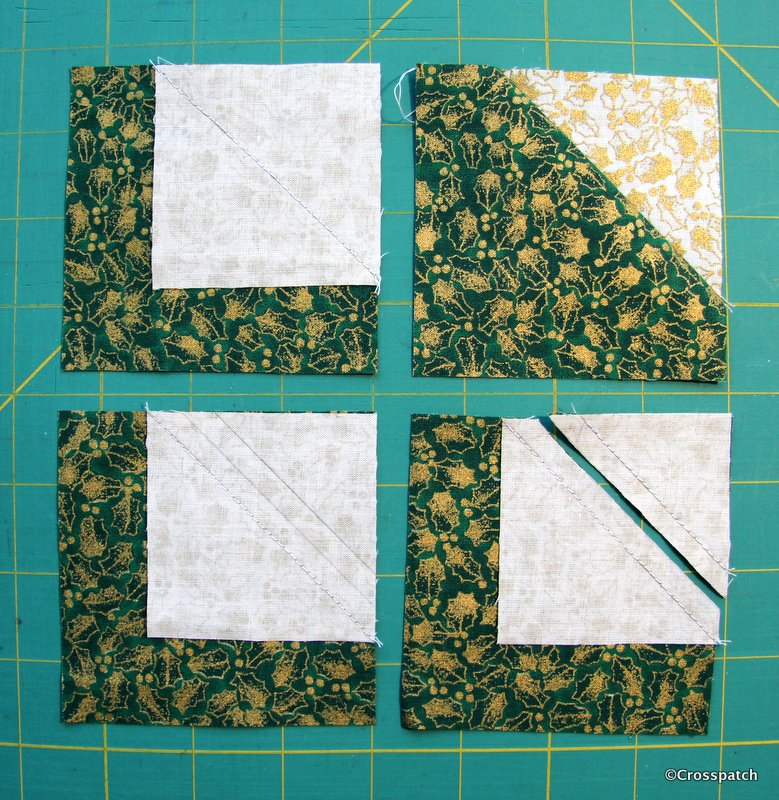
I used the stitch and flip method, place a small square on the larger square at the corner, stitch diagonally corner to corner, then cut off all but the seam allowance, and flip over to create a new corner to the block, this block uses that method twice with two different size smaller squares on diagonally opposite corners.  I took the opportunity to sew together the two bits I would cut off, simply because it’s easier to sew fiddly little bits while they are still attached to the larger piece.

Christmas wreath
a little gold sparkle

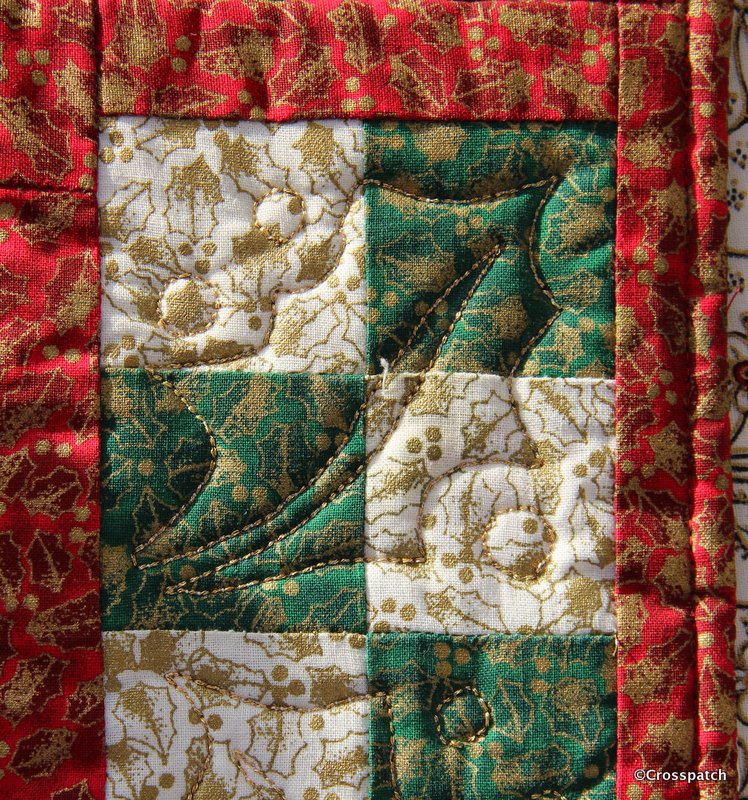
I copied the holly leaf quilting pattern from a hand bill advert I found, it was a tiny but simple line drawing of a holly leaf with berries, which I had to scale up and transfer to cardboard,cereal box card. I drew round the pattern with a disapearing pen, and machine stitched with gold thread for a little Christmas sparkle. Finally the Christmas wreath block, which is supposed to be a holly wreath is embellished with little red buttons, they are too big to be berries, but smaller ones would have been difficult to source, and I would have needed very many of them to get the balance of colour right.

subsequently I’ve cut some more chequerboard squares and made another Christmas wreath placemat… well I’ve got the top done. The wadding backing and quilting will have to wait till I can get to a shop that sells wadding.

christmas wreath
easy squares

Christmas Wreath
easy peasy

Christmas wreath
putting it together.

I’m also making something bigger, I’m not sure yet what it will look like, possibly a table runner to go the length of the table or maybe just something for the middle of the table to hide all the table mats, and protect my snowy white table cloths. Watch this space, but don’t hold your breath, it might be ready for next Christmas.

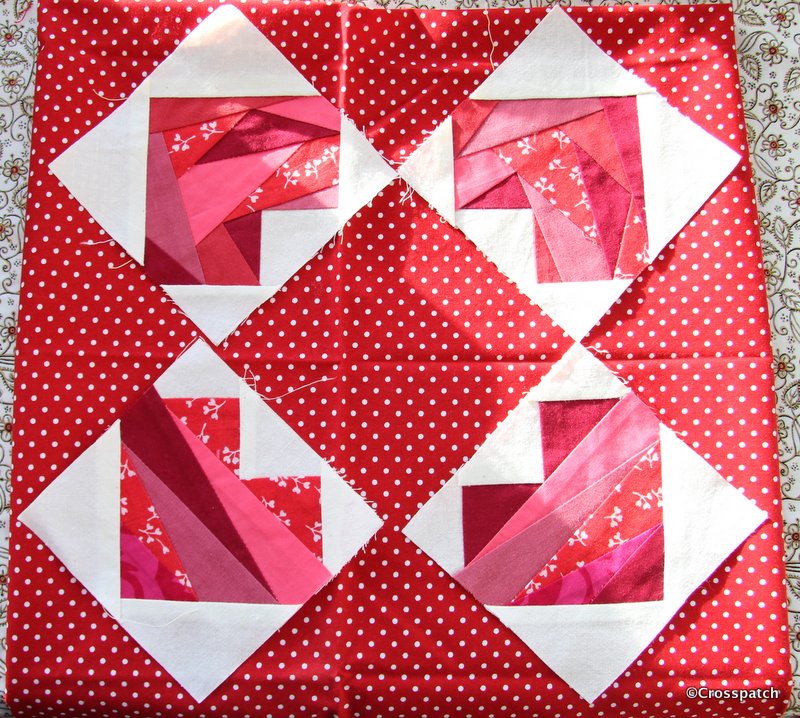
Four Little Hearts, foundation style.

I just have to use these little squares, waste not want not. My first thought was to just put them together , on a red background, or maybe add some applique.

hearts
foundation pieced hearts

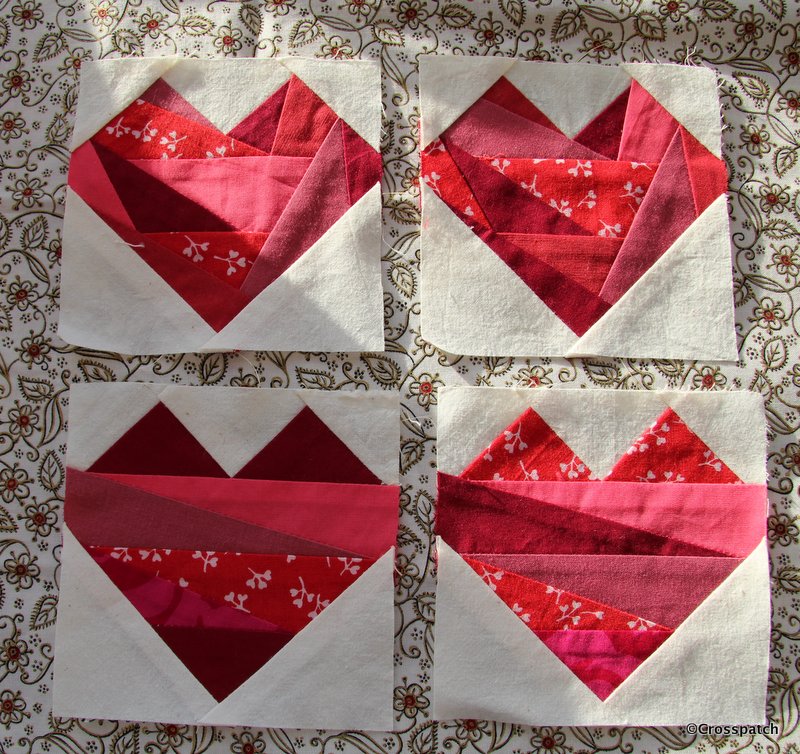
What do you do with your unfinished projects, I don’t remember making these scrappy hearts blocks, who knows how long they have a lain unloved in the bottom of a box? While searching for some star templates to finish another project I found another UFO (Un-finished Object) four little red hearts foundation pieced from scraps of red fabric on cream calico. Well what can I do with those? Looking at the fabrics I don’t think I have any left, I don’t recognise them at all, but no matter, I think I can finish them into a usable size by introducing another red fabric.

hearts
maybe like this?

Co-incidentally, my quilting group’s annual challenge this year is “call it red“. I just have to use these little squares, waste not want not. My first thought was to just put them together as in the picture, on a red background.
Or… I could add some applique hearts in Calico on red, with red stitchery… perhaps some more foundation pieced hearts in different reds… perhaps… anyway I have till July to figure it out.

I love red and white quilts and I had been planning to begin a red and white quilt for Cecily’s challenge , a feathered star in white on a red background, but if I’m honest it’s not likely to happen, not unless I find an eighth day in the week, or am in the happy position of being able to  retire before July. So I’m really pleased to have found these Hearts, I can get them made into something before July… surely.

I have recently redecorated and re-carpeted my Studio and am back in and free to sew again, but for one small problem, now the room is clean and warm and bright, a certain 15 year old who had denied any designs upon the space, now thinks his own room is way too small for him and perhaps my playroom will suit him better. In the summer when I have redecorated the living room, I will have to think about decamping to what is currently the dining room, so hopefully I can get my little red hearts quilt completed before then.

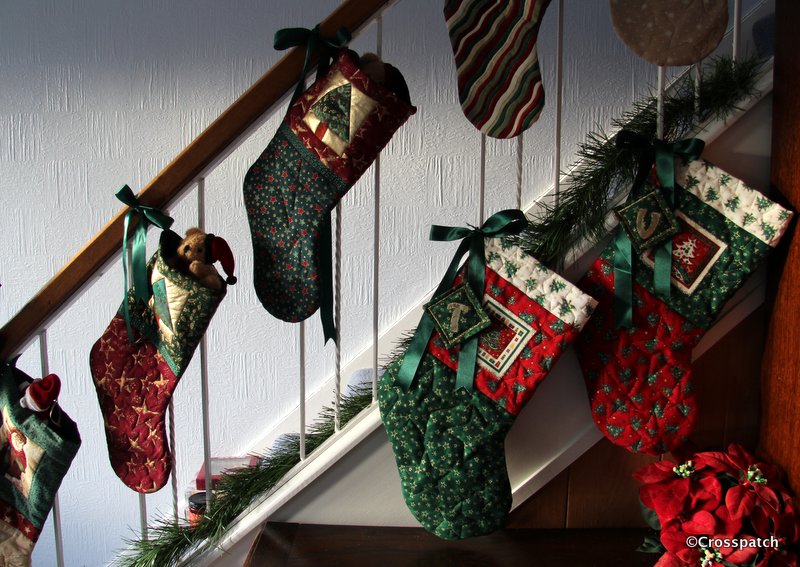
Christmas stocking, finished at last…

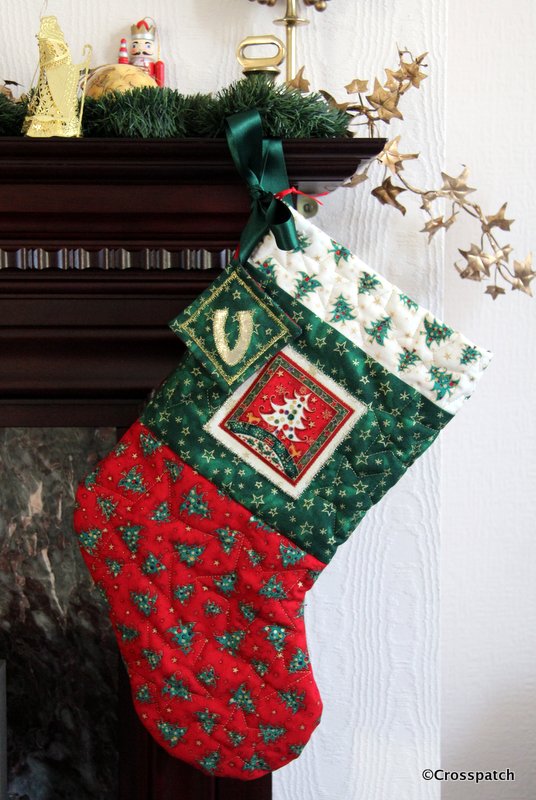
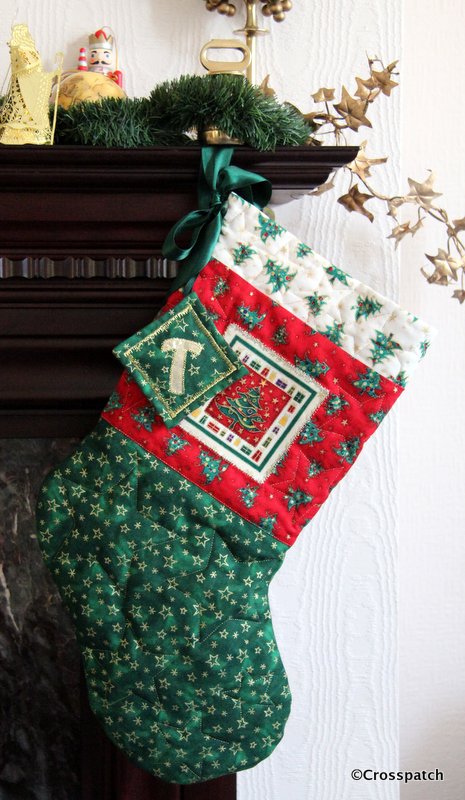
I’m celebrating finally finishing two Christmas stockings I began 8 years ago.

Christmas stockings
finished at last

I’m celebrating finally finishing two Christmas stockings I began 8 years ago. The children for whom I began making them were 7 and 11, are now 15 and 19. If you want the whole story check out my archive for December 2012and January 2013. Suffice to say Christmas is always a busy time and sometimes you just have to prioritise, Sewing takes second place to shopping, cooking and cleaning only once a year, at Christmas.

Christmas stocking
both finished

So beginning where I left off, one of the stockings was quilted and ready to be made up, the other was not. I wanted them to be the same and I had lost the quilting templates, 5 little cardboard stars in graduated sizes which I created using cookie cutters, which I had also subsequently lost, and to this day have not turned up… I suspect foul play.

Thankfully the templates did turn up, and this Christmas I was determined to finish what I’d started. I used a disappearing pen, (which for some reason isn’t disappearing) and drew the stars on the lining of the stocking, then putting the gold thread in the spool and a transparent thread on the top I quilted from the back stars in different sizes to fill the spaces round the motif in the centre of the stocking leg, and in the foot of the stocking.

Christmas stockings
final finishing touches

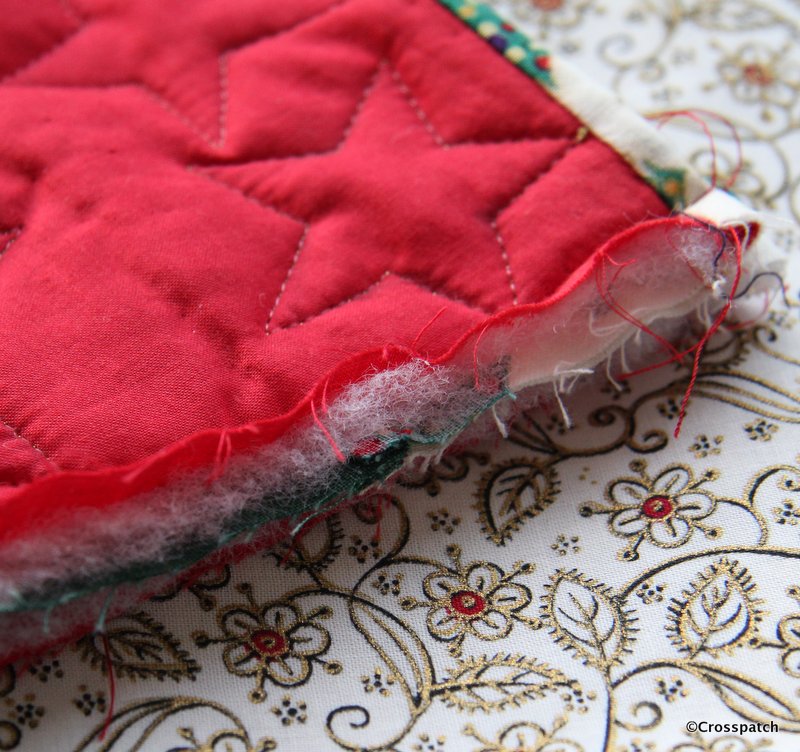
Putting the right sides together I stitched the two halves around the edge with a generous 3/8ths seam allowance to make it easier to neaten the edges. To finish the seams on the inside I cut away the wadding, and hand stitched the lining closed over the raw edges down to the bottom of the leg. Beyond there the foot still has raw edges showing, well not showing, but that’s the point, you can’t see it so I’m not going to worry about it, I may overlock the raw edges with a machine stitch…when I have a minute.

christmas stocking
another mistake

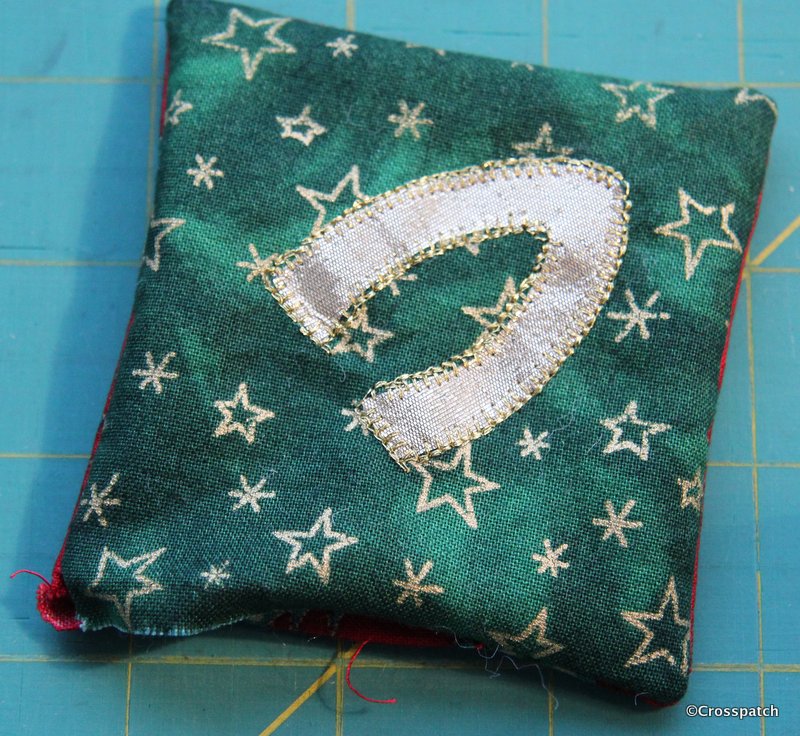
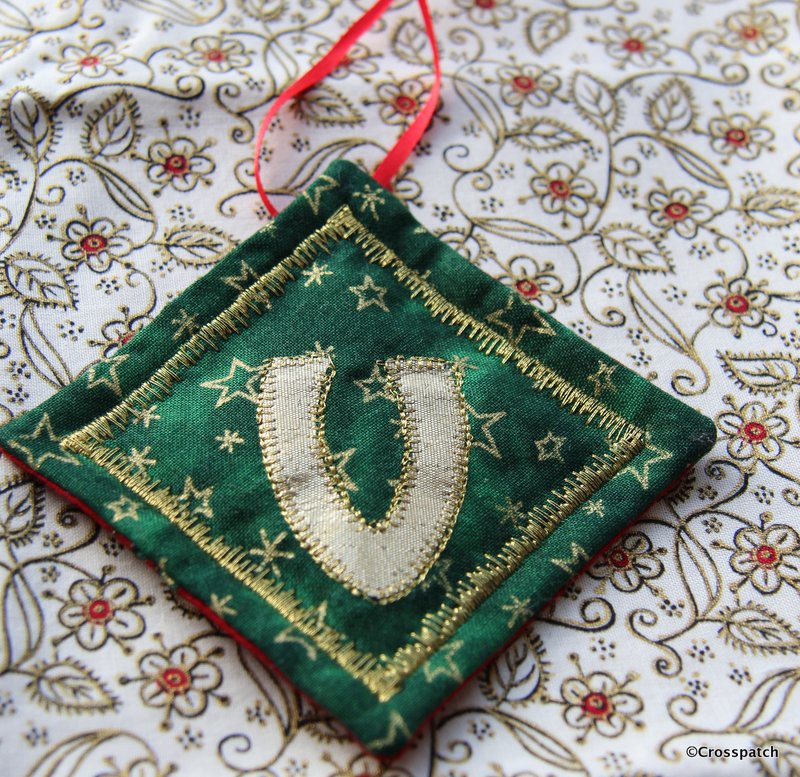
Next, I had to make the swing tags for each stocking, cutting two squares of fabric for each tag, and applying a gold letter to the green side of each. I worried that the gold letter might eventually peel off having been applied with Bondaweb, so I used my gold thread again and stitched around the edge with a machine blanket stitch, not very accurately I have to say, but I wasn’t about to unpick and start again.

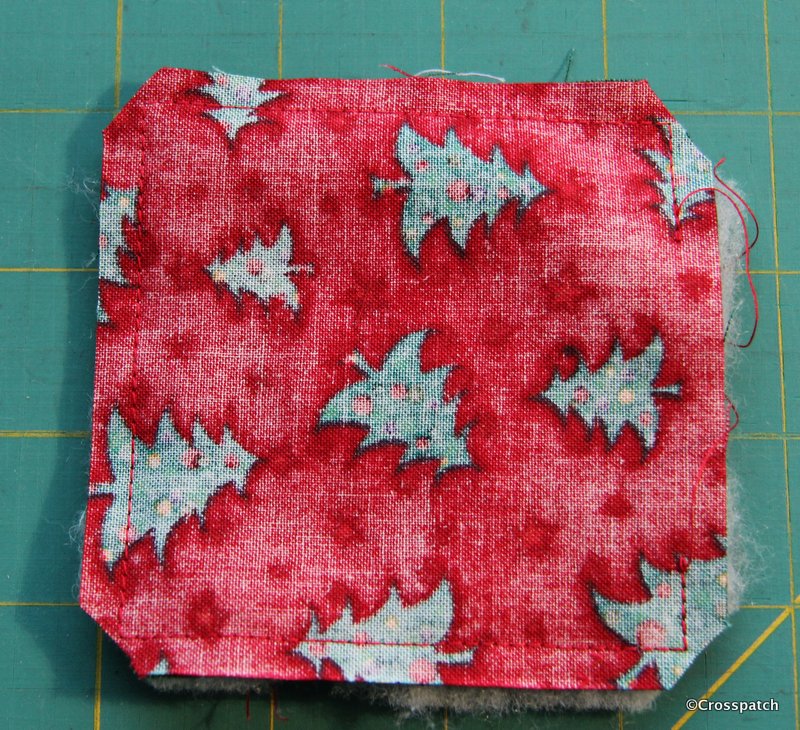
Right sides together again, with a little wadding on the back, I made another mistake; if you leave the hole to turn the fabric at a corner you’ll never achieve a neat closure… unpicked and did it again, this time with the turning gap amidships.

christmas stocking
better, all 4 corners stitched and clipped.

Having snipped the corners and turned each tag right ways out, I neatly closed the open edge by hand. Then I topstitched a gold border using another fancy machine stitch like the one I used on the stocking motifs.

Christmas Stocking
ribbon loop


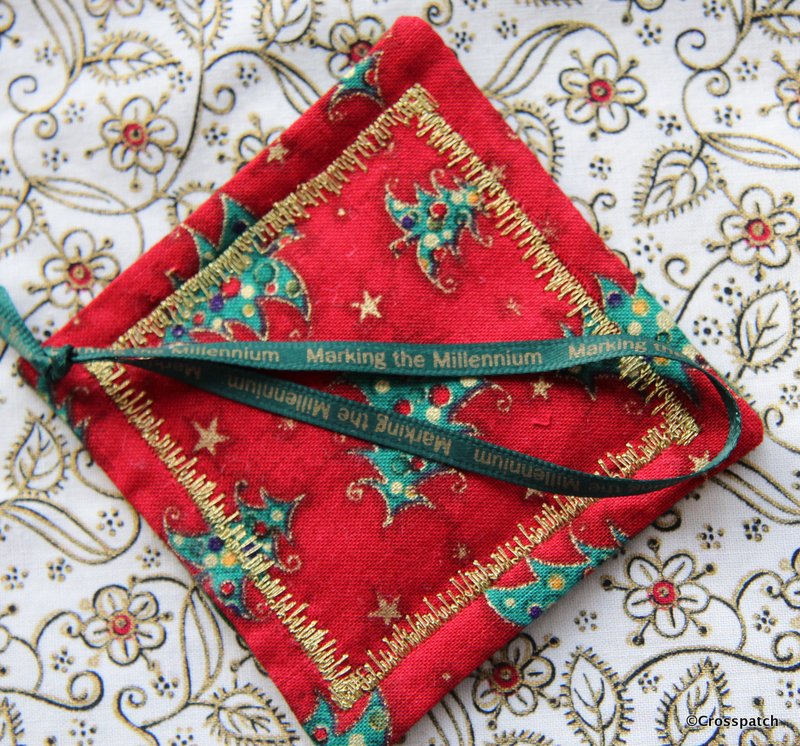
Finally a loop of ribbon was attached to the back of each tag, these ribbons tend to get ragged over time so rather than stitch it into the seam I’ve just tacked it to the back. The 15 year old is a Millennium baby, born in 2000, and when I first knew him at 7 he couldn’t say Millennium, he would a say Millellium, or Minnellium, it has always been a thing I could tease him with, so I used some ribbon I had tucked away since the Millennium, it has “Marking the Millennium” printed on it. Maybe if he keeps and treasures his stocking, it may make him smile every Christmas…long after my day.

christmas stocking
millennium ribbon

And so they are completed and hung up ready for Christmas… now all I have to do is help the 19 year old make a wall hanging, and start the wrapping, with only 3 days left till Christmas.

Christmas stocking
and here’s a few I made earlier


Bigger slippers

I love being able to mend and customise, fix my mistakes, and make something usable out of left over scraps from another project, retrieve the torn and damaged, create something usable out of what otherwise would be thrown away.

So what do you do when you have bought things for Christmas which turn out to be the wrong size? I recently had two such mistakes to solve, I bought my Dad a pair of soft jersey pants, which he finds comfortable to wear at leisure, but they had cuffs at the ankle and were too long, not a good look. Saggy grey cotton jersey doesn’t really suit anyone, no matter how old. I cut the cuffs off and finished the raw edge with an overlock stitch and double stitched hem. Problem solved, pants no longer sagging in the legs.

bigger slippers
we need bigger slippers

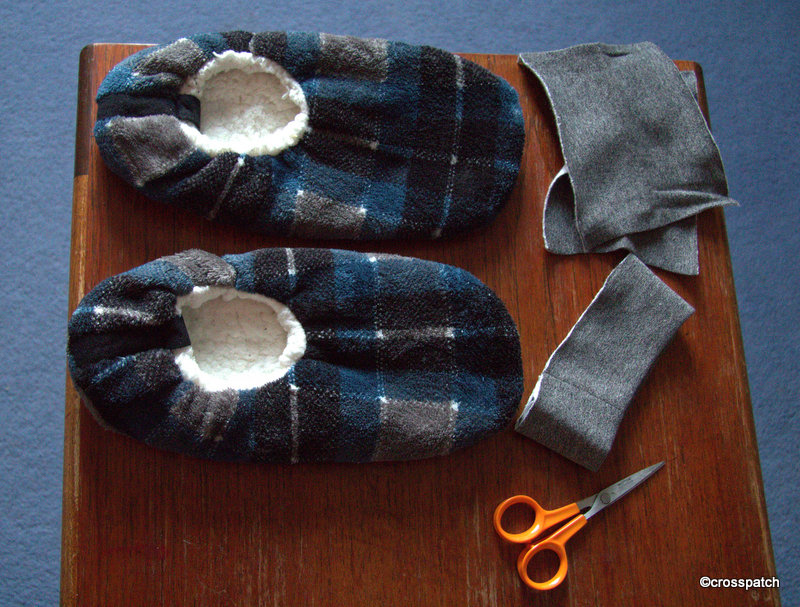
The next problem was a bit more difficult to solve, a pair of soft fleece slippers for the 14 year old. To me he’s still a boy, I keep forgetting how big he has grown, he is taller than me and his feet are larger than his dad’s, so how I managed to think Medium sized slippers would fit I don’t know! He likes his slippers, and wants to wear them but they are a tad too small, and although stretchy, not quite stretchy enough, so what to do? Make bigger slippers. Yes but what with? I was considering what I had which I could use to build an extension for the 14 year old’s toes, when I saw the cuffs I’d cut off Dad’s pants sitting on my sewing table, perfect colour, now how?

bigger slippers
problem solved, bigger slippers.

I cut one cuff along the seam and then cut it in half, each half was stitched along the two short edges to create a little pocket, then I opened up the toe of the slipper peeled back the fluffy faux lamb’s wool lining and stitched the little grey jersey pockets to the outside fabric. The lining was then hand stitched back into place covering the seam allowance so the lining is held in place and the seam hopefully will sit under the toes, where the toes meet the ball of the foot, and won’t be too uncomfortable.
They may look rather silly, but it worked, it solved the problem and the 14 year old tells me they are comfortable and a much better fit, of course the acid test is, does he wear his Bigger Slippers? Yes he does. I thought asking him to model them was pushing my luck too far, he would probably have a fit if he saw this post, so Sshh.
I love sewing, I love being able to mend and customise, fix my mistakes, and make something usable out of left over scraps from another project, retrieve the torn and damaged, create something usable out of what otherwise would be thrown away.

An Owl quilt for a dear friend

All I needed was some freezer paper and an iron, how difficult could it be?

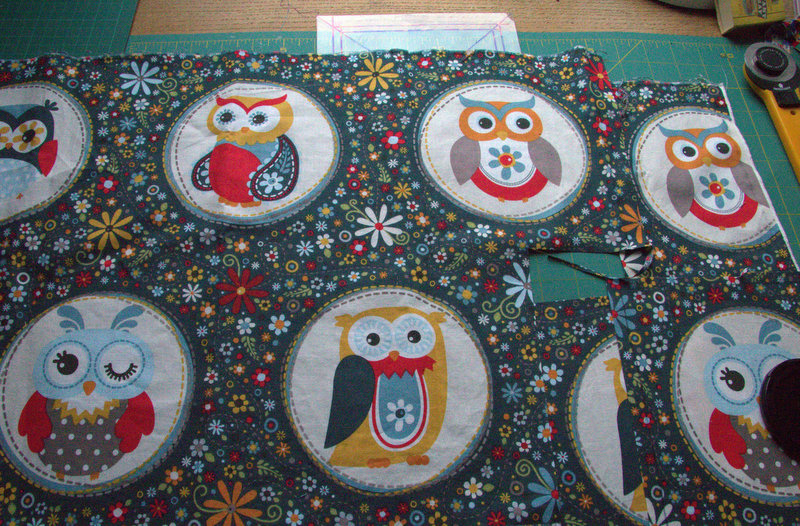
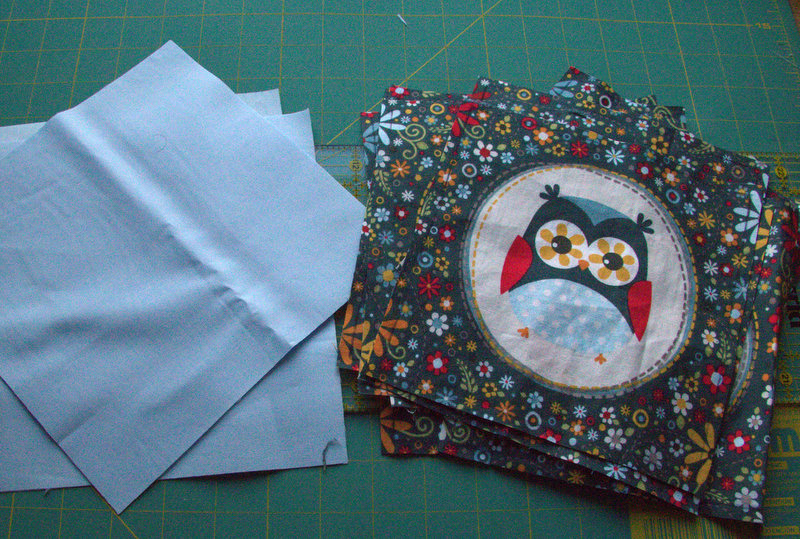
I have a dear friend who likes Owls, or “Wols” as she calls them, so when I came across this remnant of fabric being sold at my quilt group meeting I just had to buy it. I didn’t know what I would do with it but I knew I would come up with something. An Owl quilt, a lap quilt, a comforter, a virtual hug, that my friend could use whenever a hug was required and me not there to offer it.

owl quilt
a lucky find

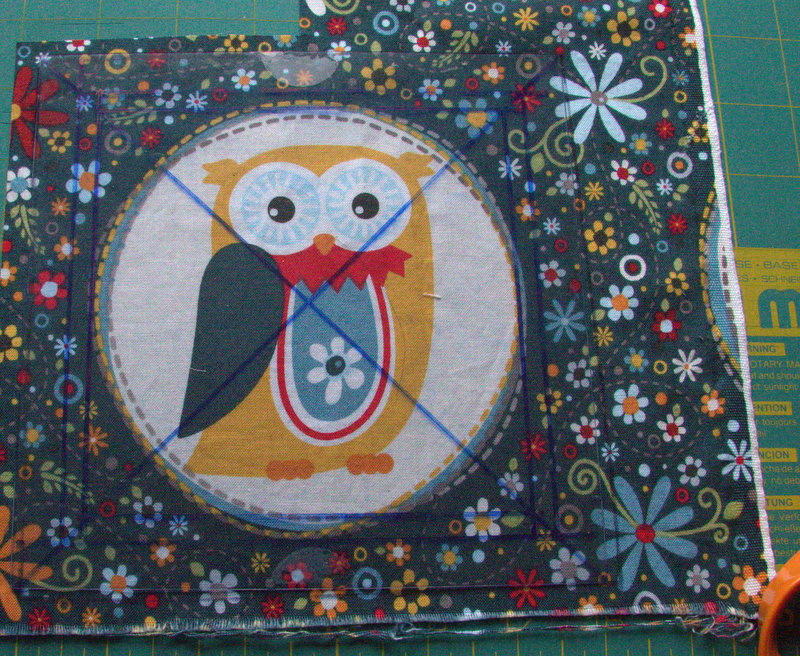
The first challenge was to cut out each Owl with as much fabric as possible surrounding the centre medallion, cut each one with the Owl dead centre in the medallion, and each the same size. The background fabric was too random to give me any help so I devised my own template using a piece of clear plastic  packaging. The circles were asymetrically placed so I needed two squares to fit them into, to “fudge ” a best fit with the centre of the medallion. The outer edge of the template I lined up by eye, given the background pattern was random I knew it wouldn’t cause me too much problem if it was slightly off the grain. In any case I don’t think it was printed entirely plumb with the straight grain of the fabric.

owl quilt
transparent template

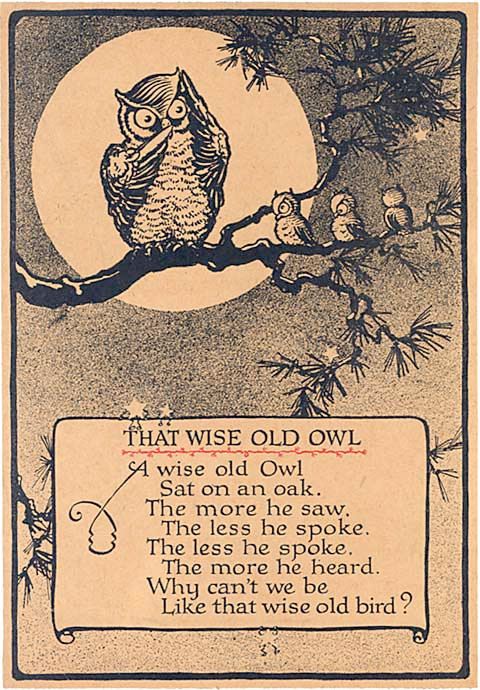
Next challenge, there were only 10 complete Owl medallions, and no way of buying more, I had to come up with a design which would make a lap quilt, at least a metre square, and quickly, I wanted to give it as a Christmas present and it was well into November when I began. While I was cutting out the medallions, I was reminded of an old nursery rhyme about a wise old Owl.
owl quilt
Happily its 8 lines long so I could alternate each of 8 Owl medallions with a line of the poem in a plain fabric, but what fabric? I went to the fabric shop thinking cream, and came home with blue, it often happens that way, when I get to see the fabrics together what I had in my mind’s eye just doesn’t work and so I always have plan B.

owl quilt
what to put with it?

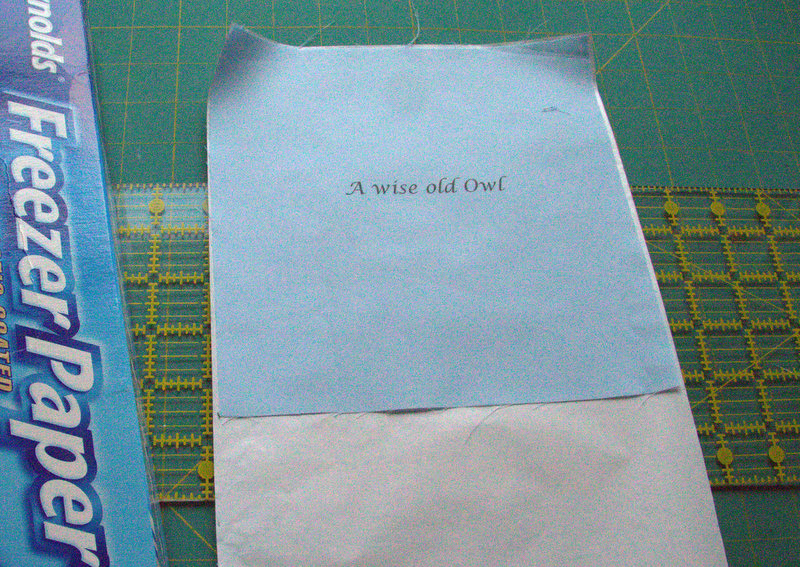
Challenge three, how to apply the lines of poetry to the fabric? My handwriting is not good enough. My hand embroidery is even less appealing, not to mention how long it would take me to hand embroider each one. I could have used machine embroidery but I wasn’t convinced my machine would do a good job either, and centring the text would be a nightmare. I did however have a plan. I’d read on Pinterest a number of articles about printing onto fabric using an ordinary household ink jet printer. All I needed was some freezer paper and an iron, how difficult could it be?

owl quilt
perfect…ish, not quite central

The plain fabric was cut slightly larger than the Owl medallions and the printing planned to be in the centre and then trimmed down to the right size leaving a little wiggle room all round in case the centring wasn’t accurate.

Damson Gin: Time to make another batch.

The Damson Gin I made for Christmas last year was such a success that I just had to make some more, my Dearest wants two bottles for us.

Damson gin
Lyth Valley Damsons

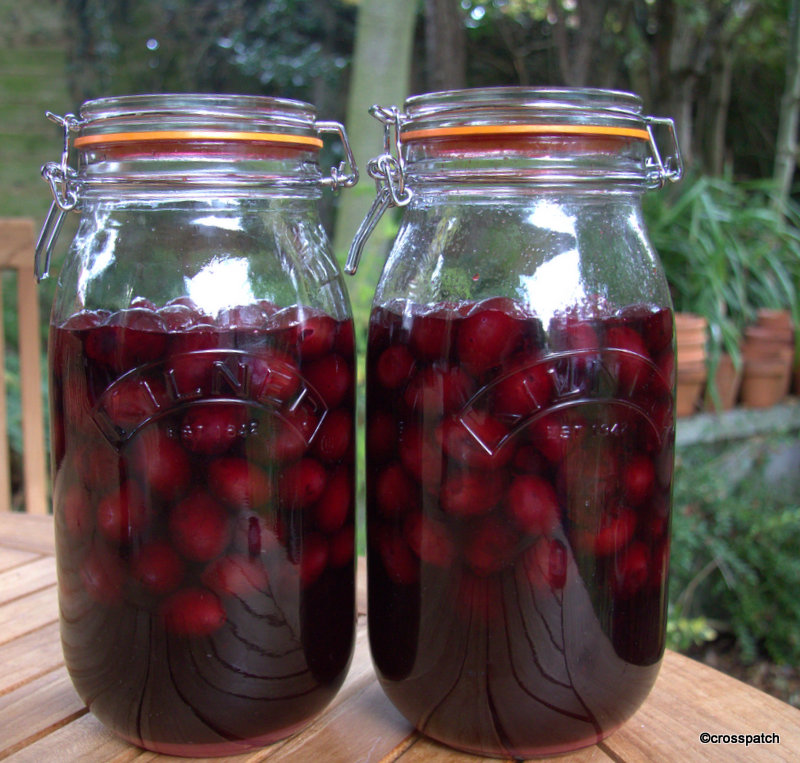
The Damson Gin I made for Christmas last year was such a success that I just had to make some more. My Dearest wants two bottles for us and the rest for gifts. I have three 2 Ltr Kilner jars at the moment each of them containing nearly a kilo of fruit and a bottle of gin. I can assure you that we won’t be drinking 2 out of the three of this particular brew, but I’ll break it to him gently, once the other bottles are gift wrapped and given away. He thinks My Damson Gin is delightful, so do I but not two bottles- that’s just greedy, and besides, there are people I know who now know there will be more Damson Gin this year, how could I not share?

Damson gin
2ltr Kilner Jar, sugar, Gin
damsons

last Saturday, the sun shone unexpectedly and so we took my little sports car for a spin. We drove to our favourite place for buying Damsons in the Lyth Valley and bought 4 kilos. Most of them went in the gin, there were some which were too ripe, they got eaten just as they were. The rest were cooked with a little sugar, and put in the fridge to be eaten with yogurt for breakfast, they tasted wonderful.

So this year I have put 900 grams of Damsons pierced all over with the tip of a sharp knife, in each Kilner clip top Jar with a 75cl bottle Gin, and covered with a 400g of caster sugar, and sealed the jars. I have given them a good shake every day till the sugar dissolved.

damson gin
Gin sodden damsons

This Damson Gin will sit in a cool dark place for 3 months and then the contents will be strained and the gin bottled, ideally I’m told we should allow it to mature for another 6 months, but I doubt it will Survive Christmas.

A new technique; Broderie Suisse

Then I began something more ambitious …

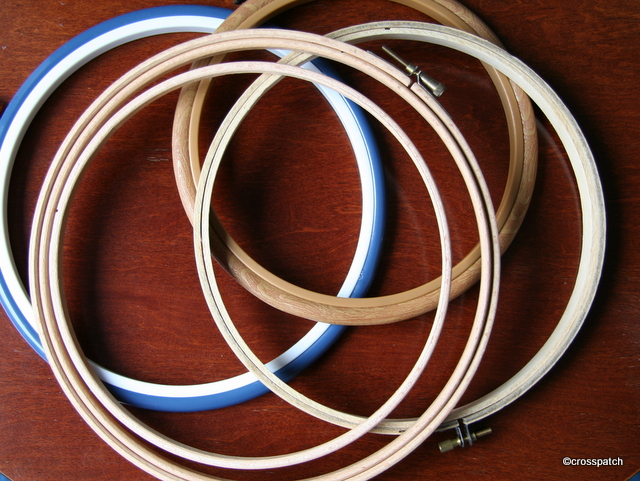
Bargain: embroidery hoops

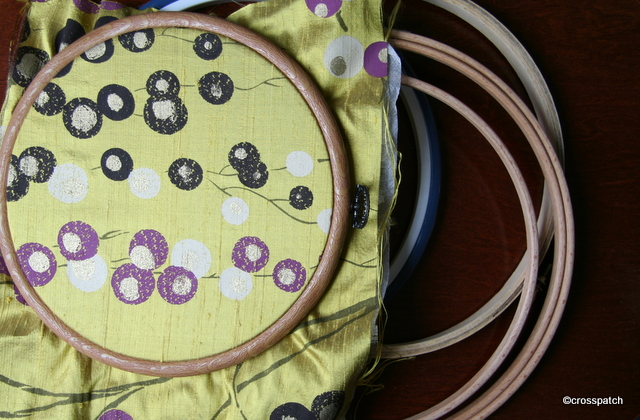
I recently bought a collection of embroidery hoops, £2 for 5 at my local charity shop. I’m making a collection, not that I do embroidery you understand, the idea was to use them to showcase some of my beautiful fabrics, the ones I can’t bring myself to cut up, by using the hoops like picture frames and hanging them in groups on the wall of my studio.

showcasing favourite fabrics

See this one with a piece of patterned silk which my mother gave me.

everything I need
everything I need

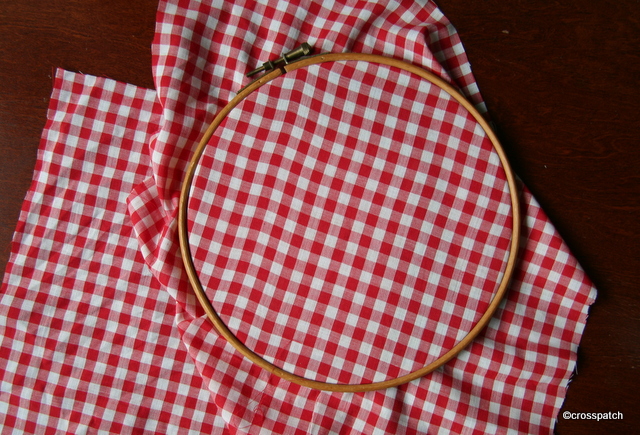
I also had two pieces of red and white gingham, which had been languishing under the lamp table beside the sofa since Christmas, it had been used to wrap small gifts and being an avid recycler I could not bring myself to throw it away.

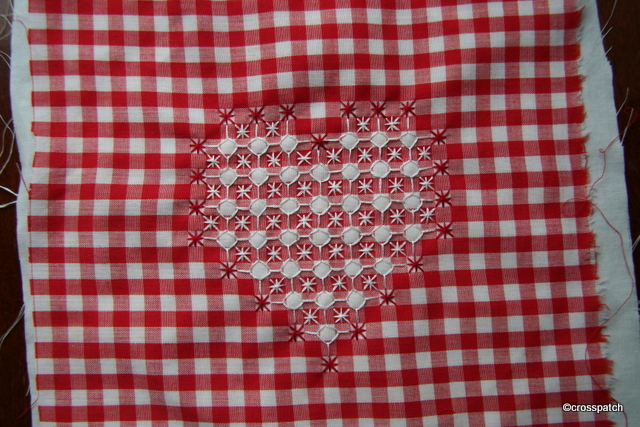
Then on Pinterest the other day I stumbled upon Broderie Suisse, (or chicken scratch) and thought….hmmm.

first attempt
first attempt

Embroidery silk… no problem, I have a large tin full under the bed… backing, because the gingham is a bit flimsy… no problem, I have some old sheet which will do… embroidery hoop… what size? I have plenty in varying sizes. Working from the photographs I found on Pinterest, because most of the tutorials are not in English, I made this little heart shaped embroidery.
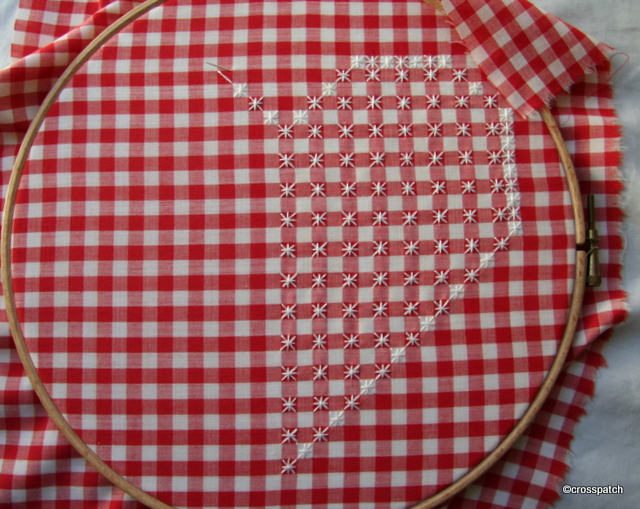
Then I began something more ambitious …

lets try something on a bigger scale

When it is complete, I think I will make it into a cushion, perhaps a hop pillow, or a sleep herbs pillow, with herbs cut from my own garden, and dried.

My lost fabric materialised too late.

a number of lost treasures which had fallen down the back, a few socks, a scarf, and my precious stash of special fabric. So that was an unexpected piece of good fortune.

The fabric which I had been seeking for months, the fabric I wanted to use to make a quilt for a good friend of mine, it turned up the moment I gave up seeking it. Isn’t it always the way? A cupboard which usually stands at the bottom of the stairs, and holds that part of my stash which I’m not planning to use any time soon, needed to be moved.

We had invited my parents to join us for Christmas dinner which meant the dining table needed to moved to the dining room from the sitting room where it normally lives ( long story, don’t ask), and the two arm chairs which normally live in the dining room, had to move to the sitting room.  The Christmas tree which would normally be put up in the dining room, would not fit in there this Christmas, so we decided to set it up in the hall; the only place it would fit was the spot where the cupboard was standing.

The cupboard clearly had not been moved for some time, and once moved there were a number of lost treasures which had fallen down the back, a few socks, a scarf, and my precious stash of special fabric. So that was an unexpected piece of good fortune.  ( Note to self, clean behind furniture more often.)

Turned up at last
Turned up at last

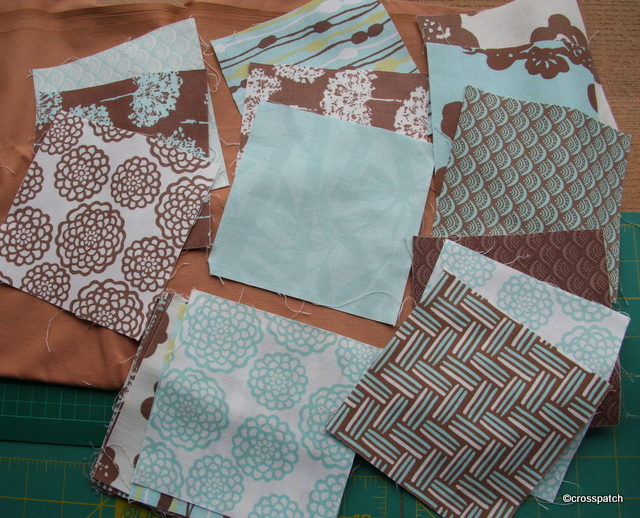
This is a charm pack of squares, which I need to put together with another bought fabric to tie them all together, and an accent colour to brighten them up a bit, I originally thought of using the terracotta fabric I’ve placed them on but it isn’t right, it just isn’t looking good, so I might see if I can find a mushroomy grey beige for sashing, and a guacamole or mushy pea green for the accent.

44 Days Later : Coffee Orange Liqueur

The Damson Gin was DIVINE, like liquid Damson, not too sweet, doesn’t taste of alcohol it just tastes of the most wonderful, concentrated damson flavour

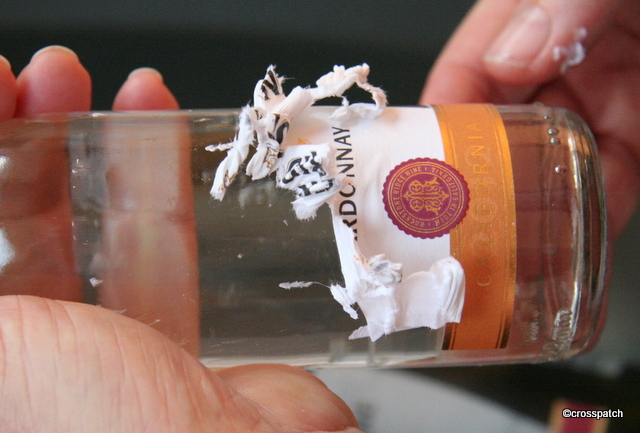
Christmas Eve and I needed to decant my macerating liqueurs in time to give them as gifts and enjoy them myself. The first task was to prepare the bottles. I’d put aside some half and quarter litre bottles, which I’d bought specially for the task, they were full of wine at the time, but I soon put paid to that, I needed the bottles, but they come free when you buy the wine and it would be a shame to waste it.

presto, clean bottles

Getting the labels off is easy, soak in hot water till the label is soaked and the glue underneath it warmed, so it peels off easily or at least scrapes off easily with a thumb nail, if there is residue left I have a great trick which I got from Pinterest. Rather than use Sticky Stuff Remover which is petroleum based and toxic , so not a good thing to use on bottles for consumables, I use plain old cooking oil made into a paste with bicarbonate of soda. Rub on… rub off, wash it with liquid soap, Presto, crystal clean bottles.

44 days later
44 days later

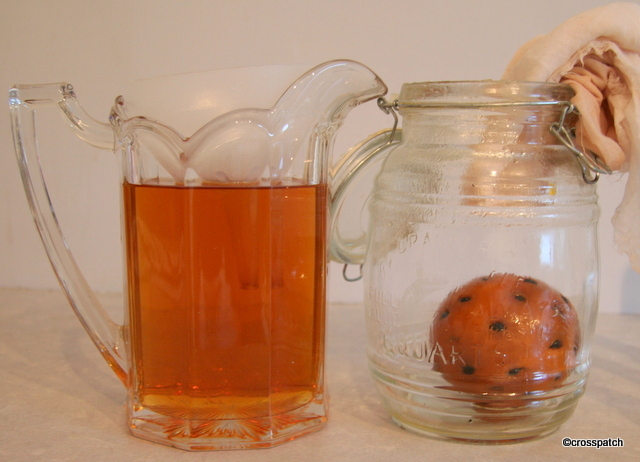
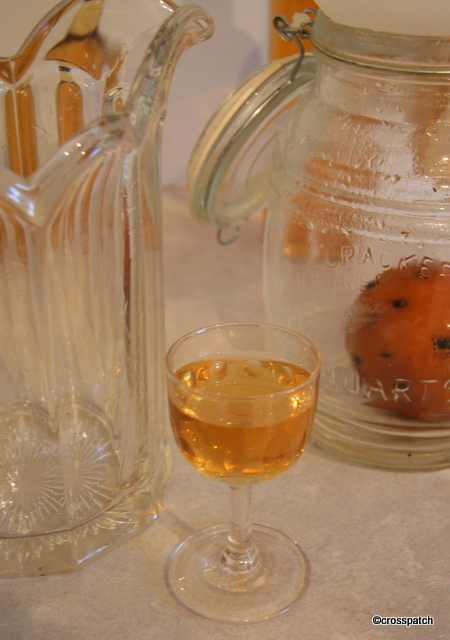
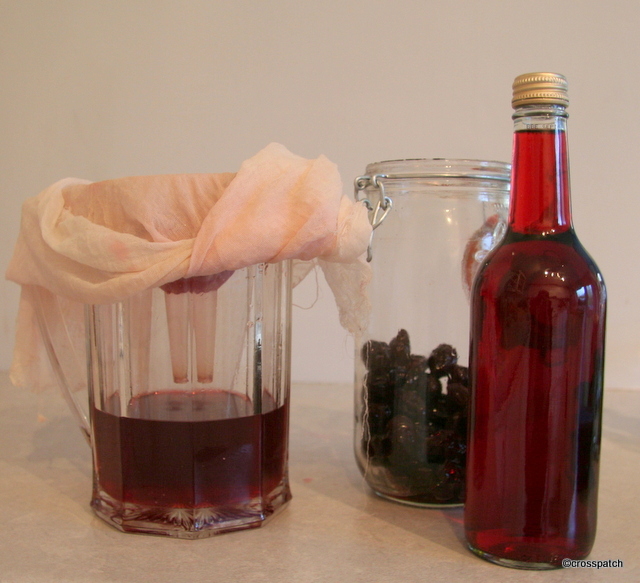
First I strained the Coffee Orange Liqueur through muslin, the smell was incredible, and very conveniently when I had bottled it there was just enough to fill a glass to taste it before I made it into stocking fillers.
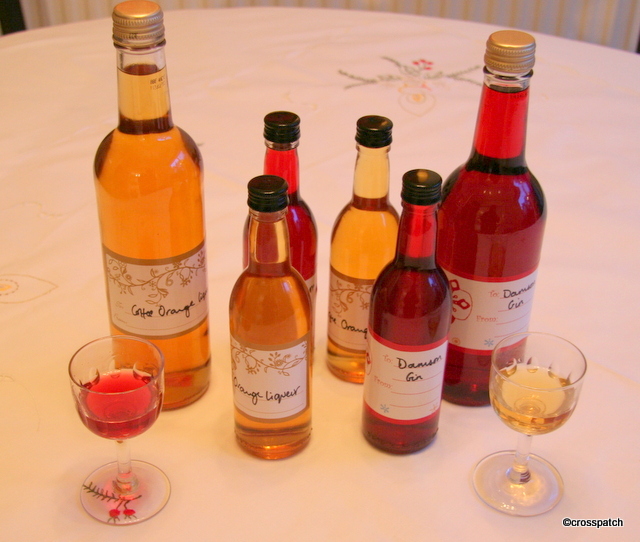
The glass was a bargain, another charity shop find, 4 little Victorian sherry glasses, £2, and another 2 crystal liqueur glasses, a pound each, they will be going in stockings along with the liqueurs, just in case the recipients don’t have a suitable glass to serve it in.

little Victorian Glass

Then I strained the Damson gin off the damsons (which I then heated in a pan, to burn off the alcohol, they look like mini prunes, and will be going on my morning porridge ) and strange to say when I had bottled the Damson gin, there was again just enough to fill a glass to quality check the produce, how lucky is that?

Damson Gin
Damson Gin

The Coffee Orange Liqueur is lovely, but the Damson Gin is DIVINE, like liquid Damson, not too sweet, doesn’t taste of alcohol it just tastes of the most wonderful, concentrated damson flavour, which is pretty hard to beat, particularly in something “homemade”.

Stocking fillers, ready to go