Let’s twist again like we did last Summer

it’s never a good idea to use bias cut fabric , bias cut edge to bias cut edge if you can avoid it, but if you cut same size squares on straight grain, and
join then alternately bias cut edge to straight grain edge, you can produce a string of coloured squares to use as a border,

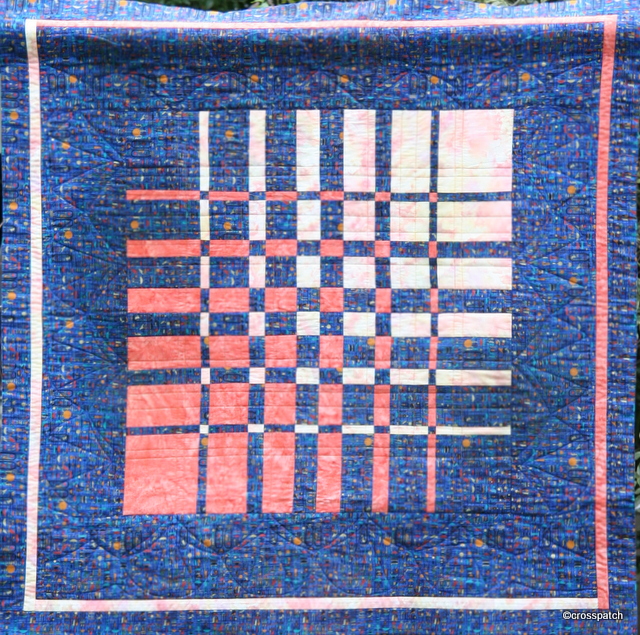
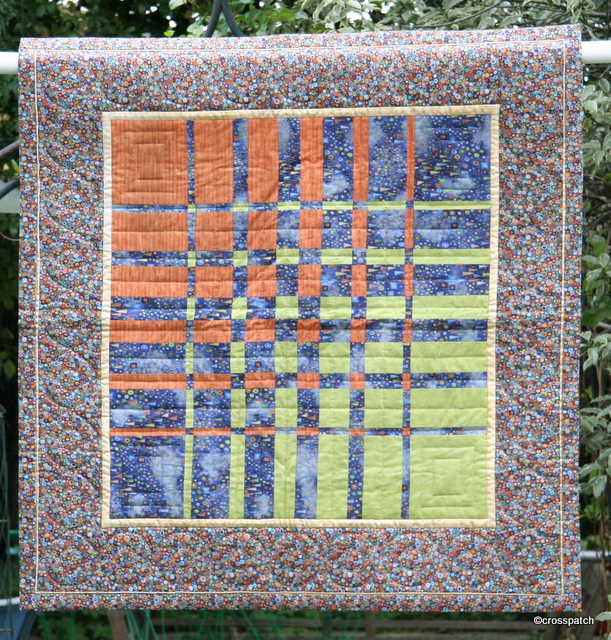
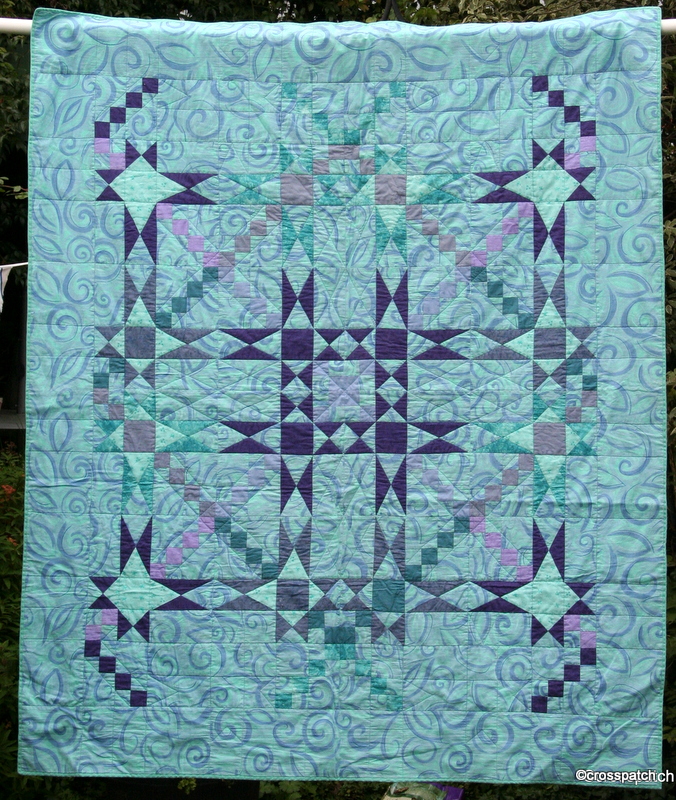
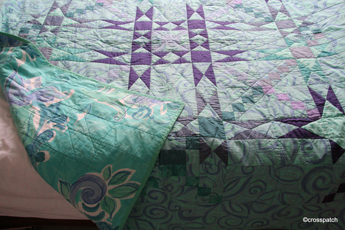
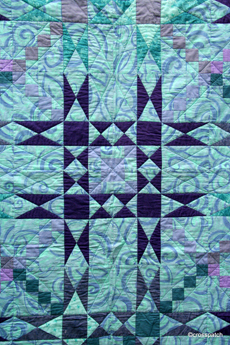
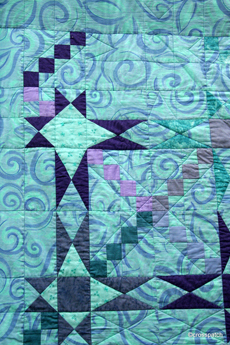
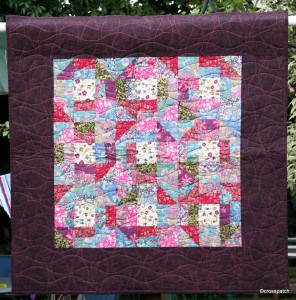
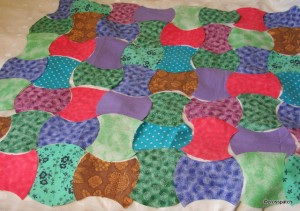
These two quilts are another mother and daughter effort, the first is mine using my favourite bright colours, with black. The second is my mother’s, rich colours which tone beautifully together.

Mulitcoloured Twister quilt

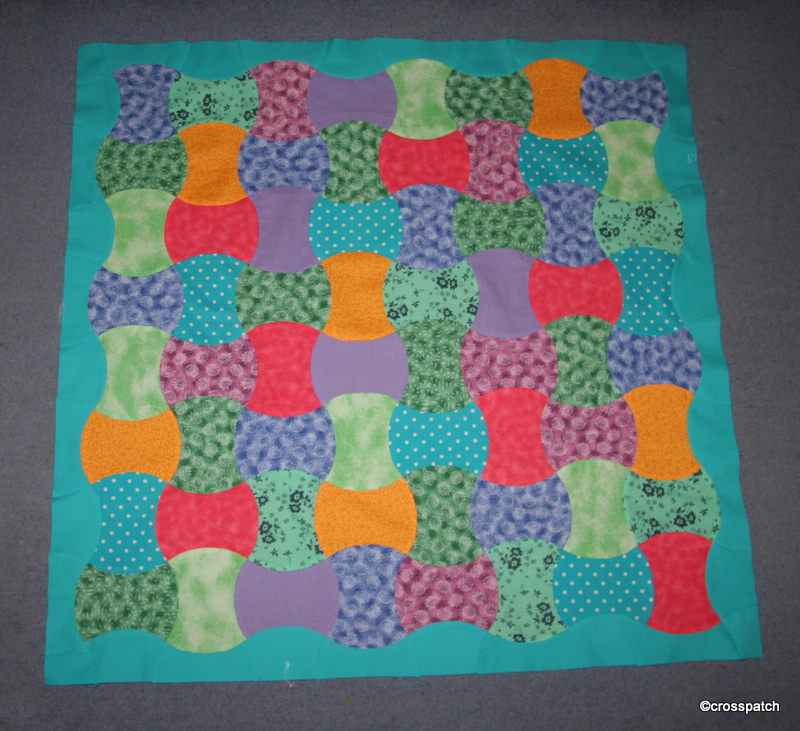
The block is known as Twister, it looks rather complicated, and whilst it does take some planning and a large workspace is helpful it is actually fairly simple to achieve.
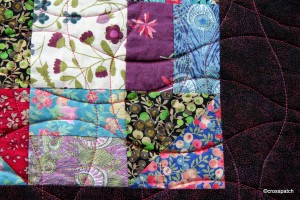
First task is to cut out squares and put them together in a grid bearing in mind that each square will tessellate with its neighbouring squares in the finished article, so each square should be sufficiently different from its neighbour to give the definition you want.

Mum's twister quilt

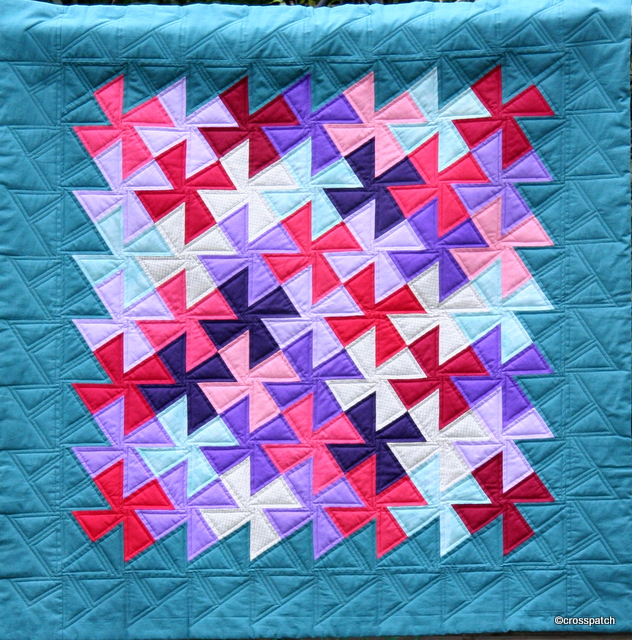
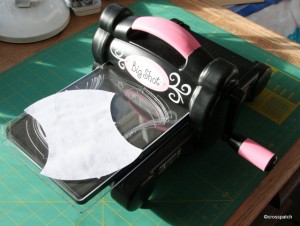
Once you have a grid maybe 20 percent larger than the finished article you plan, you take your scissors to it cutting it up using a template guide. At first it may seem that there is a profligate waste of fabric as you do cut to waste. A large bias square is cut from the centre of each square, I set these aside to use in the border. As each new square is cut diagonally from the fabric with the intersection of the squares as the centre of the new squares you cut, you should then rotate the square 90 degrees and set it back next to its neighbour. You will find they begin to tessellate; now you see why you need to have a large workspace, because you need to set out the entire quilt top, each piece placed by its neighbour, to get the placing correct.

http://www.pinkchalkfabrics.com

You will have a collection of little bias cut squares left over, now it’s never a good idea to use bias cut fabric , bias cut edge to bias cut edge if you can avoid it,because both edges will stretch. If you cut the same size squares on straight grain, and join them alternately bias cut edge to straight grain edge, you can produce a string of coloured squares to use as a border, it will still stretch a little if you are not careful, but at least there will be no waste. I cannot bear waste.

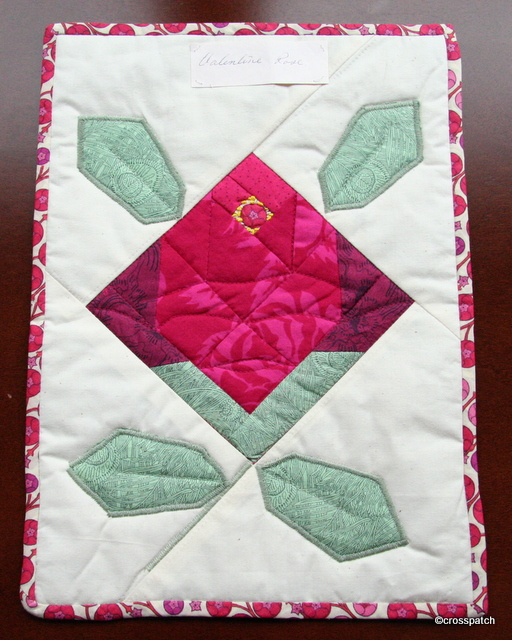
The first quilt I made in this pattern I can’t find a photo of, probably because it was photographed long before I discovered digital photography, in fact it may have been made before digital photography existed.( Do you know how old that makes me feel?) It was a cot quilt made for a friend at the birth of her daughter, and was in pretty pinks and blues and on a very small scale, hand quilted in circles.

Fibonacci: a lesson from the 12th Century

When I have a few hours to spare…. Some time in the next 5 years! I think I have the right two fabrics to make another one of these.

Here are two more quilts made from the inspiring work of Ricky Tims, not mine I’m afraid, these two were both made by my Mother.

Egyptian math

The first probably made at the same time as my first and to the same instructions, I think we may have been lent a book or attended a workshop together.

W.I. challenge quilt

The second, I’m sure was made in response to a Women’s Institute Challenge to use a particular challenge fabric inspired by Gustav Klimt. Or perhaps it was made from the left over fabric. The lime and copper fabrics look to be plains while the other two fabrics are patterned fabrics which have patterns taken from the paintings of Klimt, I particularly love the blue.

When I have a few hours to spare…. Some time in the next 5 years! I think I have the right two fabrics to make another one of these.

Every quilt deserves a label

If the label goes on before the quilt is put together and quilted through, then it’s difficult to remove, it can only be covered up by someone who might wish to change its history or attribution, ( I mean pass it off as their own) later to be happily rediscovered, when the stitching begins to come apart.


I have used a spare apple core for the quilt label, and my lovely Janome sewing machine supplied the pretty script to write the words, “Scrappy Apple Core Quilt” My name and the date. It’s really important to put a label on the back of every quilt you make and to put it on before you put the quilt together and quilt it. Why? Many reasons; posterity for one, if your quilt is treasured and survives for hundreds of years as some do, the owners will one day wonder who made it, when and why – so tell them.

scrappy Apple core quilt label

Quilts are used to evidence the history of fabrics and fashions but only if they can be reliably dated. Let the historians be happy to have found a dateable treasure in your quilt.
If the label goes on before the quilt is put together and quilted through, then it’s difficult to remove, it can only be covered up by someone who might wish to change its history or attribution, ( I mean pass it off as their own) later to be happily rediscovered, when the stitching begins to come apart.
If the quilt is made specifically for a person or to celebrate an event in someone’s life, then put it on the quilt label, but be warned….. I once heard of a quilt that was made to celebrate a marriage, it took so long to make that the couple had divorced before it was completed.
scrappy apple core quilt backing
The backing was a happy find in my stash, it’s what was left over from the backing of a much larger quilt, the left over piece was too wide but not long enough, however there was a long strip that I cut off the side of the previous quilt backing, so I managed to stitch on the strip and make a square big enough for the backing of this quilt. There’s a little bit over, perhaps it will back the cushion I might make to go with the quilt. And there’s even enough for the hanging sleeve, how lucky is that!

On the subject of being lucky

With a heavy heart I reached for the secret yellow stash, cut a couple of apple cores and threw them into the mix… presto! The whole thing started to come together.

Going back to the Sizzix Big shot, I have now solved my little dilemma, and indeed the dreaded yellow was the answer. I had spent a few nights trying to think how I might avoid using the dreaded yellow and came up with an idea that a lime or apple green might work but on looking again at what was already cut I found I had already introduced a pale apple green, so that would not work. With a heavy heart I reached for the secret yellow stash, cut a couple of apple cores and threw them into the mix… presto! The whole thing started to come together.

first Apple Core Quilt

Then I went to my stash for a royal blue for the border but again…. it just wasn’t working, so off to the fabric shop I went,…..lavender blue? no, Airforce blue? no, Navy blue? no…..what about turquoise? Turquoise it is! I may even bind it in yellow too, but I’ve got time to ponder that while I do the quilting.
So next dilemma… how to quilt, and what to back it with?

A new quilt every time we redecorate; madness.

Quilts are for using, and enjoying, signs of wear are badges of honour for a quilt.

Sally's quilt full size

Here’s an idea for a quick quilt to match your bedroom décor. This quilt was made by my mother for her granddaughter, my sister’s daughter. Sally had recently repainted her bedroom and her mother had bought her new bedding to tone in with the Lavender walls. Her old quilt no longer fitted in with this new colour scheme, and a new quilt was required.Sally's quilt;backing

My mother, went back to the shop where the bedding had been bought and bought a king size duvet cover in the same pattern, one side had very large cabbage roses printed on it, not suitable for cutting into small pieces, so that side would be used for the backing, the other side an easier fabric to cut up being an all over swirling pattern.
Using small amounts of toning fabric, a paler green Broderie Anglaise, bright and greyed Lavenders, dark Blue, and Teal green, with large amounts of the duvet fabric in an oversized 18inch block, she achieved a pattern apparently floating in space.
Sally's quilt detail 2
I have been looking at the photographs trying to see where the block begins and ends. I think it’s an asymmetric 4 patch block, 4 of which are placed in the centre of the quilt each one rotated 90 degrees from its neighbour. There’s an extra half block strip top and bottom to make the quilt rectangular.It was a lovely quilt when it was made, and a great idea for making a quilt to tone in with an existing décor.

Sally's quilt detail 1

The bedding was polycotton and has long since worn out and been made into dusters, and the quilt, although still in existence, up close has the appearance of worn poly fabrics, stray fibres pilling across surface. I think I could shave them off with a safety razor to improve the appearance, but to be honest I like the fact that it shows wear and tear, it is what it is, and sometimes when well used quilts are a little tatty, they invite further use. No longer preciously perfect, they can be used, thrown about, even sicked on without conscience, and enjoyed.
When I see a quilt which has lived it’s life packed away in a drawer kept for best, or for a wedding day which never happened, I feel sorry that someone’s handiwork lost its purpose, and the point of its making was missed. Quilts are for using, and enjoying, signs of wear are badges of honour for a quilt.

Lovely weekend in Lancaster

Lancaster is technically still a Port even though the river silted up over a century ago, the lovely 18th century Quay side with its bonded warehouses and handsome Georgian Customs House has not seen a ship since the days of sail.

(16.02.2013) Saturday arrived bathed in sunshine, after a cold wet winter it was a God given day of clear blue sky and crystal clear air that gave a hope of spring. After an early appointment at the hairdresser’s to get my grey as a Badger roots covered, my Dearest and I drove to Morecambe, a nearby seaside Town so that we could walk on the promenade in the sunshine. Typical then that as we arrived hazy cloud appeared and the sun struggled a little but continued to do it’s best to warm the day.

Dingy old Dinghy

We came across this sad old dinghy filled with rainwater and beach pebbles to prevent it blowing away in the winter storms, and wondered how long it had sat there disused and forgotten, filled with water rather than bobbing about on it. The LR on the side of the boat indicates that the boat or more likely the larger boat, for which this was the tender, is registered by the Port of Lancaster authorities.
The Georgian Customs hHouse Lancaster

Lancaster is technically still a Port even though the river silted up over a century ago, the lovely 18th century Quay side with its bonded warehouses and handsome Georgian Customs House has not seen a ship since the days of sail.

The Port of Lancaster is now situated further down the river estuary at a tiny village called Glasson, Glasson Dock used to have a dry dock for ship repairs, which was filled in and built over in the late 60’s, I can just about remember it.

tide gates closed
tide gates closed

The dock itself is tidal, and has great tidal gates which are opened only when the tide is high to let vessels in or out, and then closed to hold the water in the dock as the tide drops. At the landward side of the dock is another lock gate which allows smaller vessels into the marina and from there by another lock gate onto a spur of the Lancaster canal.

tide gates open
tide gates open

Sunday dawned another beautiful sunny day, cold but bright, we went with the 16 year old to Glasson Dock in hope of the opportunity to take some photographs, but there was little that captured our eyes or imagination, and the warm fireside beckoned.
Today was another day like Saturday, mild, sunny not a breath of wind, three days sunshine in a row, in February, how lucky is that? So this time we walked the river path on an old railway track long since decommissioned from Conder Green to Stodday and back, the route shared with cyclists, dog walkers and Mums with young children on foot, bike and scooter, just enjoying unseasonable sunshine.
 The Lune estuary, with Glasson in the distance

From the river path we could see Glasson Dock on the horizon. My lovely day was marred by nagging worries about things I needed to achieve at work, which were not being progressed in my absence, how silly!
Note to self, stop worrying about all the things which are not getting done, and enjoy the thing you are doing.

A Valentine Rose from my Mother

a perfect little gift for Valentine’s Day, a keepsake, a rose that won’t wither. Thanks Mum, I love you too.

Pictured is a little piece of work of my mother’s which she gave me, a rose for St Valentine’s Day, this is a sweet little hanging which is paper pieced using four different patterned fabrics to create the rose flower plus a single green for the leaves. The flower centre is from the fabric used for the binding, mum has used yellow French knots of embroidery silks to create the sense of pollen covered anthers in the rose centre.

Valentine Rose

This was a challenge, I think the theme was celebration, and this is a perfect little gift for Valentine’s Day, a keepsake, a rose that won’t wither. Thanks Mum, I love you too.

A challenging challenge

I like the curvy line quilting because it’s easy to do and does not rely on the accuracy of the piecing, in fact if your piecing is not accurate curvy line quilting is very forgiving. That’s always a good thing.

What do you do if you don’t like the challenge block? Hide it.

Cecily's favourite churn dash block

This Lap quilt is made using the Churn Dash block (or monkey wrench), I think it was the favourite block of our most venerated late member and the instigator of our quilt group’s challenge, Cecily. But I dislike it. I wanted to rise to the challenge as always but I find the block rather pedestrian, perhaps because I’ve only made it in co-ordinated colours and plain fabrics, so a decided to do it in heavily patterned fabrics and mix it up so that the pattern was lost and the fabric became the star of the piece rather than the block.
Good idea, but I think I took it too far, the pattern is completely lost and with it the sense of rhythm to the quilt top, as a consequence what stands out are the pale squares, rather than the fabric in general. All of the fabrics are Liberty scraps from the printer’s factory shop, I’m so lucky to live nearby; I call in occasionally to buy craft packs, but I can also buy off the roll if I have a big project in mind.

Detail of quilting on Churn Dash quilt

In other senses I’m happy with the quilt; it hangs beautifully flat and straight and is evenly quilted throughout. I created my own wavy line quilt guide using taped together strips of cereal packet, with a hand drawn wavy line. On one side the wavy edge has wide and fairly flat curves, on the other side they are closer together and therefore appear deeper. I used the flatter side, drew on the lines with an air dispersible pen, and chalk pencil taking the quilt pattern right out in a continuous line to the edge of the quilt.
I like the curvy line quilting because it’s easy to do and does not rely on the accuracy of the piecing, in fact if your piecing is not accurate curvy line quilting is very forgiving. That’s always a good thing.

Am I a lucky girl?

I have pulled a few fabrics from my stash and cut them into apple cores but together they lack a certain something………maybe….. as it’s a scrap quilt I should just throw it all in and let it all hang out, wherever the fabrics fall… if you see what I mean, and pardon my clichés.

Santa brought me a Sizzix Big Shot, I’d seen apple core quilts on Pinterest and coveted them, so when I discovered how the pieces were cut I coveted the Sizzix machine as well, but I couldn’t justify buying one just to have a go at making a quilt. My Dearest however thought it would make an excellent gift this Christmas. I am delighted with it and have already begun cutting apple cores from my stash.

The Sizzix Big Shot

If you are not familiar with this piece of equipment it’s a die cutter, basically a miniature mangle, which presses dies (a shape cutting blade) onto whatever you want to cut the shape in, paper, card or fabric, mostly used by card makers and other crafty people. I have already worked out that I can use it for appliqué, with bondaweb, and to make other paper crafts as yet not crystalised but bubbling away at the back of my head ( no doubt you’ll be the first to know when I get round to trying out my as yet vague ideas)
I always find myself wondering how other quilters manage to make such well balanced colour coordinated Scrap quilts, I generally find I struggle to have the right amount of sufficient variation of colour and pattern to make a balanced quilt; do you think maybe they cheat? Maybe they go out and buy new fabrics to achieve the look they want and then just call it a scrap quilt? Surely not!
I have pulled a few fabrics from my stash and cut them into apple cores but together they lack a certain something, I’m not sure what exactly and don’t want to cut any more till I know what it is that’s missing; the dreaded yellow perhaps, or maybe greater variation of darks and lights, at the moment what I have cut are mainly mid shades. I shall need to pull out a great many more fabrics from my stash and throw them in a pile I think, then pare it back, pulling out the ones that don’t work, till I have the right mix.

my first apple core quilt in the making

Having said that I think one of my weaknesses is a need to control, perhaps, as it’s a scrap quilt I should just throw it all in and let it all hang out, wherever the fabrics fall… if you see what I mean, and pardon my clichés.
The truth is I didn’t pull out of my stash the fabrics I love, I pulled out the fabrics I could spare, the unloved and languishing bits, so it’s no wonder they aren’t yet making an inspiring mix. I need inspiration, one or two well chosen fabrics to pull it all together, or white, or navy? Oh Help! What I really need is a few days of free time in my studio to let this quilt come together.

To finish those stockings

I hit another snag, the mark didn’t show at all on the green fabric. Work came to a full stop again. Till I worked out that if I put the gold thread on the bottom bobbin and marked the quilting out on the lining, I could achieve the result I wanted, problem solved.

which fabric?

I wanted to make a swing tag for each stocking. A gold initial on a swing tag to hang from each one. I’d originally planned to put the initial on the red material of the stocking but realised it would not work visually; the material is too busy and the initial would not be well defined, so I chose the green fabric.

Font: Hobo

I chose a simple font, this is Hobo, which is chunky and nicely shaped without any difficult to cut out narrow bits which would have made appliqué complicated. I enlarged the font in bold, and traced the initials onto bondaweb (if you are going to do this do it rough side up or print off a reversed initial, or your finished initial will be the wrong way round).

bondaweb on gold tissue

I ironed the bondaweb onto some gold tissue fabric, cut out, peeled off and ironed into the green fabric. If this swing tag was likely to be washed I’d consider some stitching round the edge to keep it in place but I don’t think it will be necessary.

quilting design

To quilt my stockings I was struggling to find a suitable quilting pattern, I’d initially thought of using a holly and berry pattern I already had but it wasn’t right, then looking at the green fabric I realised throughout all the co-ordinating fabrics there were 5 pointed stars. Coincidentally I’d just bought a set of star cookie cutters. I drew round the 5 star cutters onto cardboard, the points were a little rounded which I didn’t want, so I cut them out sharper. I used the smallest star along the top edge of the stocking, the middle size down the sides of the panels, and all 5 size stars on the foot of the stocking.
Next problem! I planned to use an air erasable pen to mark the shapes onto the stocking, but in the bright sunshine streaming into the room, the mark was disappearing before I could stitch the stars. I gave up, and found something else to do till it went dark.
Then moving on to the foot of the stocking, I hit another snag, the mark didn’t show at all on the green fabric. Work came to a full stop again. Till I worked out that if I put the gold thread on the bottom bobbin and marked the quilting out on the lining, I could achieve the result I wanted, problem solved.