Nearly two years ago, and before being thrown out of my studio to make room for a sixteen year old, I made a crazy patchwork cushion for a group challenge.
Crazy Patchwork Cushion… continued…
Nearly two years ago, and before being thrown out of my studio to make room for a sixteen year old, I made a crazy patchwork cushion for a group challenge from 1980’s scraps some of which were Laura Ashley fabrics.
I wasn’t happy with the way it was finished but as with many of my projects I ran out of time and completed it in a rush in order to submit it to my quilt group’s annual challenge.
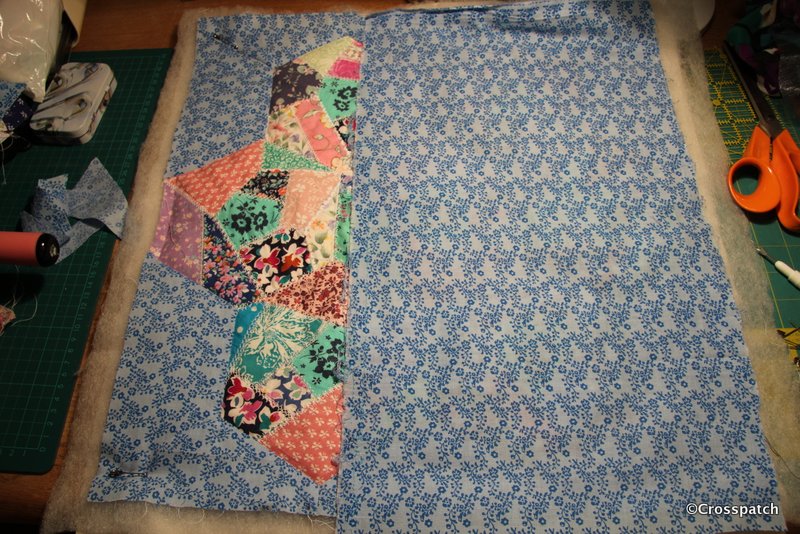
So the plan was to deconstruct it, well take the back off. I’d stitched it with a long stitch to make that easy. Put a zip in the back, instead of the envelope back that I’d had to do as a quick temporary fix.
Then I needed finish the white embroidery on the front, so that all the edges were finished in the same way.
Finally I top stitched round the edge, I do this a lot on cushions just to give definition to the edge and to make them fit the cushion pad better. I do like a plump cushion.
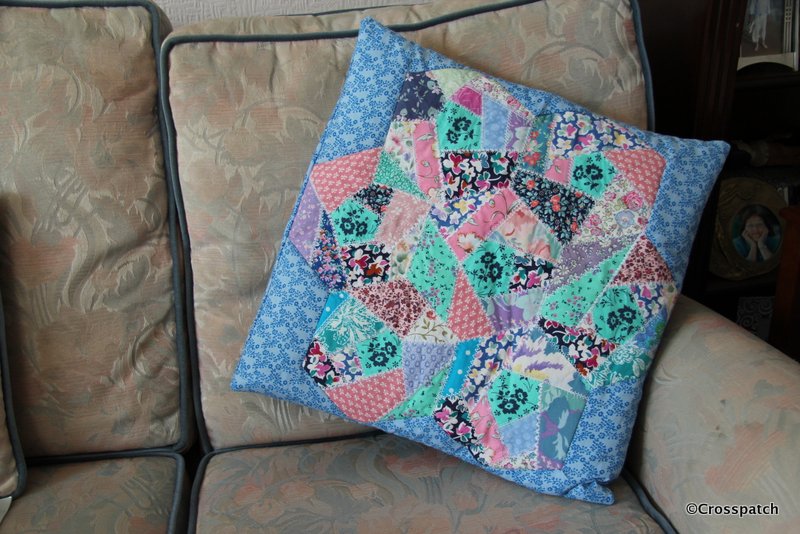
cushion for a Windsor chair
My cushion was made particularly to go to work with me to pretty up my office, but just as it was being made we were told we would soon be moving to a new “agile “ working environment where there would be 3 desks to 5 staff . The “personalisation of work spaces” would be frowned upon, or rather strictly forbidden. So my Crazy patchwork cushion will remain at home, and pretty up my new studio, on my Windsor chair with a view of the back garden.
The crazy patchwork cushion will also be submitted to my group’s biennial exhibition later this month, so that’s two items… see my next blog post for the third item.
I dread to think how many times I pieced and unpicked that border, and every time it was wonky.
30 years of scraps
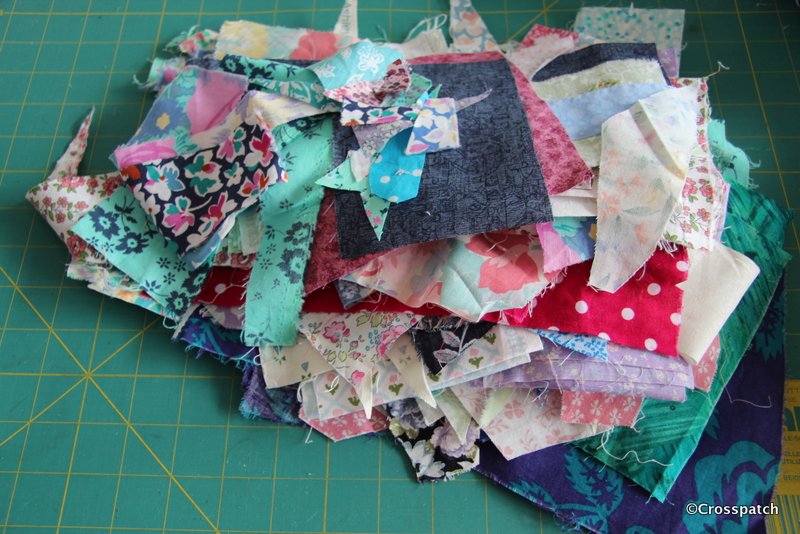
This year’s challenge from my Quilt group, was Crazy, put simply anything made from crazy patchwork, fill your boots. My plan was to collect silk ties to cut up, and I did buy a few from my favourite charity shop, but I soon realised that I would need a lot of ties, to have enough variety of colours and patterns, so back to the stash.
rejected scraps
I found a bag of scraps, (well three actually), sorted it into three piles, blue and white Laura Ashley scraps dating back to 1977, (of which more later), a pile of pastels some Laura Ashley of the same vintage and some from the 80’s, and a reject pile the colours of which would not meet the criteria for my piece, brown orange, cream etc.
always knew Geometry would come in one day
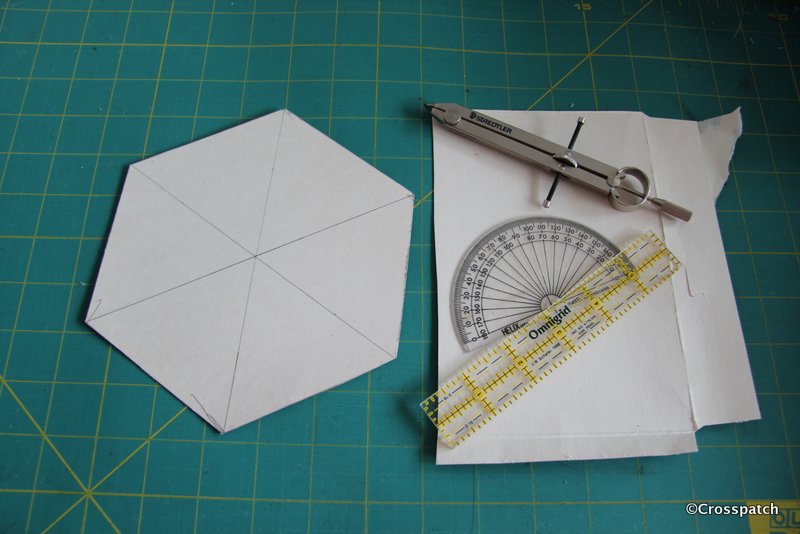
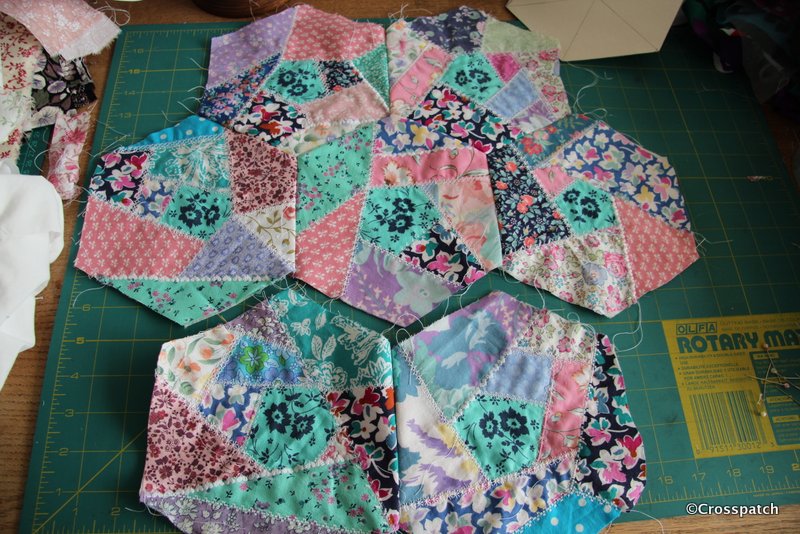
I wanted to work on small pieces which could be joined together in a larger piece, and had seen a number of crazy patchwork studies created as large hexagons, all I needed was a large hexie pattern. So out came the cereal packet, compass and ruler, not difficult, simply draw a circle, divide into 6 equal parts (60 degrees), and draw a line from radius to radius, where the circle intersects, to create a hexagon. The size of the hexagon was determined by the size of the cereal packet.
big mistake
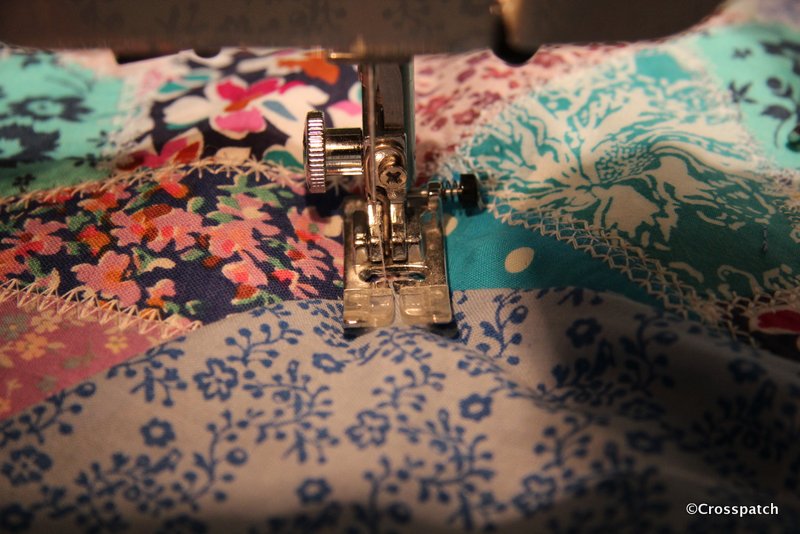
Initially I followed the advice in my only Crazy patchwork book, (big mistake, but excellent lessons) I cut and laid the pieces on a backing fabric cut from cotton calico (lesson one backing layer too thick). I overlaid the pieces by a eighth of an inch and then stitched them down with a fine zig-zag stitch using transparent filament, (mistake two, this is nasty scratchy stuff and leaves a ridge of stitching which then causes drag when using machine embroidery stitching on top).
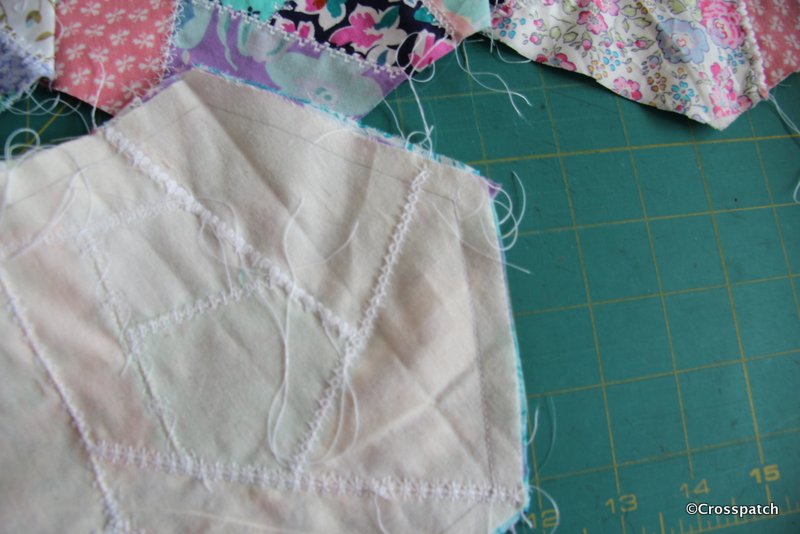
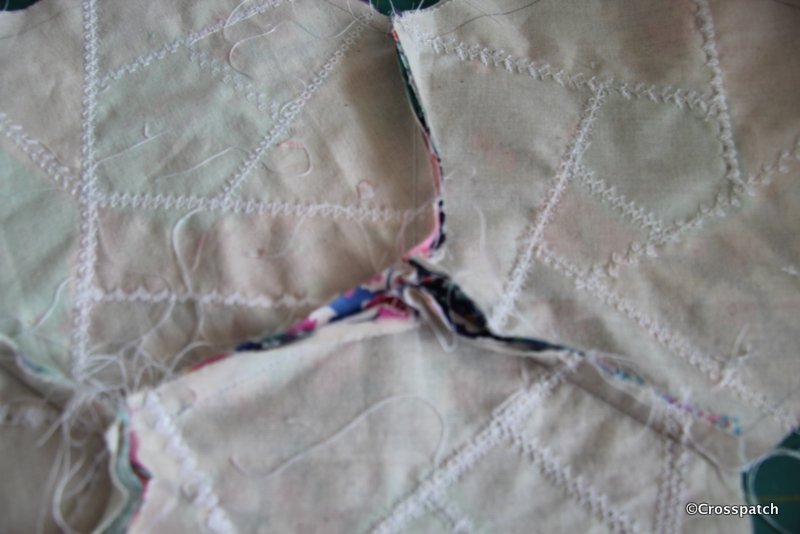
seen from the back
Running out of time (72 hours and counting) I realised using differing coloured threads to embroider the patches would take time I didn’t have and possibly require threads I didn’t have, so I decided I could pull the whole thing together and achieve balance by using one colour for the embroidery throughout, white.
I need seven!
As I picked the embroidery stitches to decorate my scraps I made my next mistake (number three), I didn’t try out every stitch on scrap before I began, and there’s no unpicking it afterwards! Had I tried them out first I could have adjusted the length and width of stitch to get the optimum look of the embroidery stitch. I would have also realised that the thread I was using would not work well with some of the more open, spidery stitches leaving a barely visible embroidery, a bold thread would have worked better (mistake number four).
always a fiddly task.
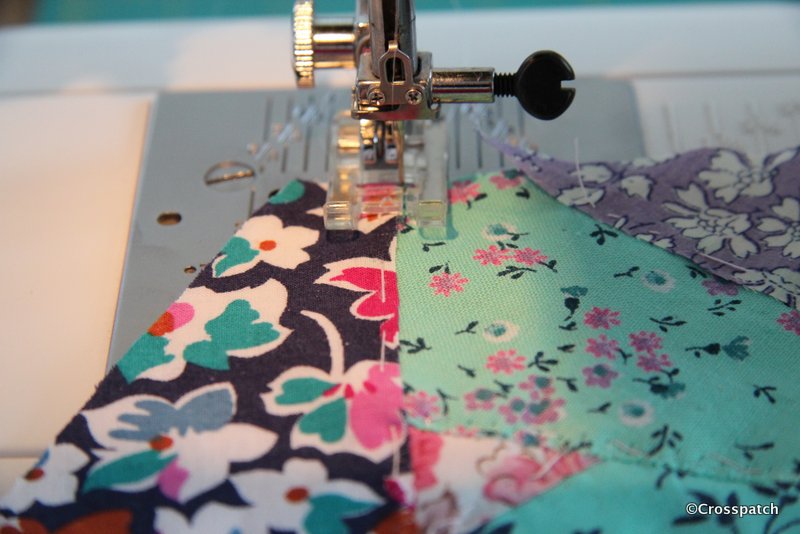
Now comes the fiddly bit, piecing the hexagons by machine, stitching into acute corners requires some skill, the trick is not to stitch right to the edge , leave yourself a quarter inch of wiggle room, it doesn’t matter if you leave a little hole at the corner, you will be embroidering over it anyway.
and now for my next trick
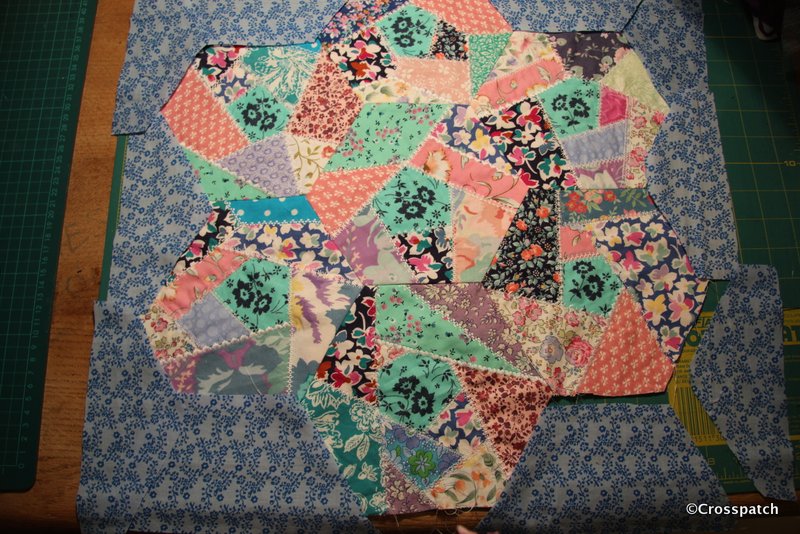
It’s at this time I discovered mistake number five, for some reason I can’t fathom I had only made 6 hexagons, and of course I needed 7, with only 48 hrs to go I didn’t have time to fiddle about with my previous method so I cut another hexagon in calico, grabbed some spray tack, sprayed liberally, cut up some scraps and dabbed them on in a haphazard way, forgot the filament zig-zag and completed with white embroidery. No mistakes and it turned out the best of the 7 hexies. Finally mistake number six , I then decided to piece the edge to create a square, all the blue sashing is made of part hexagons cut to fit around the edge, and pieced in. It would have been so much easier and quicker to applique to a straight piece of sashing. I dread to think how many times I pieced and unpicked that border, and every time it was wonky.
envelope back
Consequently I ran out of time to finish it properly, I should have put a zip into the back but I didn’t have one, nor time to buy one so I made an envelope back, which I don’t like and will replace, I stitched the final edge seam with a big stitch so I can unpick it easily, and the pieced sash edge has not been embroidered where it joins the crazy patches, so when I unpick it I’ll add more embroidery.
finished…ish
At least I managed to produce a “finished” piece of work to submit for the challenge, it didn’t win a prize. That’s ok ,I wouldn’t have quibbled with the judges decision and loved the crazy bag made by Anne Thistlethwaite which won. Well done Anne.