Paradise is a garden

I have to say there is something wonderful about sitting in our garden in the summer rain.

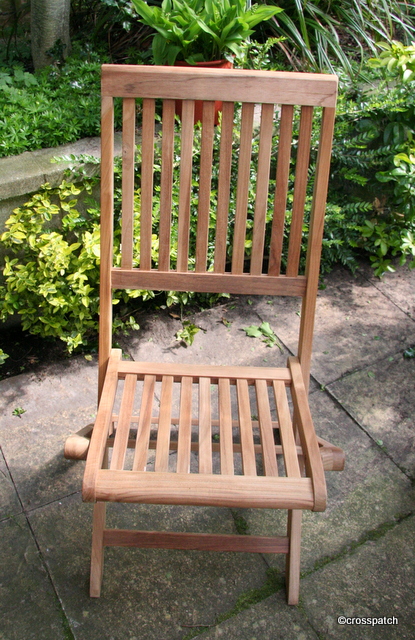
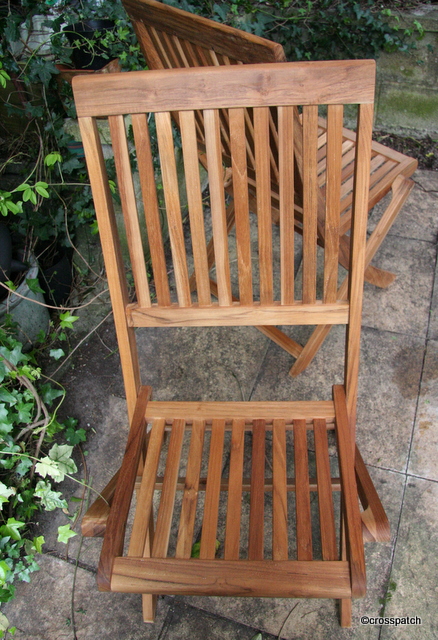
Our Garden furniture has been looking rather tatty for a couple of years now so we decided to treat ourselves to new ones; a table, chairs and a parasol to afford shade or shelter according to the weather. Getting rid of the old ones presented a greater challenge than expected, we couldn’t get the table down the side path; too wide, and it wouldn’t go through the house either, same reason. The bolts too rusted to easily take apart we came up with a canny solution… wait till the neighbours went out, then passed the table over the fence, past the too narrow place, and back over the fence…shhhh, don’t tell. The new ones all fold up for easy storage, so we won’t have that problem again.

paradise in my own back yard

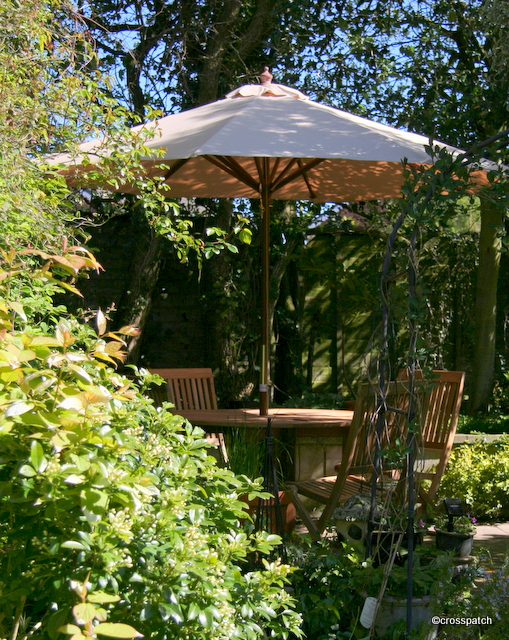
I’m not sure what we planned to buy when we began looking but we did shop around before we bought, did we want rattan… no, too likely to get dirty given the secluded position under trees, did we want glass and steel…Nope, too fancy and likely to rust in our damp climate. Wood then…hmm, maybe, maybe not, which wood? What about mosaic topped and painted metal? We finally decided on wood, but teak, not a cheaper alternative and something which could be easily stored indoors for the winter to extend its potential life. My Dearest insisted on an HUGE parasol, so that he can sit in the garden even when it’s raining and not get wet. I have to say there is something wonderful about sitting in our garden in the summer rain, paradise is a garden.

chair before teak oil

Being teak, I decided to give the furniture a coat of teak oil to help preserve it, my Dearest having determined to have nothing whatever to do with any noxious substances, said that was my job…as ever.
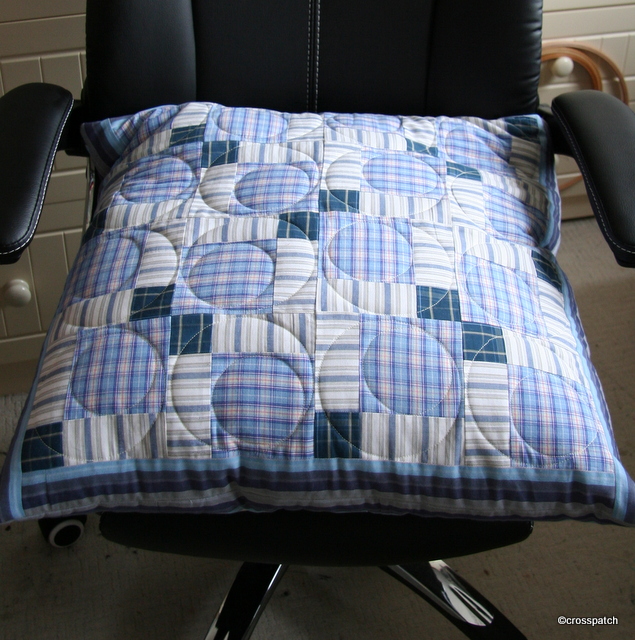
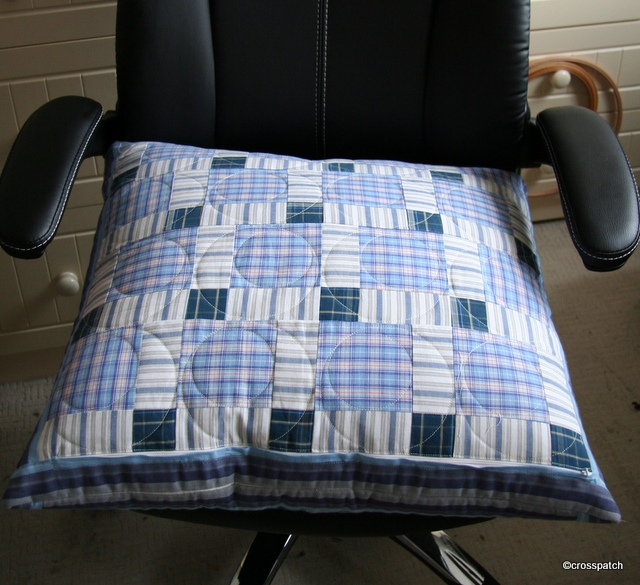
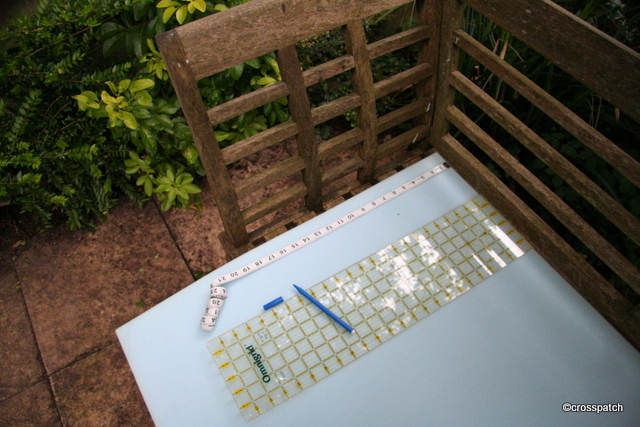
Next task making cushions to go on the furniture, we could have bought the cushions sold with the furniture, and I did like them very much, but I could not justify the expense, four small chair cushions and a bench cushion would have cost as much as 2 chairs! How much!!!

and after
and after

So off to town on Saturday for some upholstery foam, and to a local factory shop for suitable striped fabric, now all I need to do it cut the foam to fit, and cover with my chosen fabric.

yet another job for me

With what’s left of the fabric I may make some more bunting or some softer scatter cushions. All told I think I will have saved £40 or more, if I don’t cost in my time, but then I didn’t have anything else to spend my time on now did I?

easy cut to fit
easy cut to fit

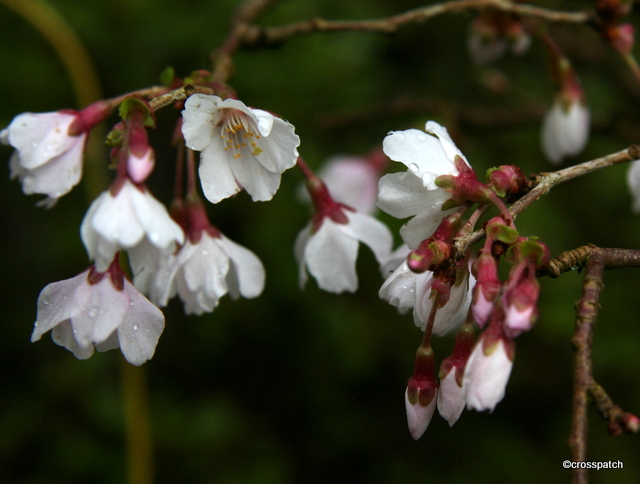
One thing I did find time for, down at the bottom of my street runs a little stream, and on the bank the City Council has planted the most beautiful cherry tree which is in full bloom, so on Saturday when the sun shone all day in a clear blue sky, I took the time to walk down to the stream with my camera.

white cherry blossom

finished the embroidery… now what

I didn’t want to use the wrong red for the borders, it would niggle me, forever.

1-IMG_6189

So now I have finished the embroidery on this piece, I need to decide what to use it for, I have two embroideries each a different size. I think I want to make one cushion from the two pieces, so I need to size them up. Putting wider borders on the smaller piece and a narrower border on the larger piece, but a definite border on each.
I already had a piece of plain red, but it was a little too dark, not a good crimson like the gingham; having put so much effort onto the embroidery I didn’t want to use the wrong red for the borders, it would niggle me, forever.
So off we went to my local fabric shop hoping but not expecting to find a good match… I was in luck, not only did I find a fine crimson 100% cotton fabric which was an excellent match, I also found a bolt of 100% cotton blue and white gingham £2.99 a metre in the sale, I bought the lot, £15 for 5m of fabric, bargain!

see the border fabric to the left

That morning we had planned to go to the Lake District, on a recce to find suitable holiday accommodation , but we opened the curtains to sunshine and hailstones…big icy chips of frozen rain, so the trip was off. To cheer myself up and remind myself that spring really is just around the corner I took my camera out to the garden, to find a few spring flowers.

cherry blossom
cherry blossom

spring is going to be earlier this year than it was last, I hope.

Primroses
Primroses

A new technique; Broderie Suisse

Then I began something more ambitious …

Bargain: embroidery hoops

I recently bought a collection of embroidery hoops, £2 for 5 at my local charity shop. I’m making a collection, not that I do embroidery you understand, the idea was to use them to showcase some of my beautiful fabrics, the ones I can’t bring myself to cut up, by using the hoops like picture frames and hanging them in groups on the wall of my studio.

showcasing favourite fabrics

See this one with a piece of patterned silk which my mother gave me.

everything I need
everything I need

I also had two pieces of red and white gingham, which had been languishing under the lamp table beside the sofa since Christmas, it had been used to wrap small gifts and being an avid recycler I could not bring myself to throw it away.

Then on Pinterest the other day I stumbled upon Broderie Suisse, (or chicken scratch) and thought….hmmm.

first attempt
first attempt

Embroidery silk… no problem, I have a large tin full under the bed… backing, because the gingham is a bit flimsy… no problem, I have some old sheet which will do… embroidery hoop… what size? I have plenty in varying sizes. Working from the photographs I found on Pinterest, because most of the tutorials are not in English, I made this little heart shaped embroidery.
Then I began something more ambitious …

lets try something on a bigger scale

When it is complete, I think I will make it into a cushion, perhaps a hop pillow, or a sleep herbs pillow, with herbs cut from my own garden, and dried.

Counselling with benefits; cheaper than therapy

It’s certainly cheaper than therapy, and I get to give as well as receive.

I have been going to the same hairdresser for more than 20 years, every 5 weeks  I go and get my grey roots covered, I often see the same fellow customers who have also been customers for years, it is like a self help group. We have shared our ups and downs getting sympathy and advice, and giving it in return, sharing knowledge or simply a sympathetic ear. No doubt  I am talked about when I’m not there but I don’t mind, if my experiences can be of help, or dire warning to others all well and good, and if it merely gives folks something to laugh at that’s OK too. It’s certainly cheaper than therapy, and I get to give as well as receive.

furnishing silks 3
furnishing silks 2
furnishing silks 1

People also give what they have and don’t need, to those who might make use of it, and this is how I came to acquire some furnishing fabrics.  They are multi coloured samples of a heavy silk weight, probably polyester, which I think I can use for foundation piecing.


printed foundation

When I was emptying my cupboard , in order to move it without doing ourselves an injury, I found these pre-printed foundation patterns. I think I will make a rainbow coloured quilt from the silks.  It will turn out quite stiff, so it may end up being a wall hanging or maybe it could be a bag…… decisions …decisions.

My lost fabric materialised too late.

a number of lost treasures which had fallen down the back, a few socks, a scarf, and my precious stash of special fabric. So that was an unexpected piece of good fortune.

The fabric which I had been seeking for months, the fabric I wanted to use to make a quilt for a good friend of mine, it turned up the moment I gave up seeking it. Isn’t it always the way? A cupboard which usually stands at the bottom of the stairs, and holds that part of my stash which I’m not planning to use any time soon, needed to be moved.

We had invited my parents to join us for Christmas dinner which meant the dining table needed to moved to the dining room from the sitting room where it normally lives ( long story, don’t ask), and the two arm chairs which normally live in the dining room, had to move to the sitting room.  The Christmas tree which would normally be put up in the dining room, would not fit in there this Christmas, so we decided to set it up in the hall; the only place it would fit was the spot where the cupboard was standing.

The cupboard clearly had not been moved for some time, and once moved there were a number of lost treasures which had fallen down the back, a few socks, a scarf, and my precious stash of special fabric. So that was an unexpected piece of good fortune.  ( Note to self, clean behind furniture more often.)

Turned up at last
Turned up at last

This is a charm pack of squares, which I need to put together with another bought fabric to tie them all together, and an accent colour to brighten them up a bit, I originally thought of using the terracotta fabric I’ve placed them on but it isn’t right, it just isn’t looking good, so I might see if I can find a mushroomy grey beige for sashing, and a guacamole or mushy pea green for the accent.

44 Days Later : Coffee Orange Liqueur

The Damson Gin was DIVINE, like liquid Damson, not too sweet, doesn’t taste of alcohol it just tastes of the most wonderful, concentrated damson flavour

Christmas Eve and I needed to decant my macerating liqueurs in time to give them as gifts and enjoy them myself. The first task was to prepare the bottles. I’d put aside some half and quarter litre bottles, which I’d bought specially for the task, they were full of wine at the time, but I soon put paid to that, I needed the bottles, but they come free when you buy the wine and it would be a shame to waste it.

presto, clean bottles

Getting the labels off is easy, soak in hot water till the label is soaked and the glue underneath it warmed, so it peels off easily or at least scrapes off easily with a thumb nail, if there is residue left I have a great trick which I got from Pinterest. Rather than use Sticky Stuff Remover which is petroleum based and toxic , so not a good thing to use on bottles for consumables, I use plain old cooking oil made into a paste with bicarbonate of soda. Rub on… rub off, wash it with liquid soap, Presto, crystal clean bottles.

44 days later
44 days later

First I strained the Coffee Orange Liqueur through muslin, the smell was incredible, and very conveniently when I had bottled it there was just enough to fill a glass to taste it before I made it into stocking fillers.
The glass was a bargain, another charity shop find, 4 little Victorian sherry glasses, £2, and another 2 crystal liqueur glasses, a pound each, they will be going in stockings along with the liqueurs, just in case the recipients don’t have a suitable glass to serve it in.

little Victorian Glass

Then I strained the Damson gin off the damsons (which I then heated in a pan, to burn off the alcohol, they look like mini prunes, and will be going on my morning porridge ) and strange to say when I had bottled the Damson gin, there was again just enough to fill a glass to quality check the produce, how lucky is that?

Damson Gin
Damson Gin

The Coffee Orange Liqueur is lovely, but the Damson Gin is DIVINE, like liquid Damson, not too sweet, doesn’t taste of alcohol it just tastes of the most wonderful, concentrated damson flavour, which is pretty hard to beat, particularly in something “homemade”.

Stocking fillers, ready to go

Return to sender, for refill

The stocking needed …(a gift tag)… with very specific instructions, to return the stocking to sender for an annual refill.

Christmas Sparkle
Christmas Sparkle

The Angels have all been outlined in gold thread to give them some shape and depth. Some of the stars stitched to hold the layers together, and the continents outlined too. Then the two sides stitched together, a ribbon tucked into the back edge to allow the stocking to be hung up; the excess wadding trimmed off and the seam allowance snipped where needed on the curves to allow the stocking seams to lie flat. I hand rolled and stitched the raw edges of the seam allowance to neaten the inside.

return to sender
return to sender

This stocking needed two gift tags one to identify the planned recipient and wish her a Happy Christmas, and the other with very specific instructions, to return the stocking to sender for an annual refill. Each panel had a medallion printed on it, a sun and a moon, which I wanted to use to make the gift tags. Problematically they were largely but not accurately round, I initially planned to force the medallions onto a circular shape but realized that I would lose the integrity of the design, so they finished up with all of the design intact but a rather wobbly, not quite round tag. I cut a circle of wadding first, applied it to the back of each medallion, and stitched it down with a little gold thread, then took a plain piece of the panel and wrote my messages on with a laundry marker, sadly the marker did not enhance my hand writing, it kept running dry and had to be retraced, but it’s the sentiment which matters, not the wobbly hand in which it is written. The two sides were stitched together with a gap at the top and turned out, a ribbon attached and the small gap closed with hand stitching. A line of gold top stitching holds the edge flat and secures the ribbon.

coins and an orange
coins and an orange

What to put in the stocking? Traditionally it should be a few coins and an orange, or in this case chocolate gold coins, and a Terry’s Chocolate Orange. I won’t tell you what else is in the stocking, the recipient should be the first to know and I’d hate to spoil the surprise. I had planned to deliver the stocking today but yesterday my car decided to make ominous noises, bump, thud, bang, metal screeching on metal so I had to stay off the road today until I could get it fixed.

Oh Dear, parking brake spring disintegrated into rear nearside brake disc, much damage done, big bill, but back on the road, thankfully.

ready to go
ready to go

Hurry up, Christmas is coming

so I put the fabric aside in a safe place till I was ready to begin….but where?

For months now I have been searching without success for a stash of fabric I had put aside to make a quilt for a friend for Christmas, I had planned to make it last year but ran out of time and energy, so put the fabric aside in a safe place till I was ready to begin….but where? I can’t find it anywhere, and I guess even if I did now, I would not have time to make even the simplest quilt. I even pulled out one of my UFO’s and considered finishing it for her but decided not, I love her dearly, she deserves her own quilt conceived and made specifically for her, in her colours. It doesn’t have to be now and it shouldn’t be rushed or ill conceived, besides I am still having ideas about it, so clearly it is not yet a done deal.

£2.99 Oxfam, Kendal
£2.99 Oxfam, Kendal

However I am making something for her, her own stocking. I found in a charity shop some weeks ago a printed panel for a Christmas stocking, and bought it for £2.99, I guess it would have been £5 to £10 pounds or more to buy in a quilt shop.
I cut the two sides apart and cut out the shapes with a centimetre seam allowance, it needs to be greater than a quarter inch because I will use the seam allowance turned in on itself to neaten the seam. I will sew it at 5/8ths and this will ensure no white will show at the edge.

press before you sew

I cut a lining from a plain white fabric I had to hand and a piece of wadding for each side, and sewed all three together along the top edge the front and the lining right sides together, with the wadding on the back.

not a wadding sandwich


Then the wadding was trimmed back as close to the seam as possible , and the printed panel flipped over so that the wadding is now in the middle. I neatly pinned the top edge then tacked it to ensure the lining did not roll out and show above the printed panel. I will top stitch when it has been tacked together to keep the top edge stable.

stabilise the top edge


Having tacked all three layers together I am now in the process of quilting the layers together with a gold machine embroidery thread to add a little Christmas sparkle.

a little sparkle to be added

Just 44 days required

After 44 days, strain the liquid off the orange, decant into bottles, and enjoy chilled.

I have always enjoyed making things for Christmas, either to offer guests or maybe as presents, this year I have a number of liqueurs macerating in jars in the downstairs powder room, it’s cool and north facing.
This is one that really intrigued me, I found it on a website http://www.instructables.com and just had to try it.

Vodka an Orange and some expresso coffee beans

It is a traditional European aperitif made using an orange, coffee beans, sugar, and grain alcohol (vodka can also be used if you can’t get grain alcohol)

shake everyday till the sugar is dissolved

Wash your Orange first. Make 44 holes in the orange and poke a coffee bean in each opening. Then put the orange in a jar.(I’m using a jar I picked up in my local charity shop for 50p) Fill the jar with 4 cups of grain alcohol/vodka. Then add your sugar over the top of the alcohol. The original recipe called for 44 sugar cubes but 6 tablespoons of sugar is enough.

 22 days to go
22 days to go

You will need to store it for 44 days in a dark, cool place before removing the orange/coffeebeans. Be sure to shake it up every once in awhile to ensure the sugar dissolves. Do remember to make a note of the date you started, or make a note on your calendar of when it will be finished.
After 44 days, strain the liquid off the orange, decant into bottles, and enjoy chilled.

a completed task

Back to the drawing board then, what does a girl have to do to get some appreciation around here?

finished cushion:front

The two sides were quilted in circles using a CD and a circle cut from card as my quilting guide, and the zip carefully set into one side.the wadding cut back and the lining turned under and slip stitched to the zip fabric, to allow the zip to run. The whole thing then stitched round and turned out through the zip opening. Had the cover turned out to be too big, I would have top stitched around the edge to adjust the size, but it worked out just right.
So I finally finished the cushion, and proudly presented it to the 13 year old to be met with an unimpressed grunt, such is to be expected from a teenager.
The next day I noticed he wasn’t using it, “its scratchy” he tells me… it is so soft to the touch because it’s made from recycled, well washed fabrics!
Finally he asked could it be made smaller, could I “cut a bit off all round” so it will fit on the chair better? I admit I made it to fit the cushion I had, rather than the chair. Back to the drawing board then, what does a girl have to do to get some appreciation around here?

finished cushion: back