I’m always on the lookout for Haberdashery; buttons for instance, so I was really pleased to find this tin full of buttons some of them quite old, for £2 at a car boot fair.
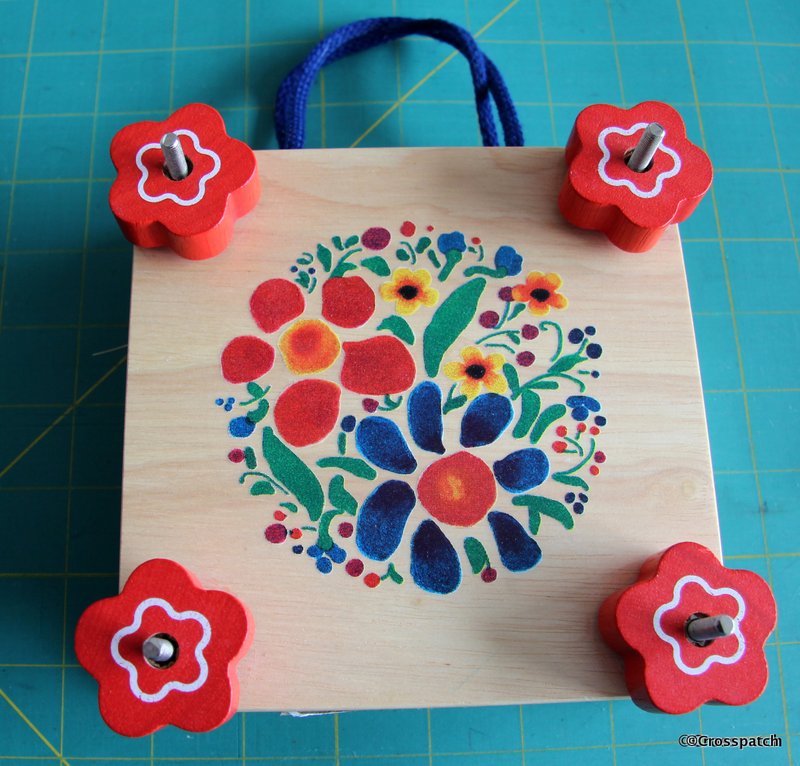
flower press
Don’t you just love a bargain? I do, let me show you what I have found recently, more thrifty buys. A few months ago I came across a lady teaching paper making. I’ve always wanted to have a go at that so when she offered to sell me a kit I could not resist it. To make paper with pretty little organic inclusions in it you need organic matter, flower petals for instance.There were some in the kit, but I thought I could make some of my own from the flowers in my own garden. If you just collect petals they will dry up and discolour, they need to be pressed to preserve shape and colour. My dearest suggested I buy a flower press but I reckoned I could find one in a charity shop, and a few weeks later… presto £1 in my local charity shop. It even came with pressed flowers in it. I have a good collection of flower petals in the press waiting till I have time to get out that paper making kit, cold wet winter weekends are just around the corner.
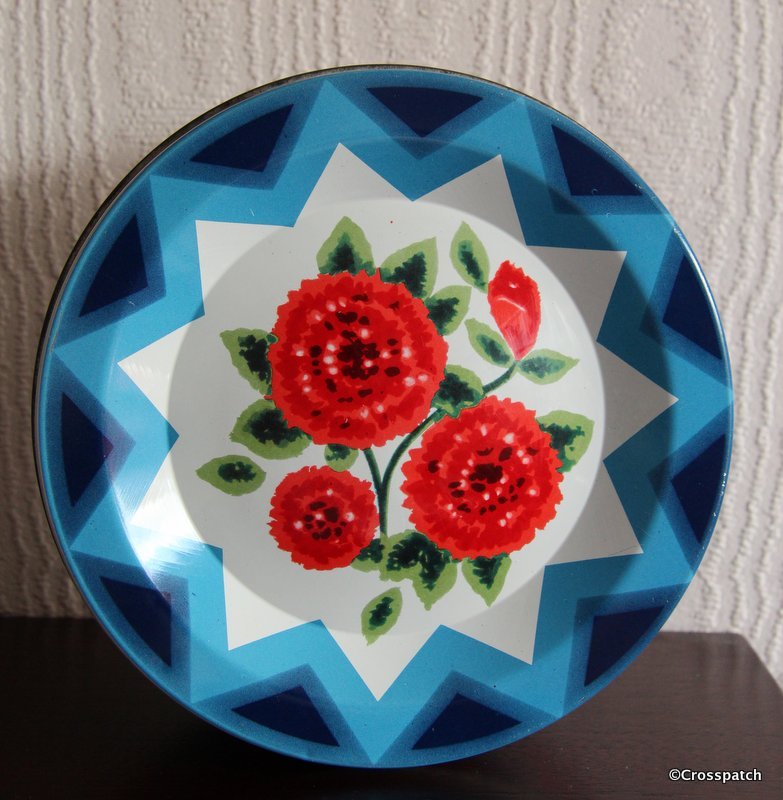
button tin
I’m always on the lookout for Haberdashery; buttons for instance, so I was really pleased to find this tin full of buttons some of them quite old, for £2 at a car boot fair. I guess there must be easily £20 worth of old buttons which I can sell, and the tin is vintage, in really good condition it’s a 1960’s Quality street tin. A similar one on Etsy is selling for £4.99. Maybe I should open my own Etsy shop.
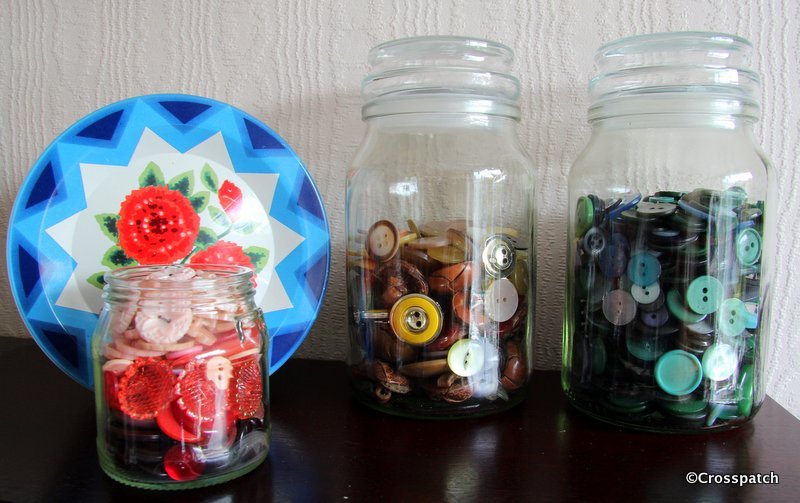
button jars
A few days later I found a plastic bag full of buttons also £2, some of which are also quite old, together with the ones in the tin there was enough to fill all of these jars. I might sell the old ones, the Victorian and Art Deco ones, and use the others for embellishments on patchwork or fabric pictures. I’m really pleased with my thrifty buys. It doesn’t take much to please me when it comes to craft materials, my thrift shop bargains.
no little beads clinging to every surface, my hands, my clothes… if you’ve ever had dealings with polystyrene beads you’ll know what I mean.
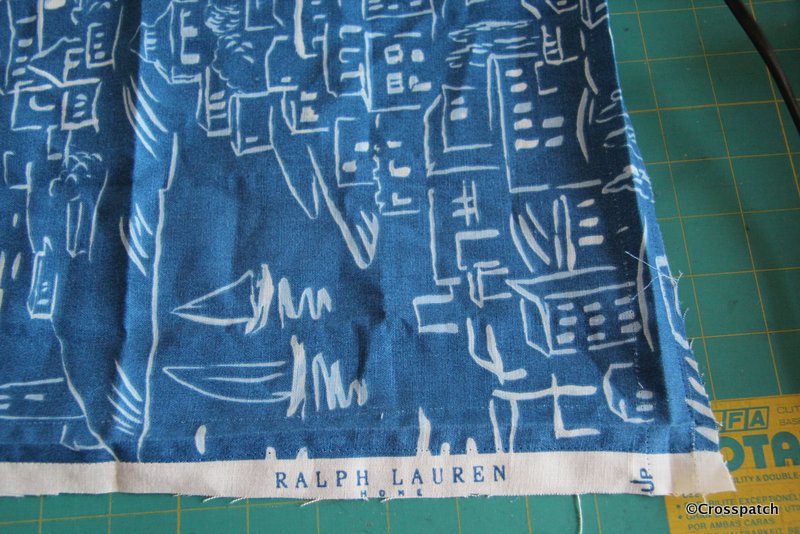
freebie fabric
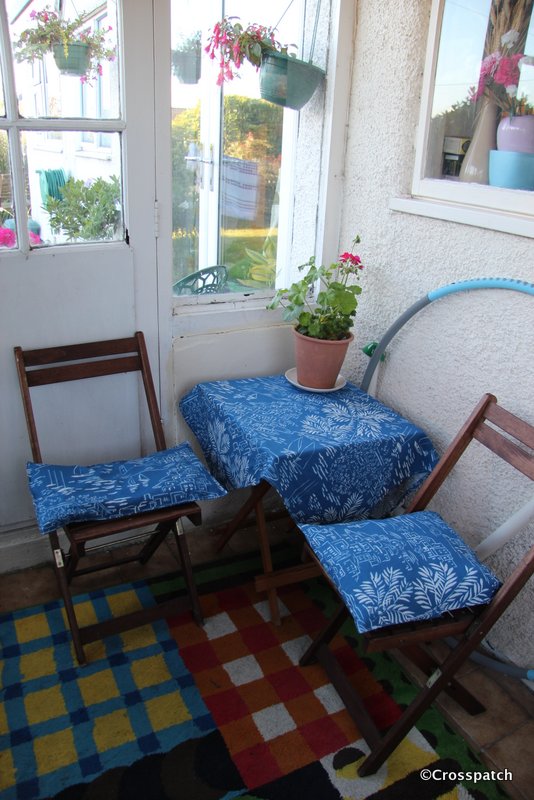
In the middle of developing an idea about making a beanbag support for my camera I visited my sister and whilst telling her all about it she showed me her new make. She had been to the wonderful factory shop we have locally which sells designer furnishing and dress weight fabrics, and bought a small amount of Ralph Lauren Home fabric. She had made cushions and a table cloth to spruce up her porch, to make it into somewhere she could sit when the sun is shining but not quite warmly enough to be outside. She had a small amount left which she gave to me, because it was just the size I needed for my project. I’m such a lucky sister.
Inside/outside sitting area
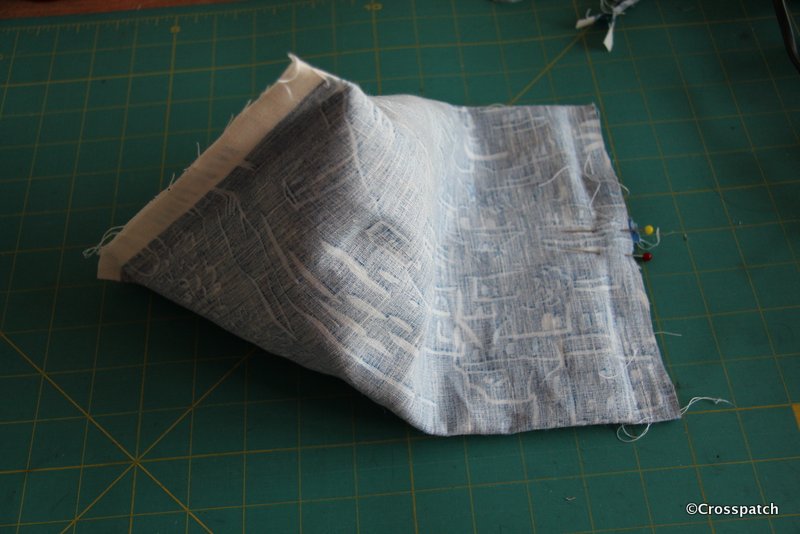
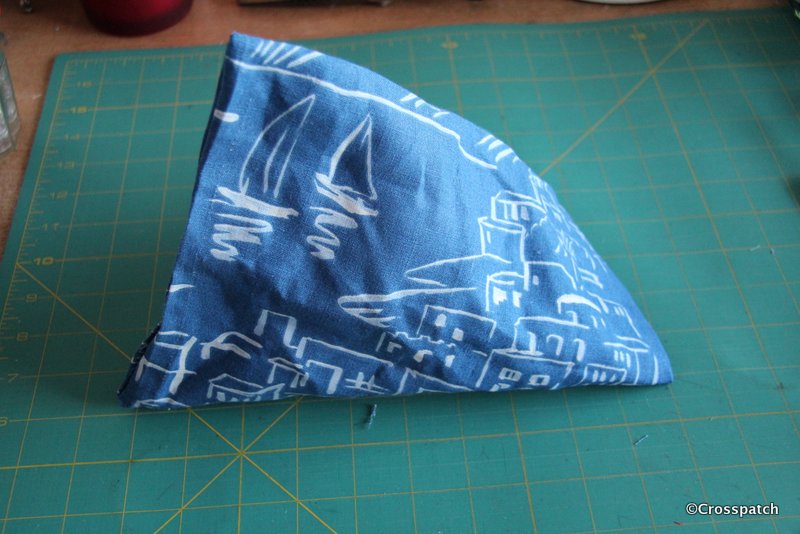
So I made a beanbag, by turning the fabric into a tube and then stitching the end seams at 180 degrees to one another to create a little humbug shaped beanbag cushion, leaving a gap at one end for the filling.
make a humbug beanbag
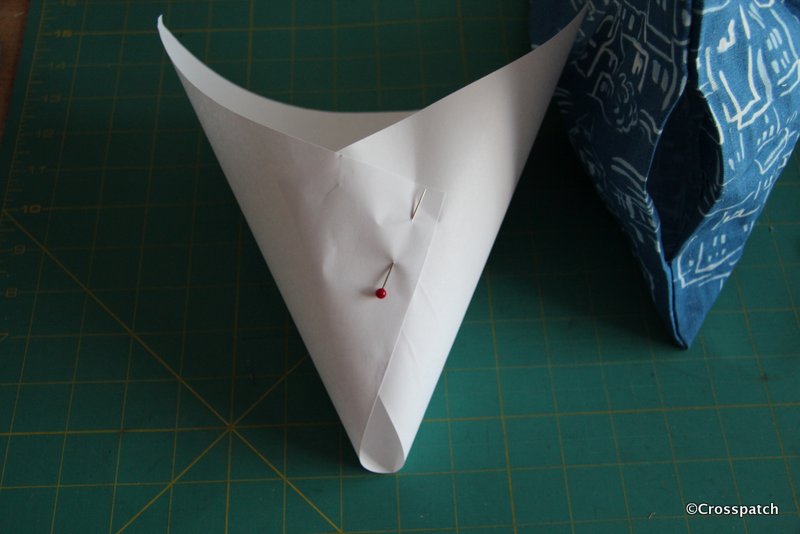
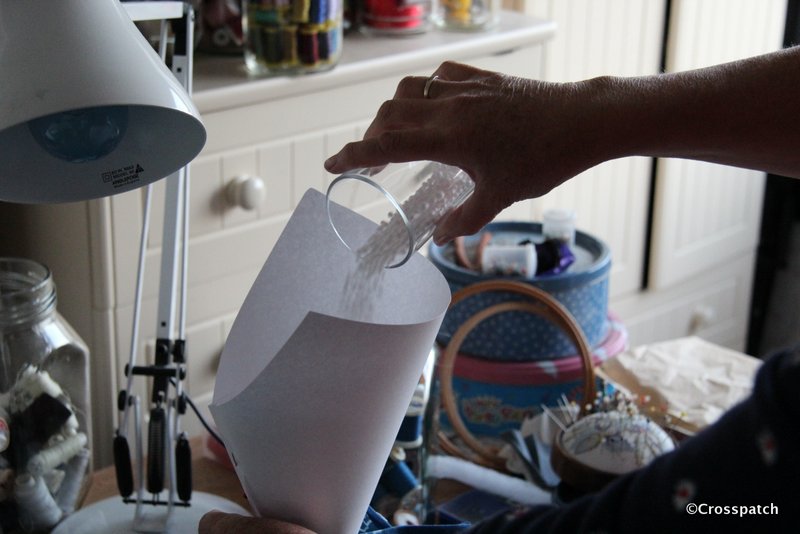
I turned the beanbag right sides out, and made a paper funnel out of some scrap paper to fill the bag with.
paper funnel
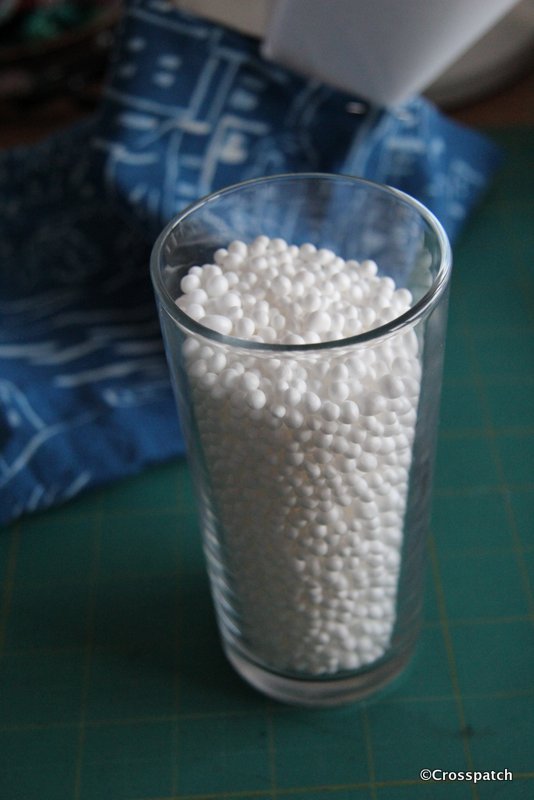
The beanbag is filled with polystyrene beads, which I have recycled from an old beanbag seat that was bought for the 15 year old to sit on when he has a little lad, and which has lain forlorn and unused in my studio for longer than I care to admit (my excuse is I always knew it would come in handy one day). l could have used rice or beans but I wanted it to be as light as possible, because my camera kit is already heavy enough.
polystyrene beads
I scooped a glassful of beads from the old beanbag seat, then holding the funnel inside the bag with one hand it was really easy to pour the polystyrene beads into the bag, encountering very little problem with static cling. There were a few beads left in the bottom of the glass, probably because I didn’t dry it properly, but no little beads clinging to every surface, my hands, my clothes… if you’ve ever had dealings with polystyrene beads you’ll know what I mean.
filling the beanbag
It just needed a machine stitched closure, to make sure it won’t bleed little beads all over the place and it’s done.
beanbag
and what’s the point of all this I hear you wondering? It’s my own take on beanbag camera kit. At the time I had just bought a telephoto lens for my camera, and at 300mm you can’t really hand hold without getting camera shake. I have a tripod but don’t really want to hump it about with me, it’s rather heavy and my hips and knees are getting arthritic so the weight is a problem. This light as air little cushion allows me to set up my camera on a wall or fence post and take pictures without camera shake… if there is a handy wall at the right height.
camera on a wall
Subsequently I bought myself to a monopod but I still carry the beanbag, it weighs nothing at all and cost me nothing but a little time and ingenuity. My sister is also a keen photographer, I wonder if she might like one…and then my niece… but then I have an idea for a slight design adaptation… watch this space.
I dread to think how many times I pieced and unpicked that border, and every time it was wonky.
30 years of scraps
This year’s challenge from my Quilt group, was Crazy, put simply anything made from crazy patchwork, fill your boots. My plan was to collect silk ties to cut up, and I did buy a few from my favourite charity shop, but I soon realised that I would need a lot of ties, to have enough variety of colours and patterns, so back to the stash.
rejected scraps
I found a bag of scraps, (well three actually), sorted it into three piles, blue and white Laura Ashley scraps dating back to 1977, (of which more later), a pile of pastels some Laura Ashley of the same vintage and some from the 80’s, and a reject pile the colours of which would not meet the criteria for my piece, brown orange, cream etc.
always knew Geometry would come in one day
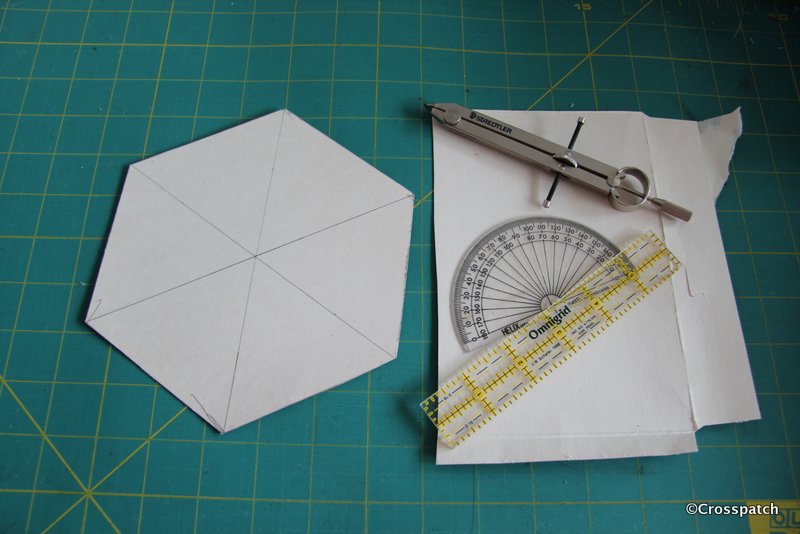
I wanted to work on small pieces which could be joined together in a larger piece, and had seen a number of crazy patchwork studies created as large hexagons, all I needed was a large hexie pattern. So out came the cereal packet, compass and ruler, not difficult, simply draw a circle, divide into 6 equal parts (60 degrees), and draw a line from radius to radius, where the circle intersects, to create a hexagon. The size of the hexagon was determined by the size of the cereal packet.
big mistake
Initially I followed the advice in my only Crazy patchwork book, (big mistake, but excellent lessons) I cut and laid the pieces on a backing fabric cut from cotton calico (lesson one backing layer too thick). I overlaid the pieces by a eighth of an inch and then stitched them down with a fine zig-zag stitch using transparent filament, (mistake two, this is nasty scratchy stuff and leaves a ridge of stitching which then causes drag when using machine embroidery stitching on top).
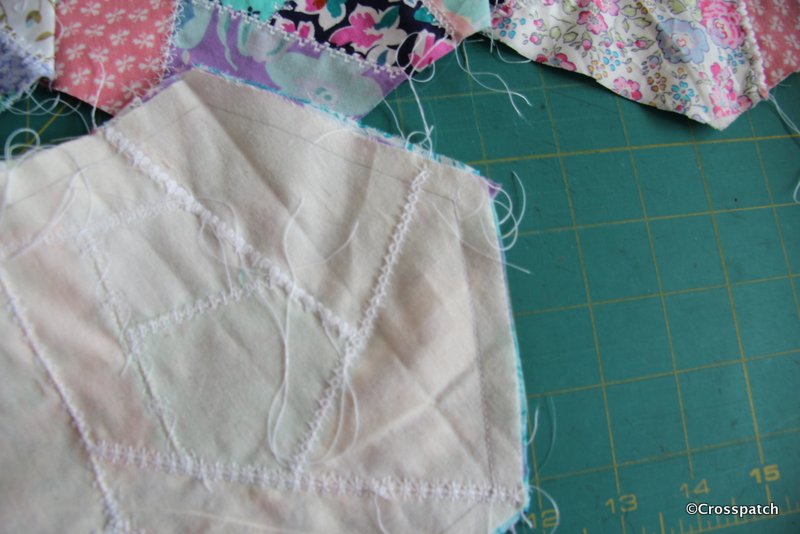
seen from the back
Running out of time (72 hours and counting) I realised using differing coloured threads to embroider the patches would take time I didn’t have and possibly require threads I didn’t have, so I decided I could pull the whole thing together and achieve balance by using one colour for the embroidery throughout, white.
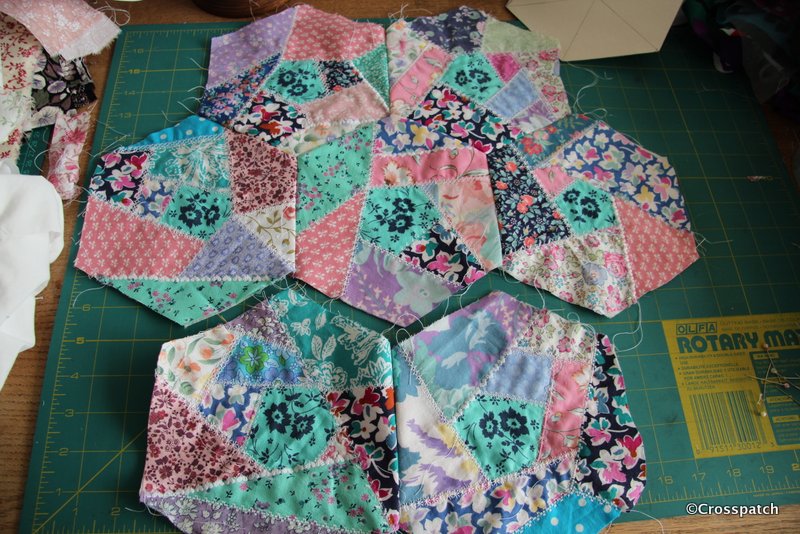
I need seven!
As I picked the embroidery stitches to decorate my scraps I made my next mistake (number three), I didn’t try out every stitch on scrap before I began, and there’s no unpicking it afterwards! Had I tried them out first I could have adjusted the length and width of stitch to get the optimum look of the embroidery stitch. I would have also realised that the thread I was using would not work well with some of the more open, spidery stitches leaving a barely visible embroidery, a bold thread would have worked better (mistake number four).
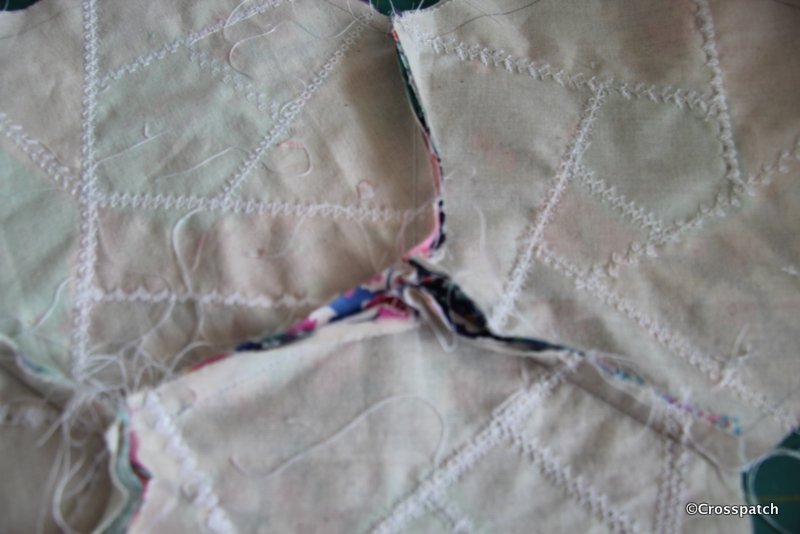
always a fiddly task.
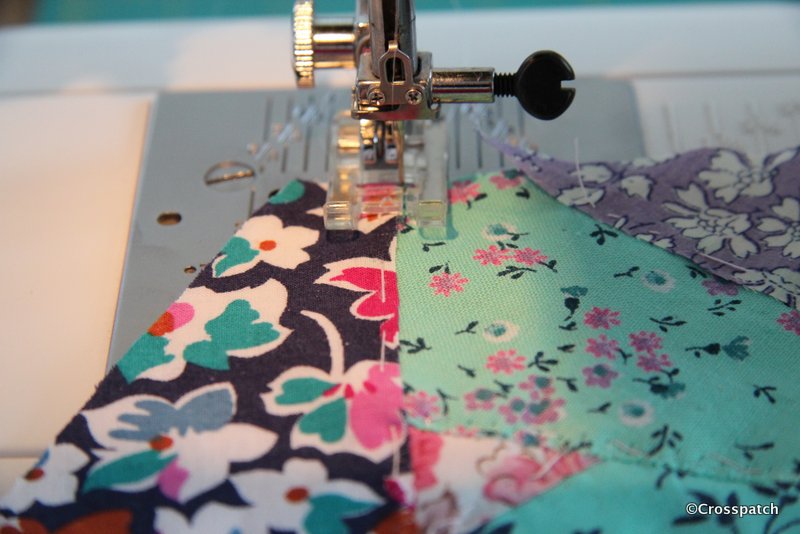
Now comes the fiddly bit, piecing the hexagons by machine, stitching into acute corners requires some skill, the trick is not to stitch right to the edge , leave yourself a quarter inch of wiggle room, it doesn’t matter if you leave a little hole at the corner, you will be embroidering over it anyway.
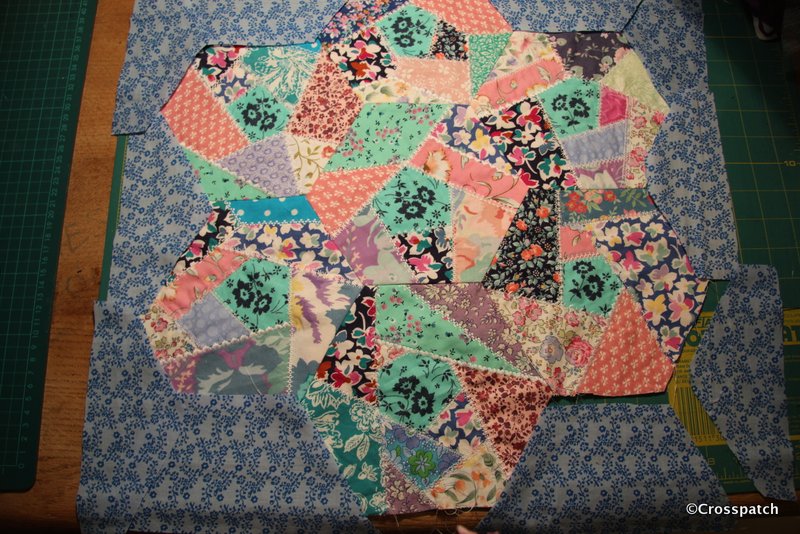
and now for my next trick
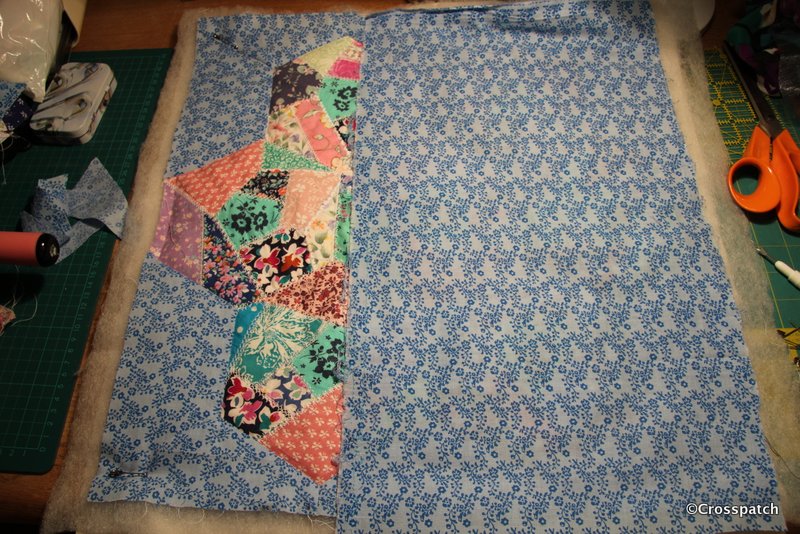
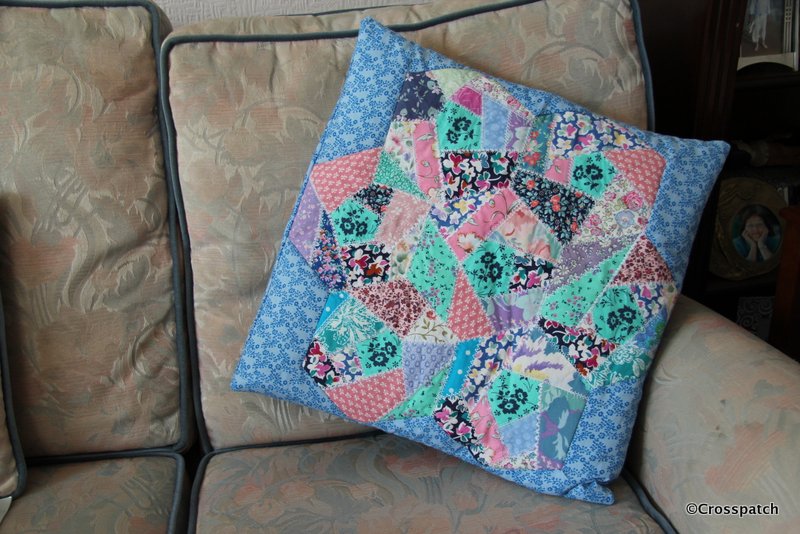
It’s at this time I discovered mistake number five, for some reason I can’t fathom I had only made 6 hexagons, and of course I needed 7, with only 48 hrs to go I didn’t have time to fiddle about with my previous method so I cut another hexagon in calico, grabbed some spray tack, sprayed liberally, cut up some scraps and dabbed them on in a haphazard way, forgot the filament zig-zag and completed with white embroidery. No mistakes and it turned out the best of the 7 hexies. Finally mistake number six , I then decided to piece the edge to create a square, all the blue sashing is made of part hexagons cut to fit around the edge, and pieced in. It would have been so much easier and quicker to applique to a straight piece of sashing. I dread to think how many times I pieced and unpicked that border, and every time it was wonky.
envelope back
Consequently I ran out of time to finish it properly, I should have put a zip into the back but I didn’t have one, nor time to buy one so I made an envelope back, which I don’t like and will replace, I stitched the final edge seam with a big stitch so I can unpick it easily, and the pieced sash edge has not been embroidered where it joins the crazy patches, so when I unpick it I’ll add more embroidery.
finished…ish
At least I managed to produce a “finished” piece of work to submit for the challenge, it didn’t win a prize. That’s ok ,I wouldn’t have quibbled with the judges decision and loved the crazy bag made by Anne Thistlethwaite which won. Well done Anne.
I love being able to mend and customise, fix my mistakes, and make something usable out of left over scraps from another project, retrieve the torn and damaged, create something usable out of what otherwise would be thrown away.
So what do you do when you have bought things for Christmas which turn out to be the wrong size? I recently had two such mistakes to solve, I bought my Dad a pair of soft jersey pants, which he finds comfortable to wear at leisure, but they had cuffs at the ankle and were too long, not a good look. Saggy grey cotton jersey doesn’t really suit anyone, no matter how old. I cut the cuffs off and finished the raw edge with an overlock stitch and double stitched hem. Problem solved, pants no longer sagging in the legs.
we need bigger slippers
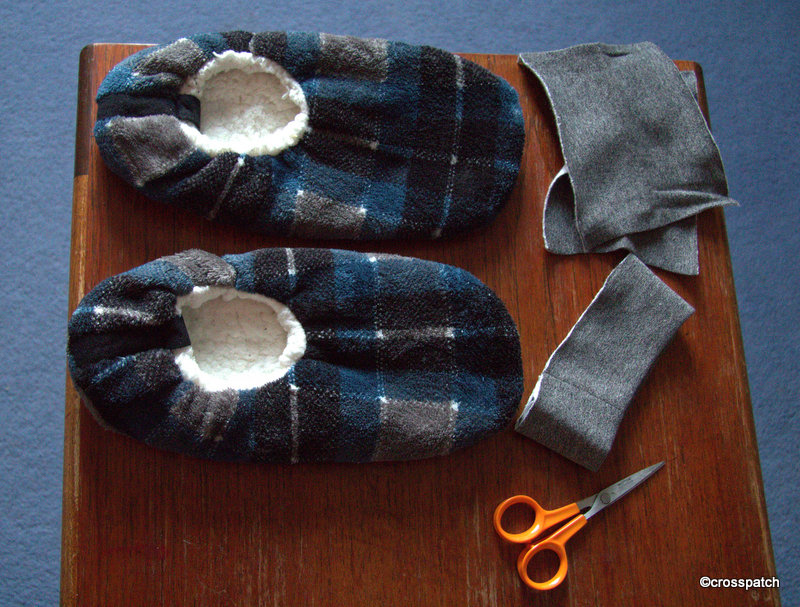
The next problem was a bit more difficult to solve, a pair of soft fleece slippers for the 14 year old. To me he’s still a boy, I keep forgetting how big he has grown, he is taller than me and his feet are larger than his dad’s, so how I managed to think Medium sized slippers would fit I don’t know! He likes his slippers, and wants to wear them but they are a tad too small, and although stretchy, not quite stretchy enough, so what to do? Make bigger slippers. Yes but what with? I was considering what I had which I could use to build an extension for the 14 year old’s toes, when I saw the cuffs I’d cut off Dad’s pants sitting on my sewing table, perfect colour, now how?
problem solved, bigger slippers.
I cut one cuff along the seam and then cut it in half, each half was stitched along the two short edges to create a little pocket, then I opened up the toe of the slipper peeled back the fluffy faux lamb’s wool lining and stitched the little grey jersey pockets to the outside fabric. The lining was then hand stitched back into place covering the seam allowance so the lining is held in place and the seam hopefully will sit under the toes, where the toes meet the ball of the foot, and won’t be too uncomfortable.
They may look rather silly, but it worked, it solved the problem and the 14 year old tells me they are comfortable and a much better fit, of course the acid test is, does he wear his Bigger Slippers? Yes he does. I thought asking him to model them was pushing my luck too far, he would probably have a fit if he saw this post, so Sshh.
I love sewing, I love being able to mend and customise, fix my mistakes, and make something usable out of left over scraps from another project, retrieve the torn and damaged, create something usable out of what otherwise would be thrown away.
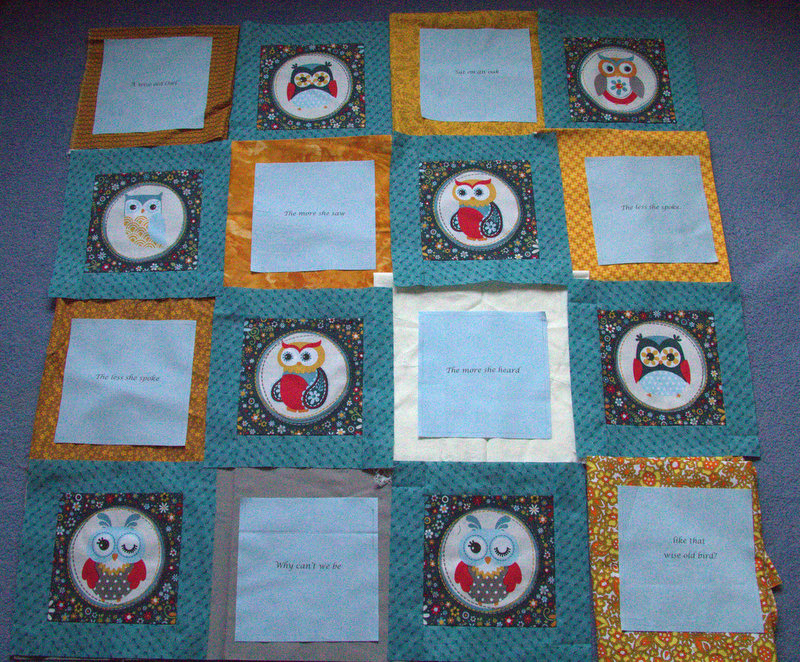
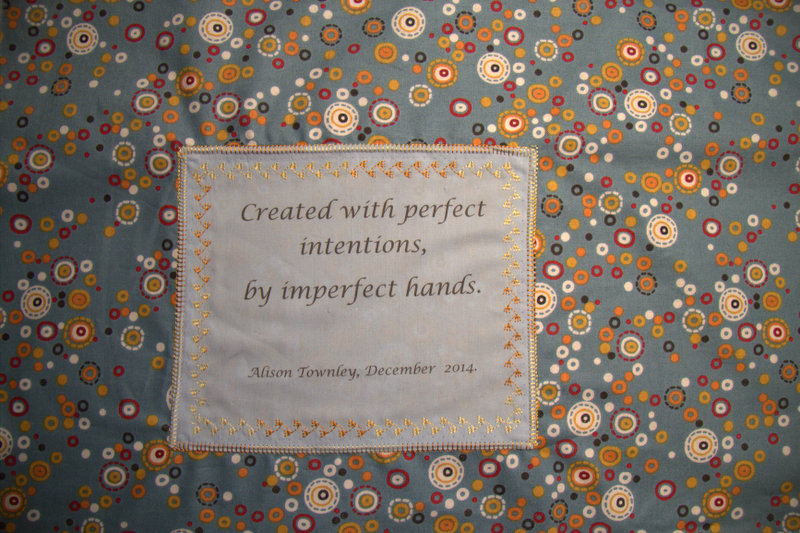
The label is a little wonky, but it matches the sentiment, made by imperfect hands.
The technique for printing on fabric is really quite simple, cut a piece of freezer paper the same width as a piece of A4 printer paper, then cut a square of fabric and iron it to the freezer paper waxy side up, so the fabric is completely welded to the paper. I created a word document for each line of the poem, and tried to set the line in the centre of the printable area, bearing in mind the fabric is ironed to the top 7 inches of the paper.
quilt label for the back
Put the paper in the printer, face down and press print.Then Presto, out comes a piece of fabric neatly printed with a line of the poem, just about centrally placed. Peel the fabric from the freezer paper. Trim the piece of fabric down to the desired size making sure the printing remains centred, and press with a really hot iron, to fix the ink onto the surface.
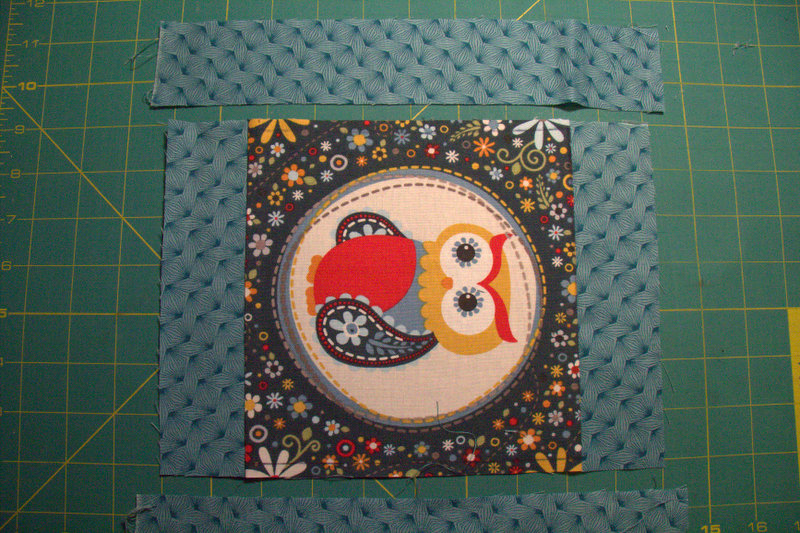
sashing from my stash
Challenge four, putting it all together. The sashing for the Owls came from my stash and was a perfect match, but I couldn’t find a fabric to sash the blue squares, nothing in my stash of fabrics was working, and I was running out of time. As you can see I tried various yellows, cream and taupe but it just wasn’t floating my boat and it looked too busy.
nothing is working here
I decided the best option was to source some more fabric from the same range, the Internet was my only hope. I only had half a selvedge as a clue to what the fabric range was called and who made it. Nevertheless it only took me a few clicks of the mouse to trace it from the scrap I had, and find a supplier for the background fabric. I also found another fabric from the same range for the backing. Flashed the plastic, and the fabric arrived two days later, I love the Internet.
that’s better!
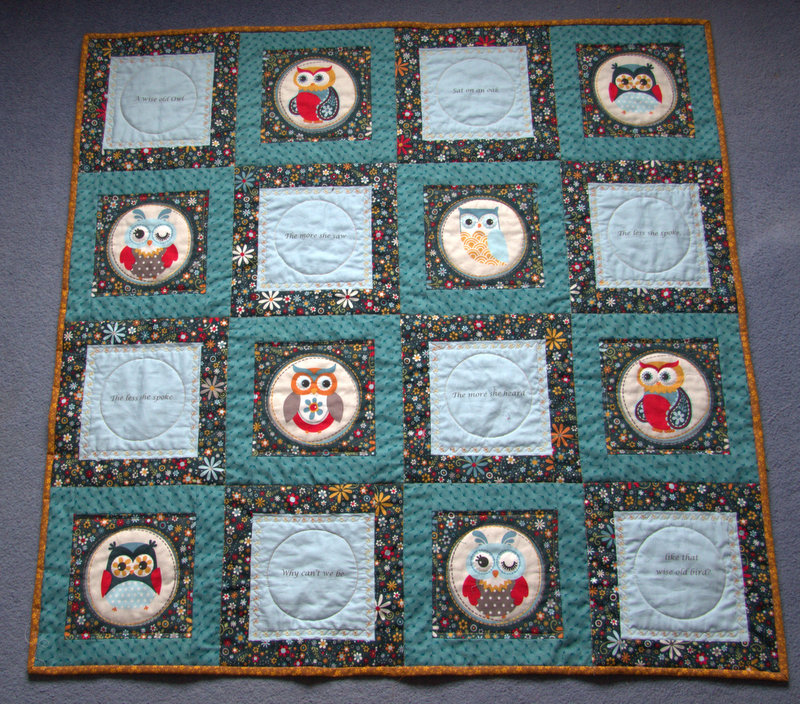
Challenge five, once I had the quilt top put together and the wadding and backing tacked in place I realised that the blue squares lacked something, there was too much plain space around the lettering, my first thought was to create a quilting template of an Owl and quilt the centre of the square but I wasn’t sure how that would work with the lettering. Maybe just a pair of Owl eyes, above the lettering, but that would be too asymmetric. I decided to keep it simple, a circle in the middle to echo the Owl medallions, and some flowers embroidered round the edge to echo the flowers on the background fabric, and to add colour. I used a space dyed thread, but I think a darker yellow or orange might have worked better.
quilting and binding
I used one of the rejected yellows I had auditioned earlier for the sashing of the blue squares to bind the edge of the quilt and to add a little contrast. It worked well with the backing fabric too. The label is a little wonky, but it matches the sentiment, made by imperfect hands.
Owl quilt label for the back.
And so, I managed this Christmas to complete a quilt in time to give it to my Dearest Friend, and even better my lovely Sister volunteered to make a detour from her day out with her daughter to a Spa to deliver it in person to my friend. It was the day before Christmas eve. I am so blessed in my Friend, and my Sister. Thank you both for being there for me.
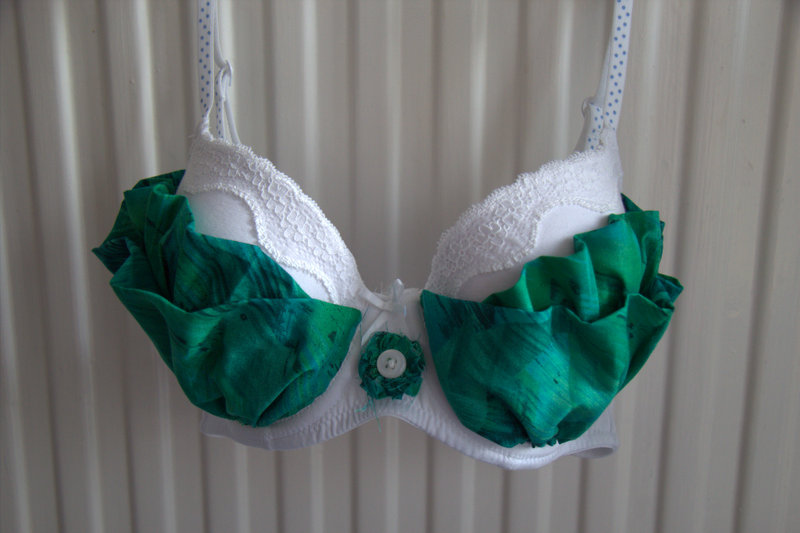
from the scraps and a button I made another little cauliflower to fasten between them
cauliflower bra
And secondly I found a little white bra in a charity shop 30D: a bra made for a generous little lady. Its not one I’ll ever fit into, but perfect for the challenge. It only needed a few strips of green fabric gathered onto the cups, and softly tacked down here and there; hey presto, two little brassicas (cauliflowers). From the scraps and a button I made another little cauliflower to fasten between them.
Both bras were entered into the bra challenge for the Christmas meeting of my quilter’s group, and will be entered into our exhibition planned for 17th to 19th April 2015.
I know its silly. It’s just a bit of fun, but I really enjoyed coming up with these ideas for words containing the letters BRA, and interpreting them in fabric, and bras. I don’t know who won the challenge, not that it matters. It’s not about winning, its about taking up the challenge.
If you happen to be in the North west of England this April do please try and visit our exhibition, you’ll find us on the A6 at Bilsborrow just North of Preston; in Bilsborrow Village hall. All welcome, see you there.
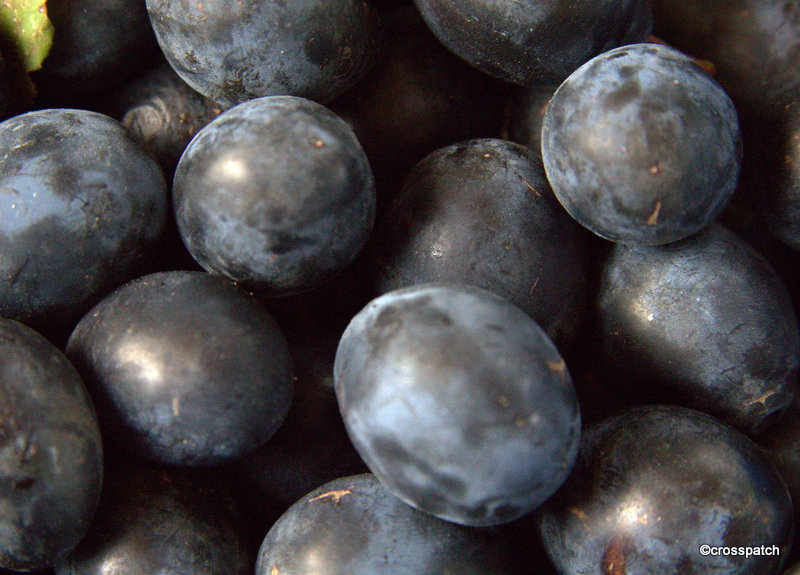
The Damson Gin I made for Christmas last year was such a success that I just had to make some more, my Dearest wants two bottles for us.
Lyth Valley Damsons
The Damson Gin I made for Christmas last year was such a success that I just had to make some more. My Dearest wants two bottles for us and the rest for gifts. I have three 2 Ltr Kilner jars at the moment each of them containing nearly a kilo of fruit and a bottle of gin. I can assure you that we won’t be drinking 2 out of the three of this particular brew, but I’ll break it to him gently, once the other bottles are gift wrapped and given away. He thinks My Damson Gin is delightful, so do I but not two bottles- that’s just greedy, and besides, there are people I know who now know there will be more Damson Gin this year, how could I not share?
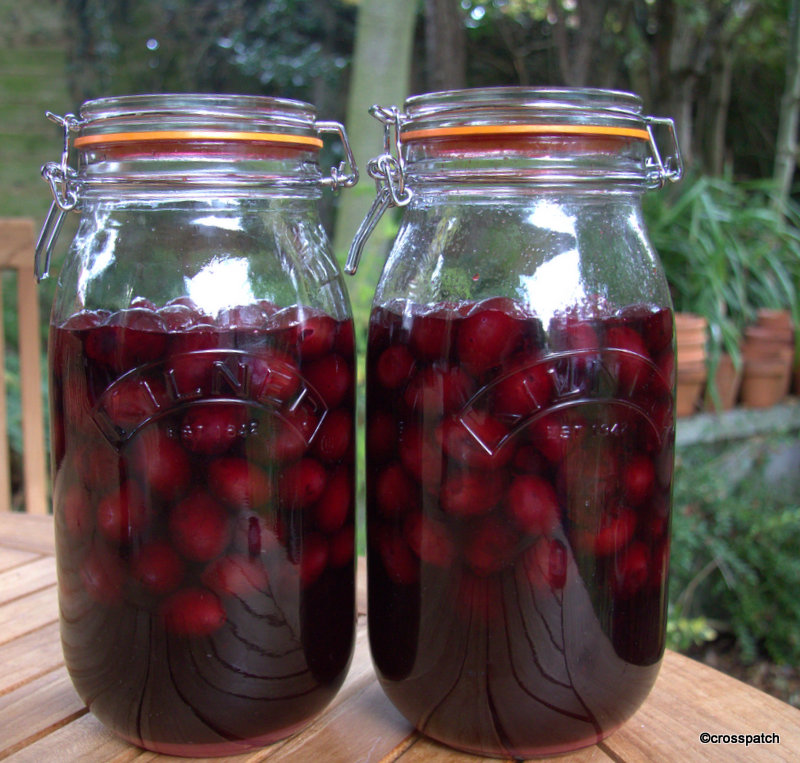
2ltr Kilner Jar, sugar, Gin damsons
last Saturday, the sun shone unexpectedly and so we took my little sports car for a spin. We drove to our favourite place for buying Damsons in the Lyth Valley and bought 4 kilos. Most of them went in the gin, there were some which were too ripe, they got eaten just as they were. The rest were cooked with a little sugar, and put in the fridge to be eaten with yogurt for breakfast, they tasted wonderful.
So this year I have put 900 grams of Damsons pierced all over with the tip of a sharp knife, in each Kilner clip top Jar with a 75cl bottle Gin, and covered with a 400g of caster sugar, and sealed the jars. I have given them a good shake every day till the sugar dissolved.
Gin sodden damsons
This Damson Gin will sit in a cool dark place for 3 months and then the contents will be strained and the gin bottled, ideally I’m told we should allow it to mature for another 6 months, but I doubt it will Survive Christmas.
I want a little summerhouse with roses round the door, a place I can sit and sew with the doors and windows open, garden smelling wonderfully, birds making their evening chorus, hedgepigs snuffling about in the undergrowth.
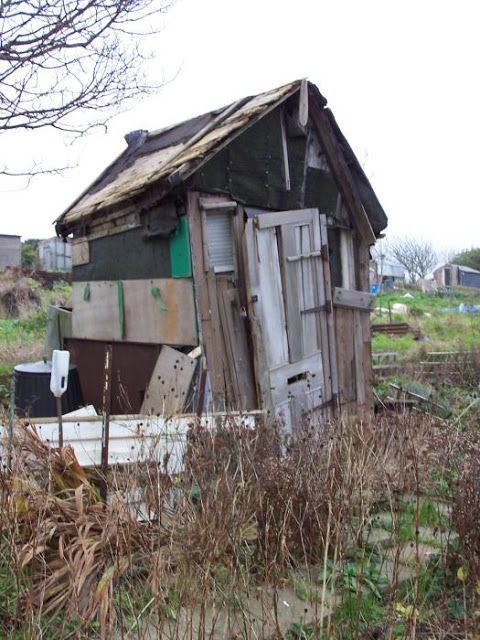
An idea has been bubbling away at the back of my mind, I want a shed. I’m loath to admit it, but I have shed envy.
Having seen many magazine articles and even TV programmes about people who have their own little outside space, garden room, beach hut, pavilion, Hobbit hole, garden shed, I have developed a yen for my own little space, another room to furnish and decorate without the need to move or build an extension. A space I can furnish on a shoestring, from charity shops and boot fairs, and use to sit in when I want to be outside but it’s not quite warm enough. That’s most evenings in a typical British summer.
this is what I want
I want a little summerhouse with roses round the door, a place I can sit and sew with the doors and windows open, garden smelling wonderfully, birds making their evening chorus, hedgepigs snuffling about in the undergrowth.
My only difficulty was where on earth to put it, my garden is lovely, but very small, any kind of wooden building would be intrusively large and would take up space where currently plants are flourishing. And why would I want to replace flowers with walls?
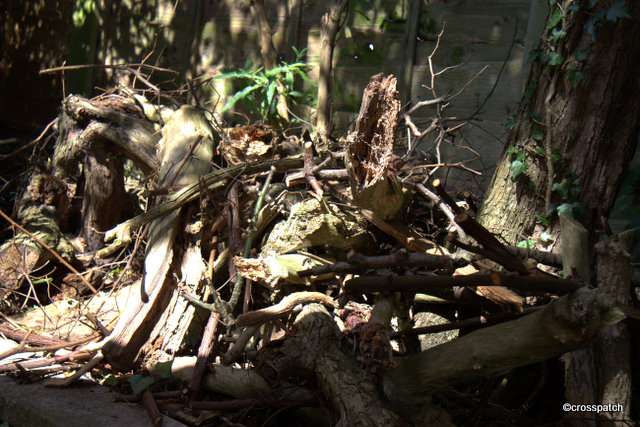
dirty little secret
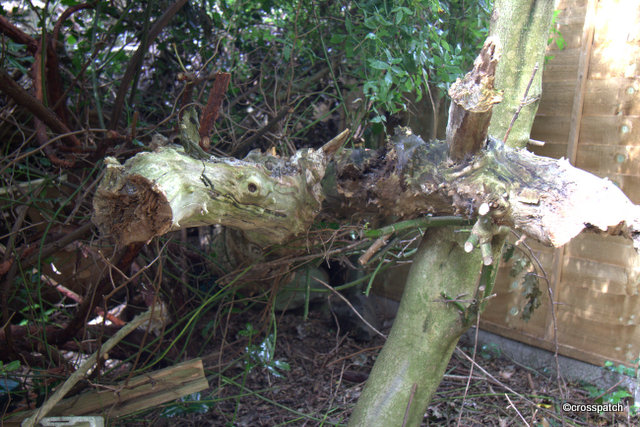
But I also have a dirty little secret, an overgrown patch behind the garage, where I have foolishly planted a rampant rambling rose which has grown way beyond its allotted space. I had intended it to grow through an old Elder tree in the corner of my plot, but one winter maybe 8 years ago the old tree fell, and the rose just kept on growing… and growing, it has grown into a tree in my neighbours garden, it has encroached upon two trees in my garden and it overhangs the garden of the folks on the other side of the fence. In fact last summer I spied them lift up the fence panel, climb into my garden and cut a whole bough from the rose, the cheek of it! I didn’t object, they took away the remains and disposed of it, and they would have been within their rights to throw the dead branch back over the fence. The rose has grown so high over the garage roof it must stand a metre higher than the roof line, and shades my garden. Despite romantic reminiscence of the Sleeping Beauty fairy tale; sadly it has to go.
Dead wood that needs to go
Despite the fact that it smells divinely in the spring, I have to cut it down. I’ve made a start but it’s a lot of work. When it has gone, and the fallen tree cleared, and a Holly tree too, I think I will be able to make a space big enough to accommodate my little garden shed. Of course I will be referring to it by some fancy name like “the garden room” but we all know in reality it will be a shed.
The old dead Elder tree
I’ve already been shopping for my shed, I think I know what I want, but I can consider it all winter while I get the site cleared, no rush, plenty to think about, …ship lap…log lap, tantalized or not… should it be painted…do I need to run electricity… what type of furniture, will it be insulated so I can use it in winter…how to heat it, safely. Curtains…rugs…comfy chair………bed? ( well that’s another story entirely)
I want a shed, my sewing room shed, my peaceful place. lets hope this isn’t the reality
I didn’t buy them to use but rather to asset strip.
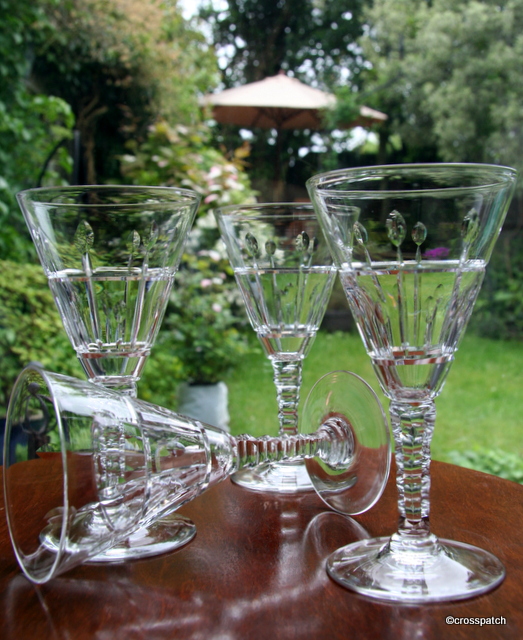
Today was my regular trip to the hairdressers, for a cut and colour, as I was leaving we were all singing the praises of my favourite charity shop Wolfwood, which is just next door. I happened to mention that I am always on the lookout for nice glassware, when my Stylist remembered having seen some nice ones in there the day before. We went in together and found them, 4 lovely crystal wine glasses; £3. Not £3 each you understand £3 for all 4 of them, needless to say they came home with me.
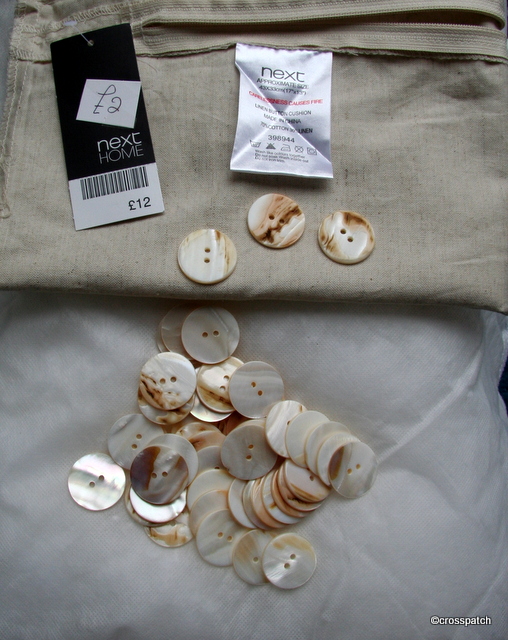
4 crystal glasses
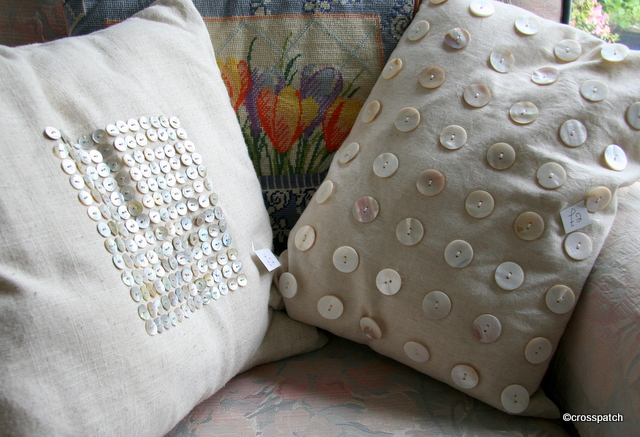
Before I left I spotted two cushions, each in plain linen type fabric embellished with real shell buttons. I snapped them up for £2 each. Now they are rather bland and beige for my taste but I didn’t buy them to use but rather to asset strip. Whilst walking home with my treasure I took a closer look, both cushions were sold by NEXT, and one still had its swing tag on, attached to the zip and tucked inside; whoever donated them paid £12 for that one. From the two cushions I have retrieved 1 cream zip, two cushion pads, 48 x 2.5cm natural shell buttons, which are quite thick and heavy , and 169 natural shell shirt buttons, plus two pieces of fabric suitable for backings once I’ve washed them. One is quite coarse, polyester /linen mix, the other a finer cotton/ linen mix.
169 shirt buttons
Had I gone out to buy these materials the zip alone would have cost £4, the buttons I guess at least 5p each for the little ones and maybe 25-30p each for the bigger ones, say £30 worth of materials for £4.
can you believe it £2?
I don’t feel bad about taking them apart because they were badly designed, the buttons being shell are heavy and the fabric they were sewn to is too flimsy, so the whole cushion front sagged, the buttons dragging the fabric down, which is probably why they came to be in the charity shop, almost unused. I have plans for all the materials, of which later, possibly much later.
can’t believe my luck
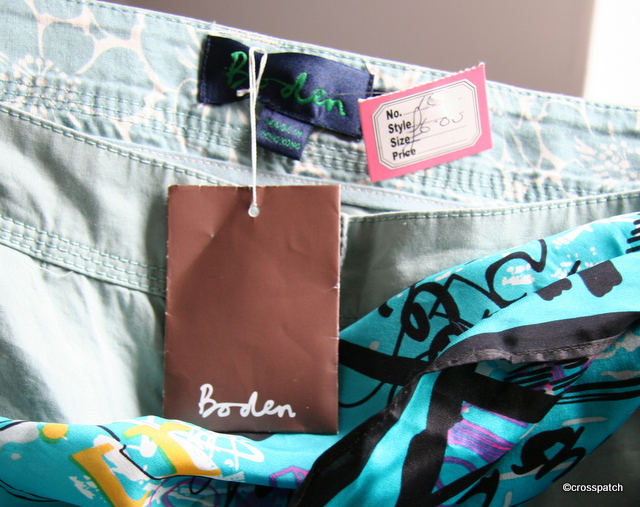
Having had good luck so far, I decided to check out the charity shops in town, and scored a pair of unworn Boden ¾ length pants in a pistachio green, the swing tag and spare buttons still attached, for £6, and a scarf which feels like silk but probably isn’t from River island for 99p. All in all not a bad haul, for £14. I love a good charity shop, bargains like hidden treasure, waiting to be discovered, if only you have the patience to search.
I have to say there is something wonderful about sitting in our garden in the summer rain.
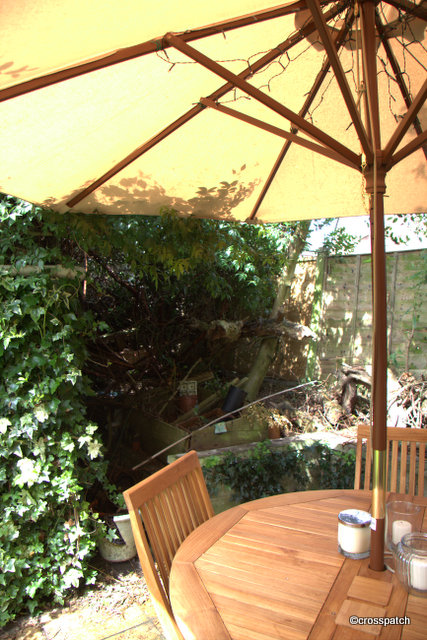
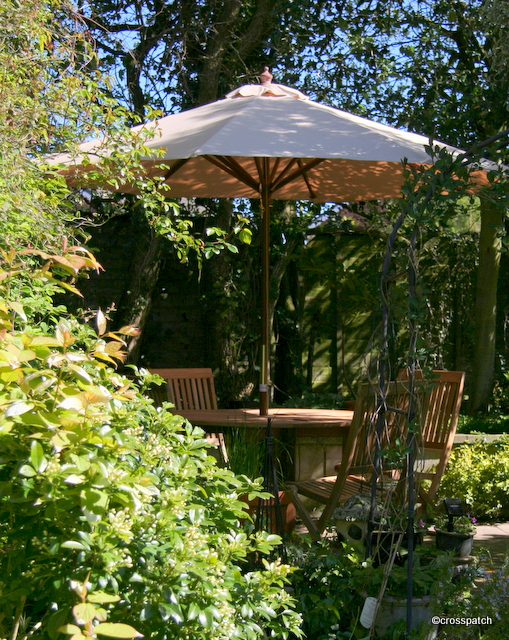
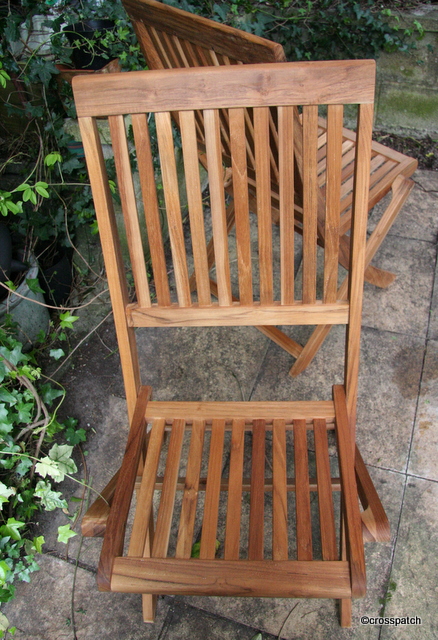
Our Garden furniture has been looking rather tatty for a couple of years now so we decided to treat ourselves to new ones; a table, chairs and a parasol to afford shade or shelter according to the weather. Getting rid of the old ones presented a greater challenge than expected, we couldn’t get the table down the side path; too wide, and it wouldn’t go through the house either, same reason. The bolts too rusted to easily take apart we came up with a canny solution… wait till the neighbours went out, then passed the table over the fence, past the too narrow place, and back over the fence…shhhh, don’t tell. The new ones all fold up for easy storage, so we won’t have that problem again.
paradise in my own back yard
I’m not sure what we planned to buy when we began looking but we did shop around before we bought, did we want rattan… no, too likely to get dirty given the secluded position under trees, did we want glass and steel…Nope, too fancy and likely to rust in our damp climate. Wood then…hmm, maybe, maybe not, which wood? What about mosaic topped and painted metal? We finally decided on wood, but teak, not a cheaper alternative and something which could be easily stored indoors for the winter to extend its potential life. My Dearest insisted on an HUGE parasol, so that he can sit in the garden even when it’s raining and not get wet. I have to say there is something wonderful about sitting in our garden in the summer rain, paradise is a garden.
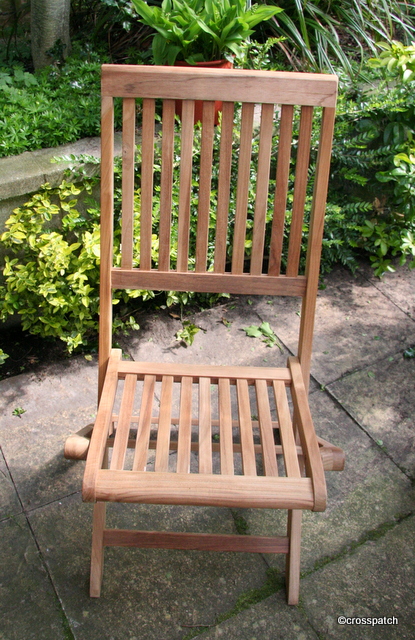
chair before teak oil
Being teak, I decided to give the furniture a coat of teak oil to help preserve it, my Dearest having determined to have nothing whatever to do with any noxious substances, said that was my job…as ever.
Next task making cushions to go on the furniture, we could have bought the cushions sold with the furniture, and I did like them very much, but I could not justify the expense, four small chair cushions and a bench cushion would have cost as much as 2 chairs! How much!!!
and after
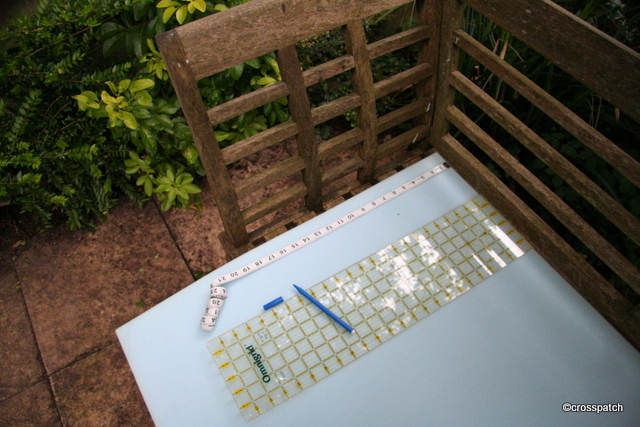
So off to town on Saturday for some upholstery foam, and to a local factory shop for suitable striped fabric, now all I need to do it cut the foam to fit, and cover with my chosen fabric.
yet another job for me
With what’s left of the fabric I may make some more bunting or some softer scatter cushions. All told I think I will have saved £40 or more, if I don’t cost in my time, but then I didn’t have anything else to spend my time on now did I?
easy cut to fit
One thing I did find time for, down at the bottom of my street runs a little stream, and on the bank the City Council has planted the most beautiful cherry tree which is in full bloom, so on Saturday when the sun shone all day in a clear blue sky, I took the time to walk down to the stream with my camera.