Nearly two years ago, and before being thrown out of my studio to make room for a sixteen year old, I made a crazy patchwork cushion for a group challenge.
Crazy Patchwork Cushion… continued…
Nearly two years ago, and before being thrown out of my studio to make room for a sixteen year old, I made a crazy patchwork cushion for a group challenge from 1980’s scraps some of which were Laura Ashley fabrics.
I wasn’t happy with the way it was finished but as with many of my projects I ran out of time and completed it in a rush in order to submit it to my quilt group’s annual challenge.
So the plan was to deconstruct it, well take the back off. I’d stitched it with a long stitch to make that easy. Put a zip in the back, instead of the envelope back that I’d had to do as a quick temporary fix.
Then I needed finish the white embroidery on the front, so that all the edges were finished in the same way.
Finally I top stitched round the edge, I do this a lot on cushions just to give definition to the edge and to make them fit the cushion pad better. I do like a plump cushion.
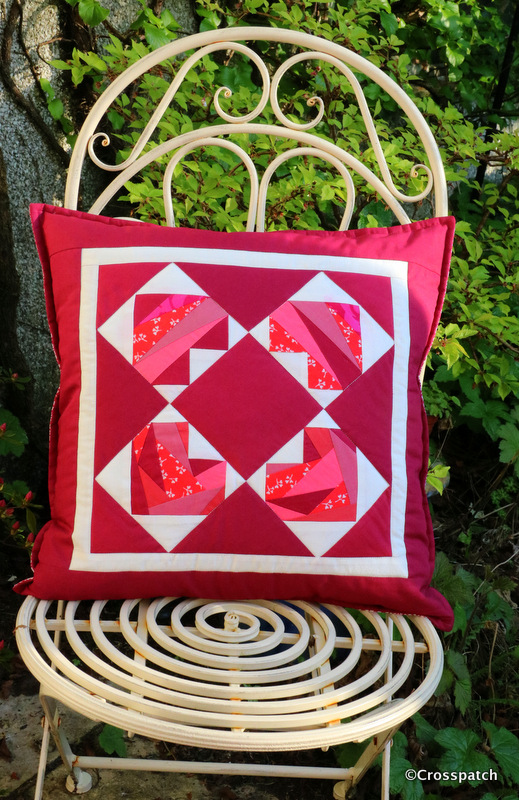
cushion for a Windsor chair
My cushion was made particularly to go to work with me to pretty up my office, but just as it was being made we were told we would soon be moving to a new “agile “ working environment where there would be 3 desks to 5 staff . The “personalisation of work spaces” would be frowned upon, or rather strictly forbidden. So my Crazy patchwork cushion will remain at home, and pretty up my new studio, on my Windsor chair with a view of the back garden.
The crazy patchwork cushion will also be submitted to my group’s biennial exhibition later this month, so that’s two items… see my next blog post for the third item.
It makes for a nice plump cushion, and was finished with a fortnight to go before it needs to be handed in. Result!
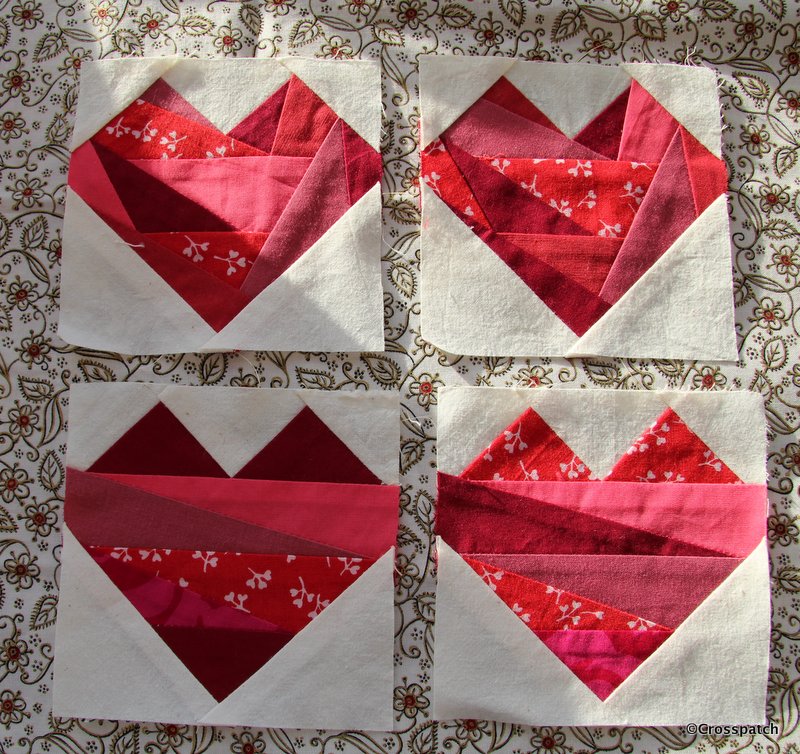
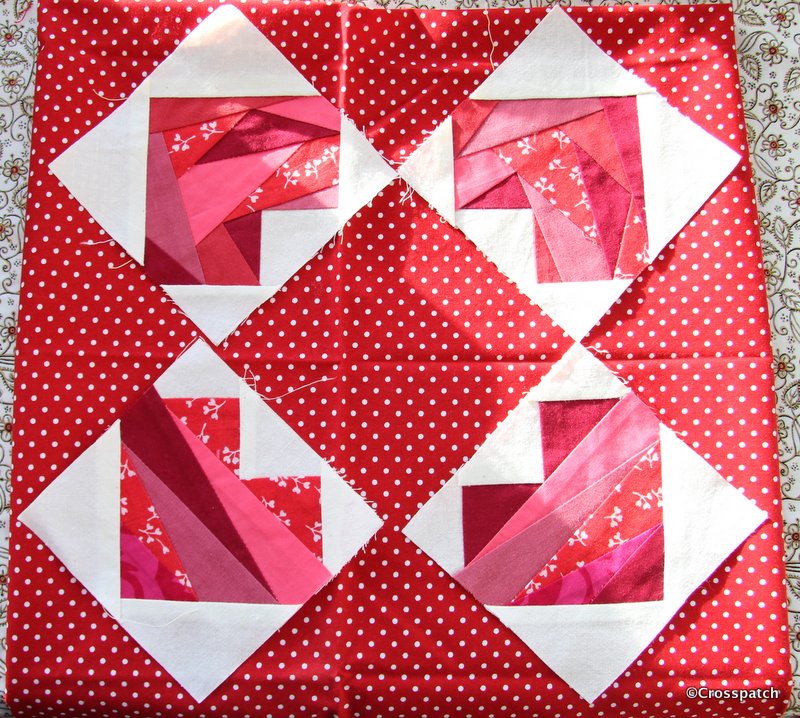
foundation pieced little hearts
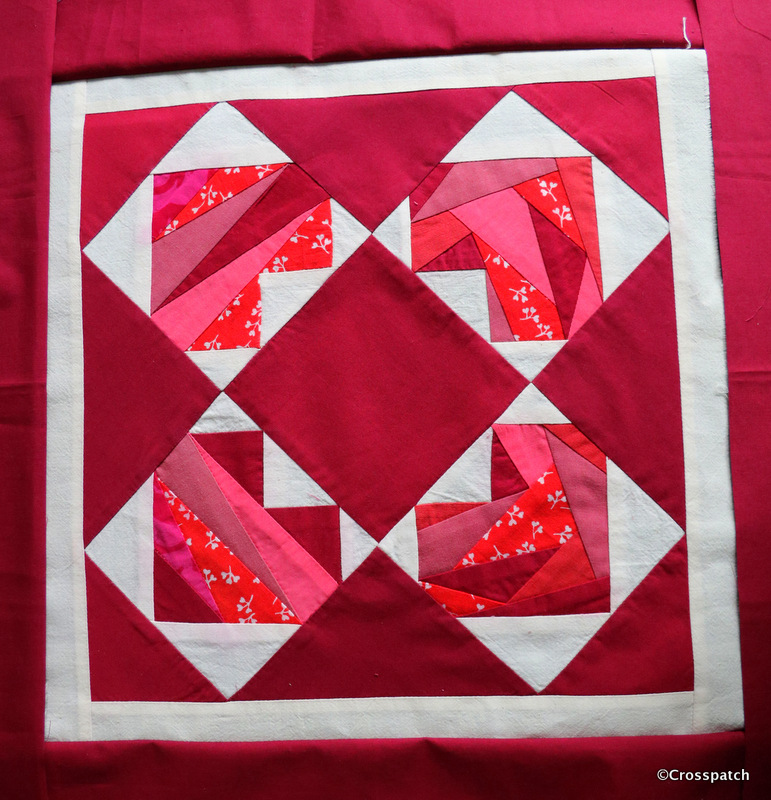
18 months ago I found 4 little hearts foundation pieced blocks in red fabrics. I had a fine idea that I could make them into a finished piece in time to submit them to my quilt group’s annual challenge. (See the original blog post here http://www.mycrosspatch.com/blog/2015/12/23/four-little-hearts
two plains
I found two plain fabrics and cut pieces to put the 4 little Hearts together to make a cushion front, but there was something not quite right. I couldn’t put my finger on it so I put it aside to think about it before going any further.
As predicted I had to pack up all my belongings and move out of the lovely newly redecorated room in order to make way for the then 16 year old who I had to admit had outgrown the box room which was his bedroom. He was beginning his important sixth form years and would need a proper study space.
All my sewing materials had to be packed up and moved into what was the box room ( we now call it Harry Potter’s room, the cupboard over the stairs) so the little hearts were packed up and moved (buried). The challenge came and went without me submitting my piece. It was only when I realised our quilt group’s exhibition was due in a couple of months that I dug out my little hearts and some other half finished pieces in the hope I could produce something to show.
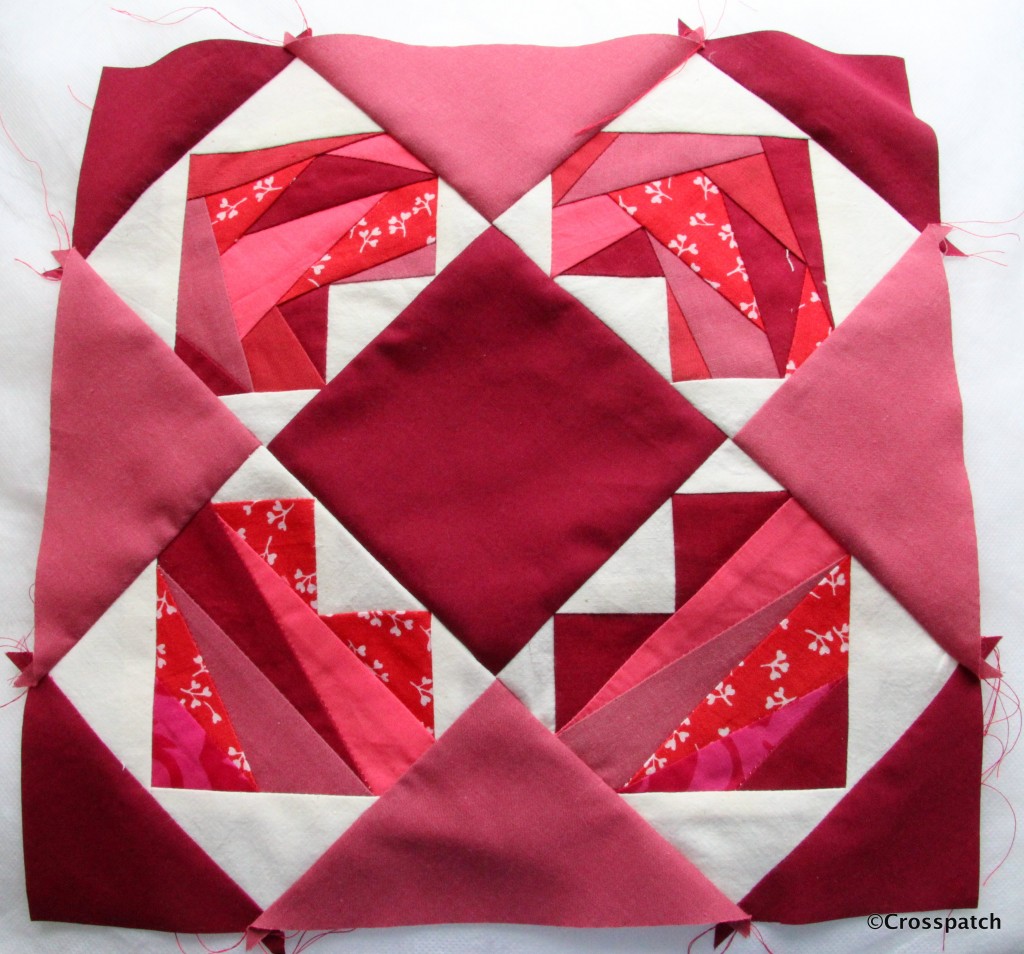
looking much better
The first step was to work out what was wrong with it. I realised the colours didn’t work together; the dull pink at the sides was just too dull, so I took it apart and replaced the dull pink with the darker burgundy colour. Sorted!
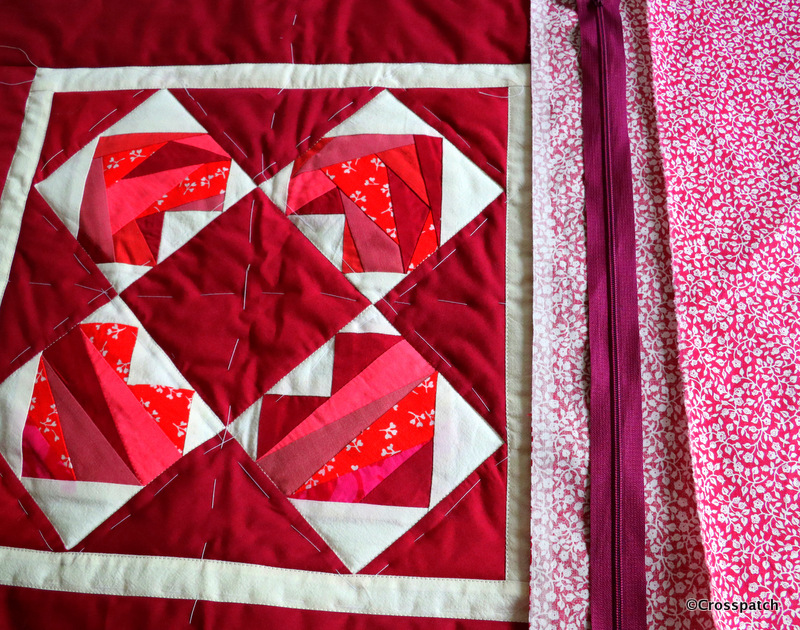
zip and backing from my stash
I wanted to make an 18” cushion and would have had barely enough of the burgundy to achieve that. A 1” sashing of the cream calico, added a pretty frame to my 4 little hearts block and allowed me to achieve that 18+” square I needed for the cushion top.
I really wanted to complete this cushion completely from my stash, and no cheating. So the backing was a found item, from my stash, it’s quite an old piece, a remnant left over, I think, from a skirt or dress from the 1980s. Happily it has finally found its purpose. The zip came from another stash, a lucky find in a charity shop, a whole carrier bag full of zips, over a hundred zips for £5.
Finished at last
Finally when I had put the cushion together it measured just shy of 18.5’’ and the 18’’ cushion pad was a little loose in the cover, so a quarter inch top stitching round the edge gave a good finish to the edge, a little definition and pulled in the cushion size to just under 18”, it makes for a nice plump cushion, and was finished with a fortnight to go before it needs to be handed in. Result!
I love Pinterest, you just search for a pattern and up comes exactly what you need. In this case a Butterick pattern for Slippers from 1955.
Last summer my Dearest decided that our youngest at 16 was old enough to be left at home overnight, while we went off for a single night away in a hotel, (Hallelujia, freedom at last.) We booked a night in a lovely Hotel in the Lake District, The Inn on the Lake, Glenridding, at a bargain price. But then the problems began, fancy hotel… what to wear? What to pack? No suitable PJ’s , no decent luggage,I don’t want to arrive looking like the poor relations. Since I plan to make weekends away a regular occurrence in my life I decided a weekend bag was a definite need for me, and my dearest, thought a suit carrier was also required, this night away was looking less of a bargain.
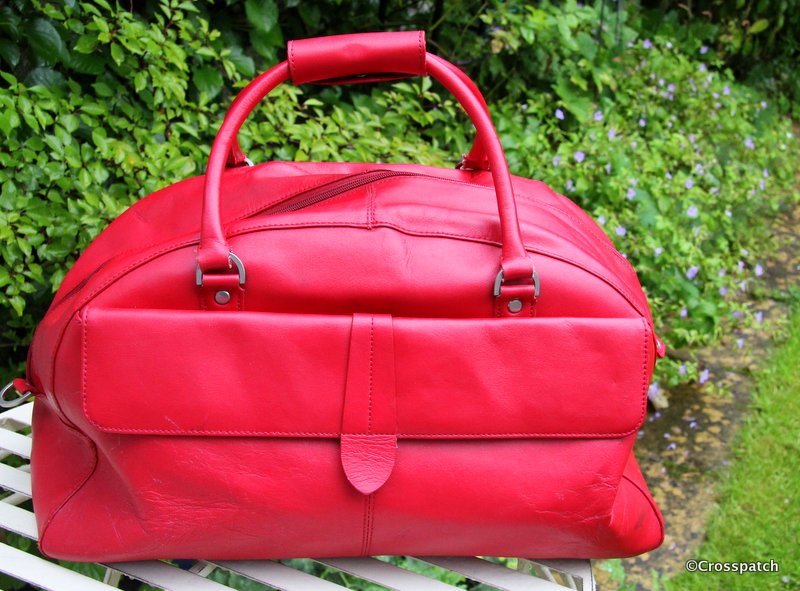
my gorgeous new weekend bag
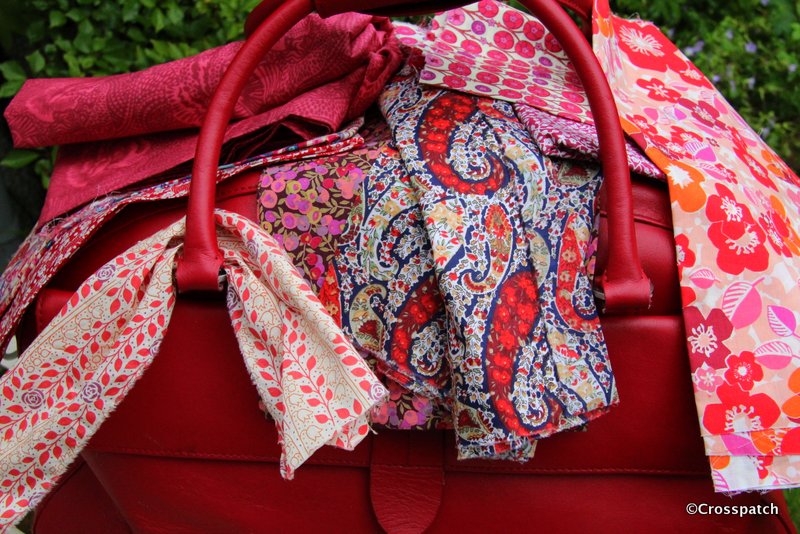
Ebay supplied me with a beautifully supple red leather weekend bag, less than half the price of a new one, I was so pleased with it. I decided what would make it even better would be some matching shoe bags to keep my shoes separate from my clothes, and a pair of slippers too. And I was going to make them with as little money spent as possible.
which would you choose?
A quick look through my stash yielded a number of suitable red fabrics for my shoe bags and slippers, deciding which one to use was easy I just draped them over the lovely leather weekend bag in the garden. The Liberty Tana lawn in the middle? Yes.
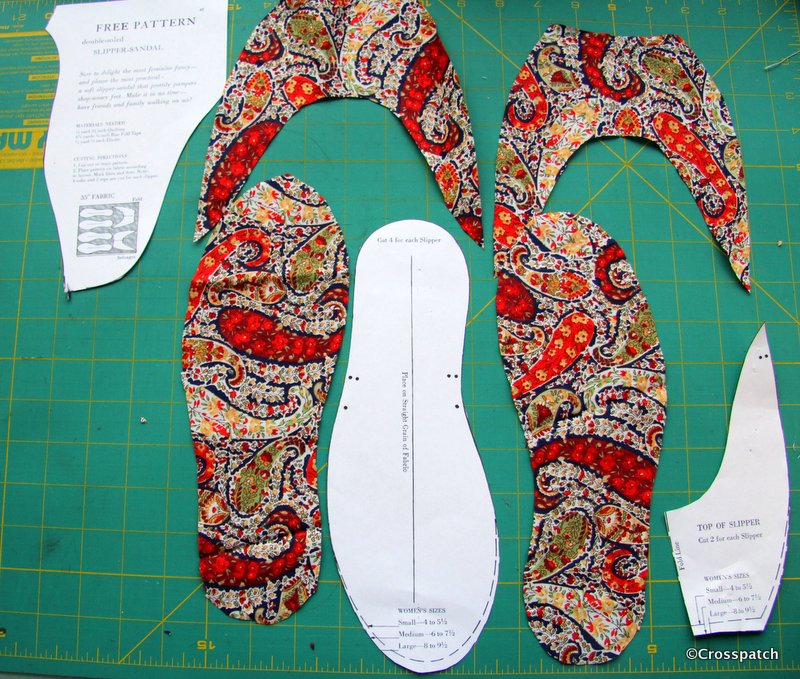
slipper pattern
I love Pinterest, you just search for a pattern and up comes exactly what you need. In this case a Butterick pattern for Slippers from 1955. And Purlsoho.com for the shoe bags.
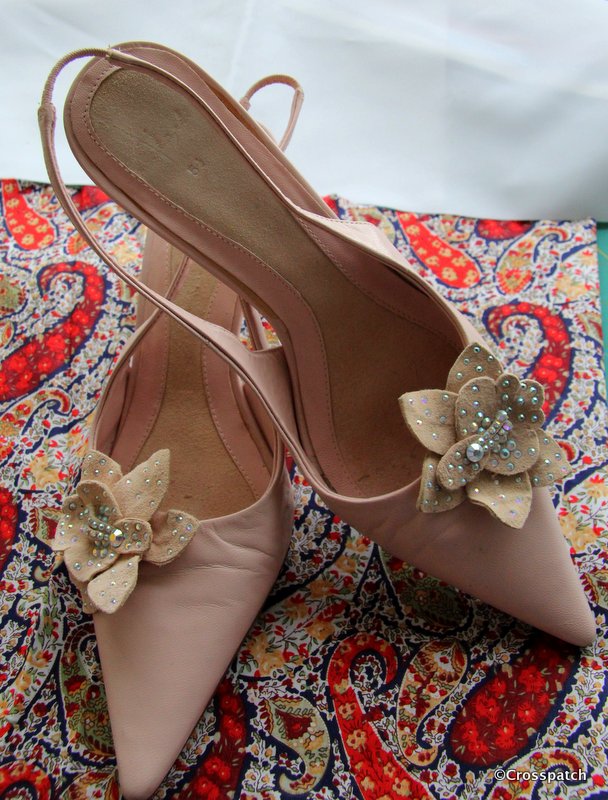
Cinderella will go to the ball
I rooted out those fancy evening shoes, the only decent heels I’ve got and cut the fabric to make two bags big enough to fit those shoes, my usual flats will fit if they do. Two simple bags, the tops turned down to make a tube for the drawstring , and ribbons for drawstrings.
Cut out and ready to quilt.
And so to the slippers, I printed out the pattern, and put my foot on it, to check the size, it looked a bit big but better that than too small. I could always trim it back once I started putting the slippers together.
Cut 4 soles, 2 left two right, and 4 tops, which are the same shape left and right.
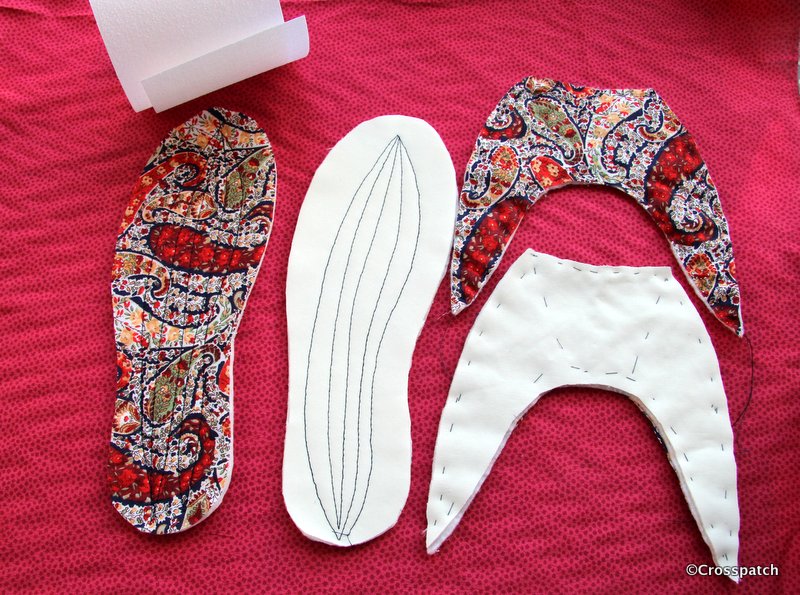
The wadding is a piece of curtain lining with a needle punch wadding on one side, to line winter curtains. To stiffen the slipper sole I used iron on Pelmet Vilene, it comes in a handy width, just a tad less than the width of my slippers.The only thing I bought was the red bias binding. The pieces were put together and quilted with random lines of stitching, I was up against it time wise, needed to finish them before I began to pack , so I wasn’t too picky about the quilting, it just needed to hold the layers together. I just needed slippers to go in the bag.
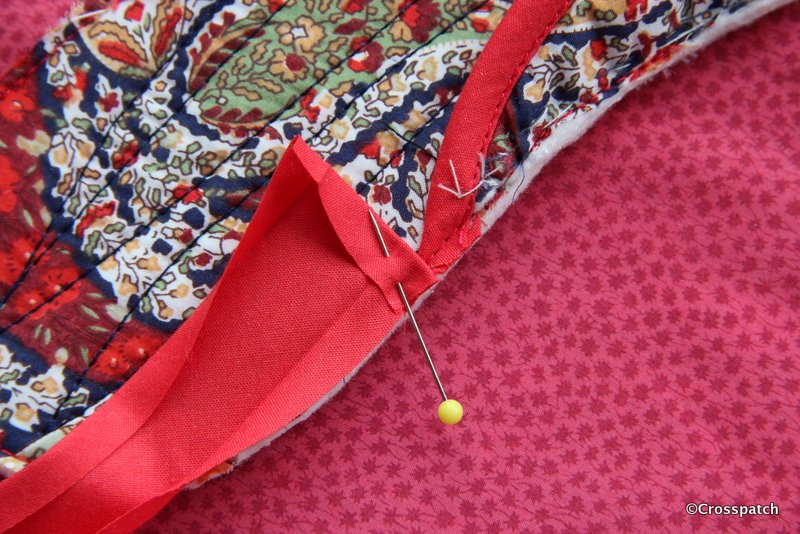
The binding
I managed to stitch one slipper together before I had bound the raw edges of the slipper top…Doh! Un-pick and start again Alison. My only struggle with the slippers was with the bias binding, it wasn’t quite wide enough to stitch on the top and then ease over onto the back and catch down with topstitching, I had to top stitch 2 or 3 times to ensure I caught it all the way round. I think I should have trimmed the sole back more accurately before easing the binding over the raw edge.
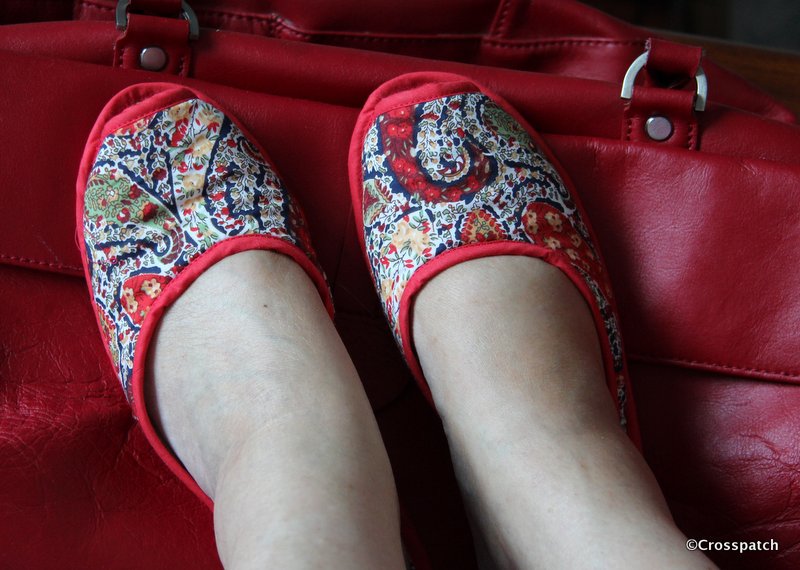
slippers finished
Here you see my slippers, made for pennies, finished on time, bags packed and ready to go on holiday.
This is such an easy process, no heat, no chemicals, and if I hadn’t reused the beans as a dye stuff, I could have cooked and eaten the beans, so no waste either, and the colour is divine. I love it, love it, love it.
Last weekend I began experimenting with natural dyes, and had mixed success. I hoped to try onion skins next because I wanted a bright orange, but haven’t had time to gather together enough onion skins. Nevertheless I’ve got the bit between the teeth now, dying with natural dyes from plant materials is like alchemy.
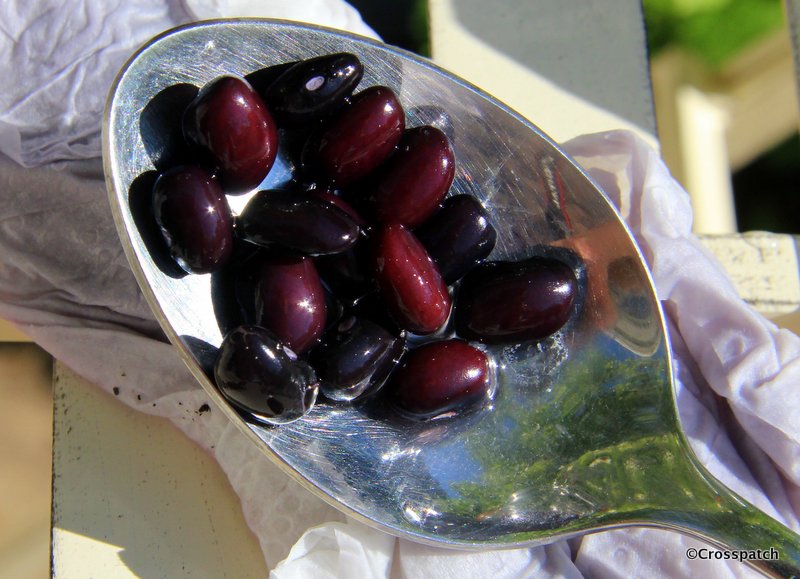
I love that lavender blue colour I call Eeyore blue. I once saw a picture of some lace which had been dyed using black beans which was just that glorious colour and decided I was going to experiment with it myself. Black beans can be found with the chick peas and kidney beans on supermarket shelves.
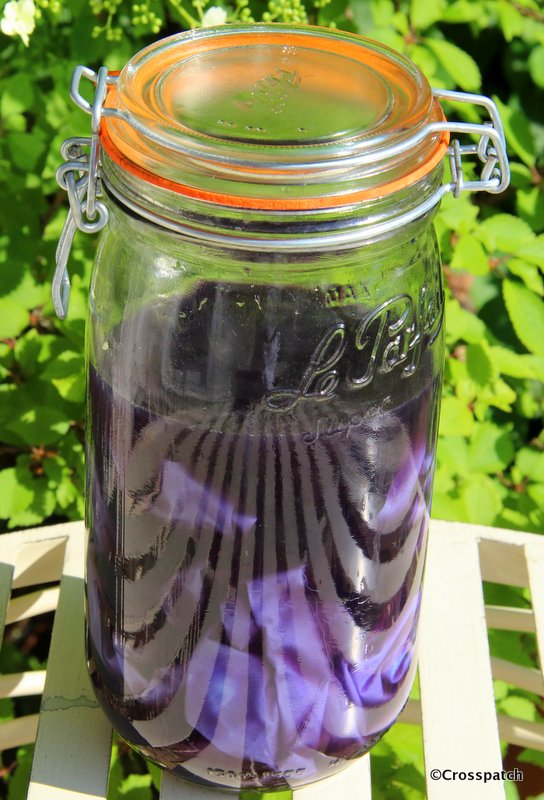
black beans soaked in cold water
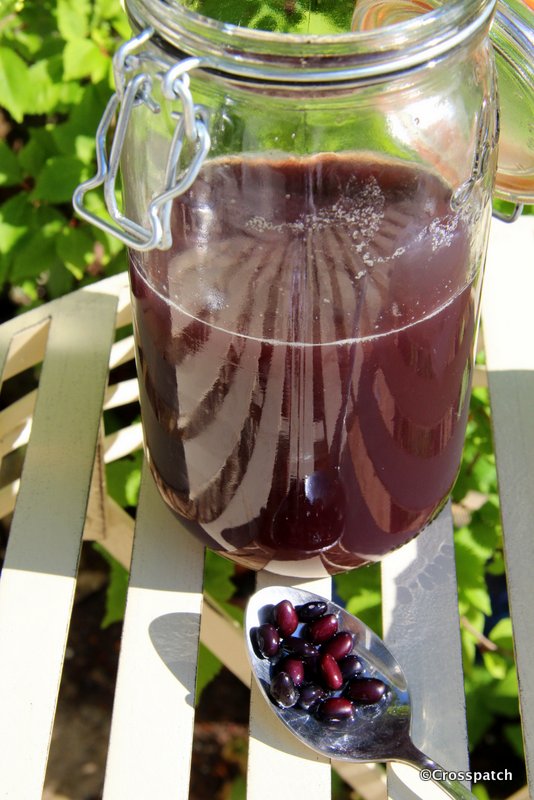
The black beans were soaked in cold water for 24 hours, they produce a rather gloomy, murky mauve coloured liquid. Not very promising I admit. But then comes the alchemy.
murky mauve
I drained off the soaking liquid from the beans, added a length of fabric which had previously soaked in Alum mordanted water and presto, the magic began… not mauve but a lovely purply blue began to develop.
magic
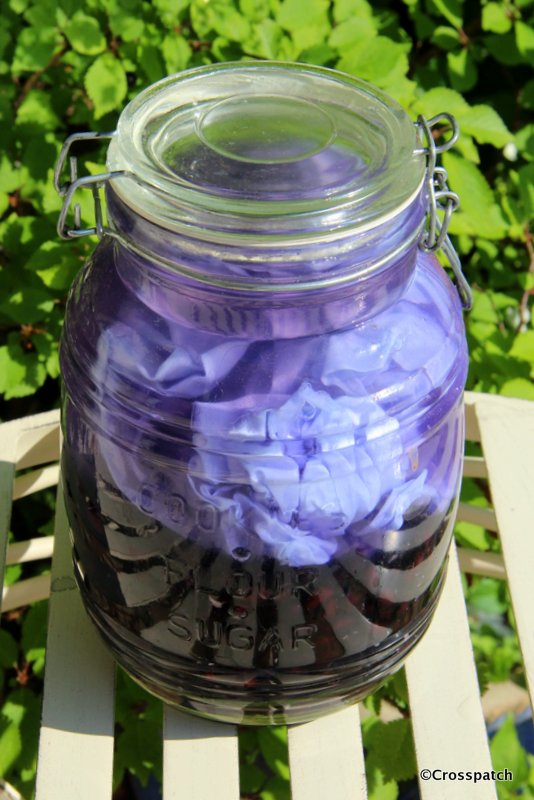
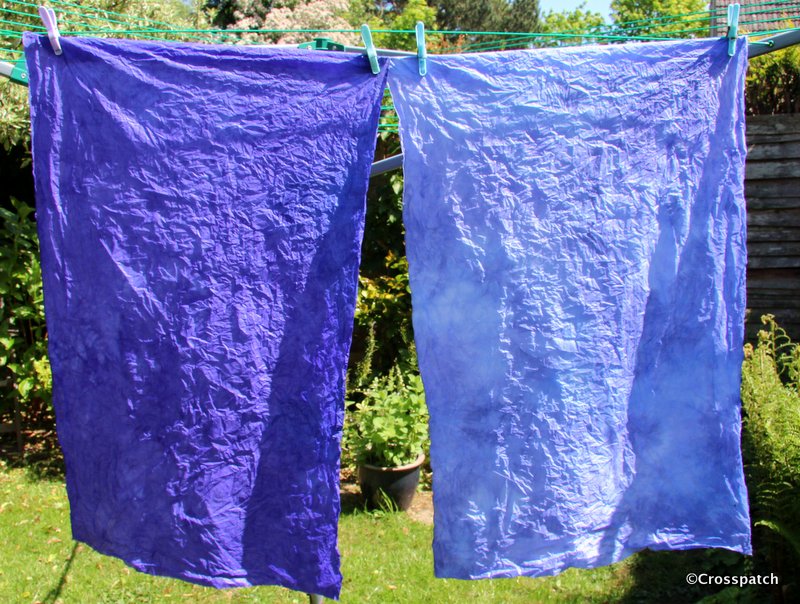
Just to test how strong the dye stuff was I put the beans back in another jar, topped up with more water and added more fabric. I left both jars soaking for a couple of days. The result was a lovely purply blue fabric, and a paler version with a rather more tie dye effect, caused by the lack of space in the jar for the beans, the liquid and the fabric.
second soaking
This is such an easy process, no heat, no chemicals, and if I hadn’t reused the beans as a dye stuff, I could have cooked and eaten the beans, so no waste either, and the colour is divine. I love it, love it, love it.
Lately I’ve been thinking about trying to dye my own fabrics, but I wanted subtle shades, from natural dyes. I was drawn to the idea of solar dying but I was unsure if I wanted to invest time in a method which requires lengthy periods in the sunshine, a commodity not to be relied upon in the North of England, even in a good summer. I imagined a summer of hope followed by an autumn of disappointment as the solar dying technique failed to develop the results I hoped for. Nevertheless I fancied having a go at dyeing from natural materials.
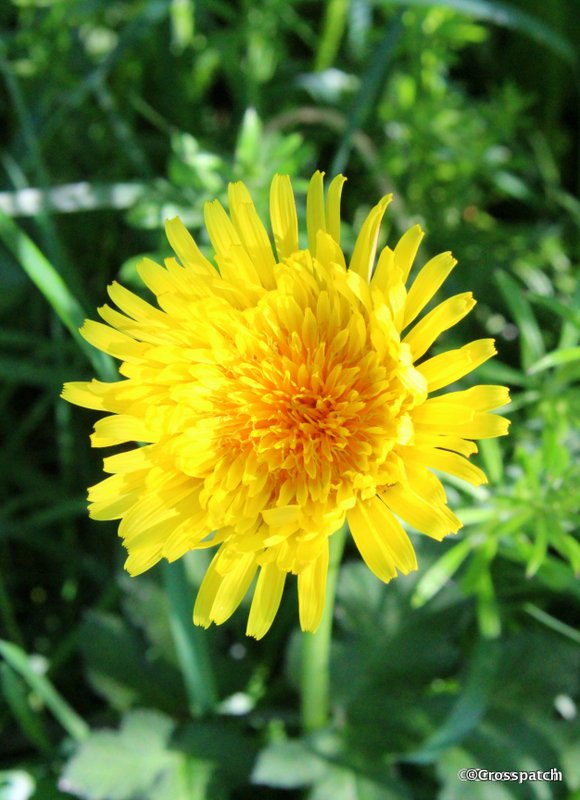
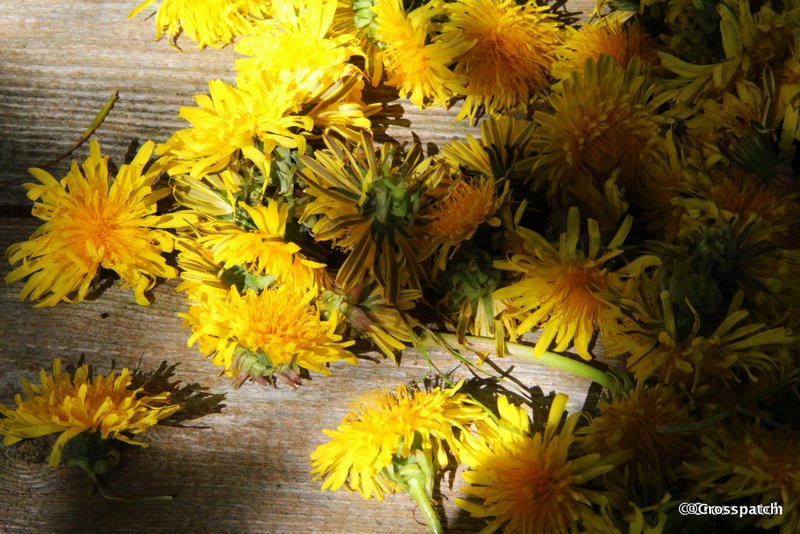
hedgerow pickings
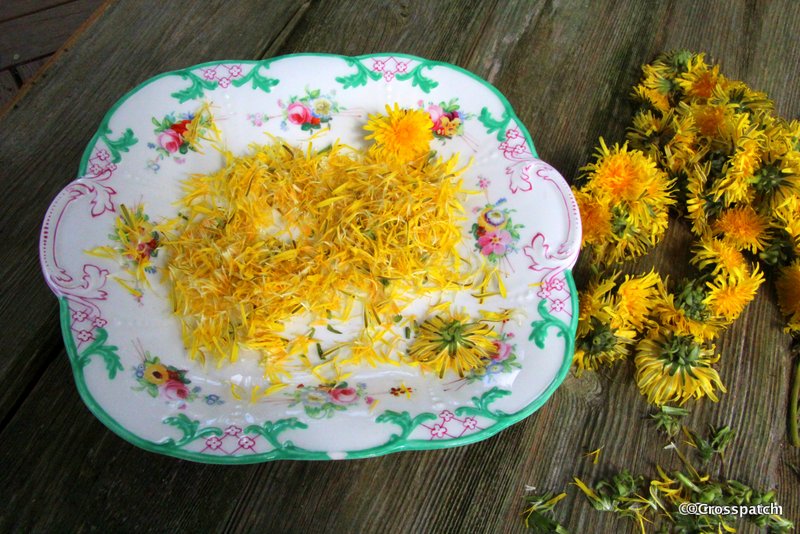
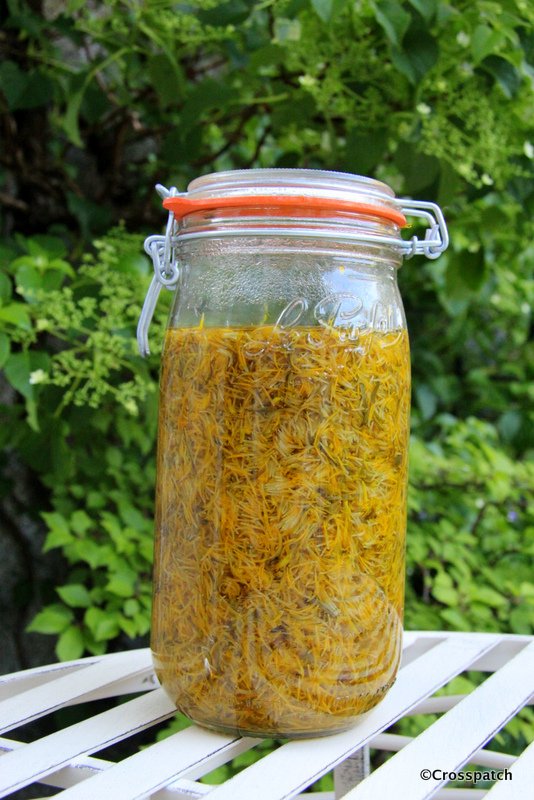
I found a recipe for dyeing using dandelion heads, well they are plentiful enough at this time of year, so on a Sunday morning stroll with my sister I gathered a bag full of dandelion heads from the hedgerows near the local University. That afternoon I picked the petals from their heads and put them in a jar, added boiling water and letting them steep.
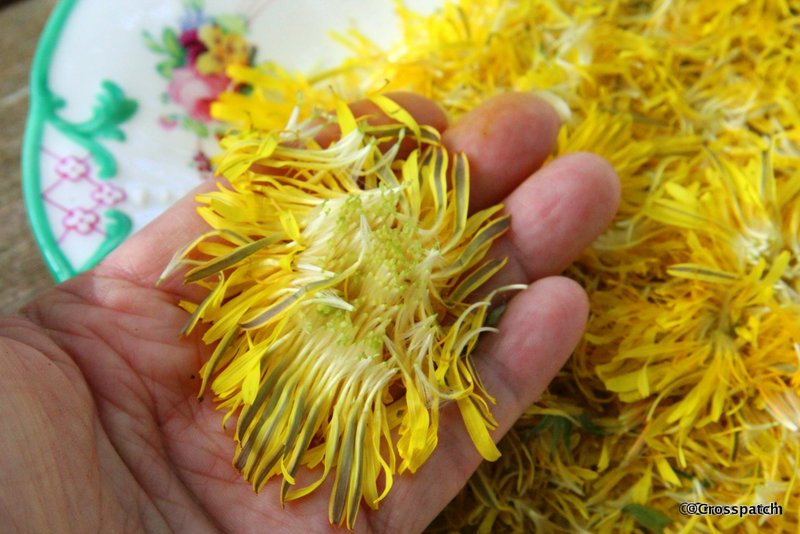
petals like saffron stamens
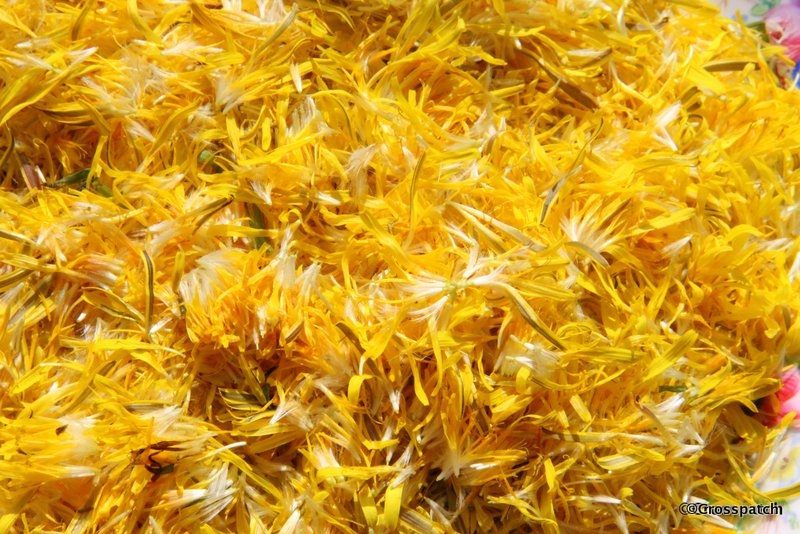
I was really hopeful that I would get a good clear yellow. The strands of bright yellow made me think of saffron and stained my fingers bright yellow, surely this was going to work.
yellow stained fingers
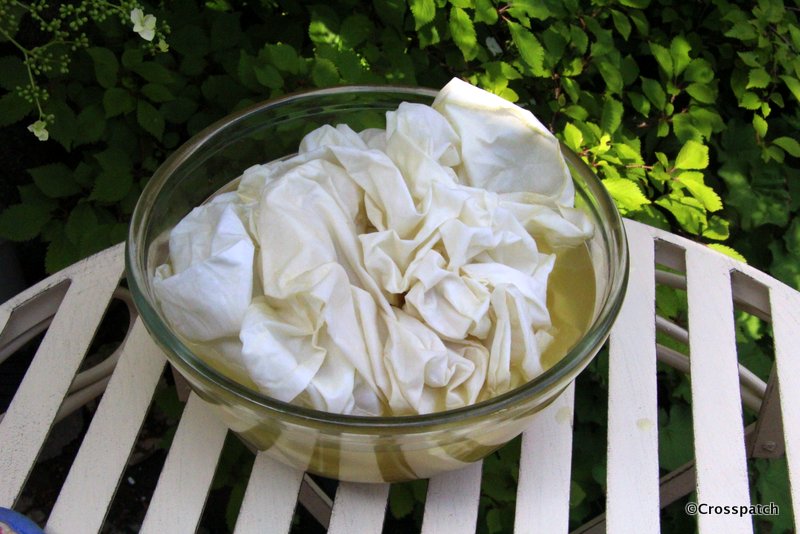
Meanwhile I soaked some plain white cotton chintz (I just happened to have a whole bolt of it which had been hanging around in my studio for years) in warm water with a little Alum added, as a mordant ( to fix the dye).
just petals
The instructions were to strain off the steeping liquid, add the fabric and microwave, in 2 minute bursts.
Steep overnight in water
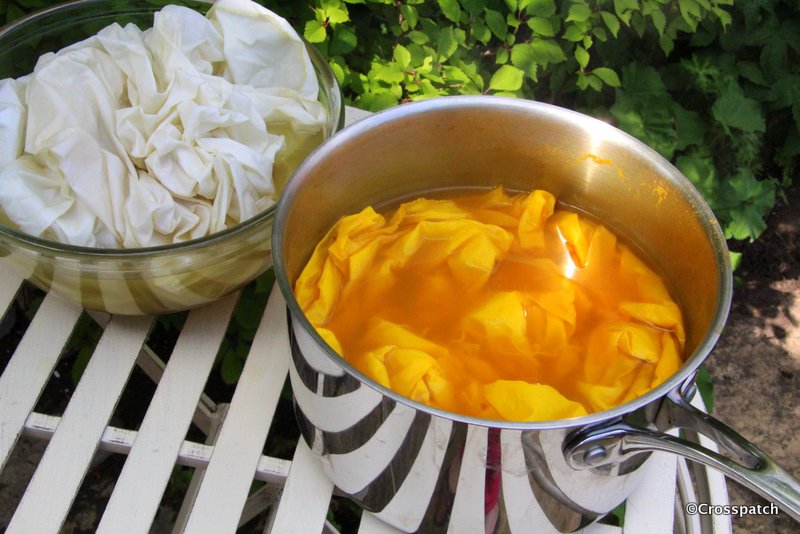
I did as I was instructed, 2 minutes, stir… 2 minutes, stir… 2 minutes… ad infinitum it seemed, but there was no discernible change in colour, well, what I had is not even the palest lemon yellow, a complete fail in my estimation.
Complete Fail ?
Undeterred I turned to an old favourite amongst natural dyes, Turmeric and white Vinegar. In a pan of boiling water I emptied half a jar of Turmeric, and a good glugg of white vinegar, and dropped on a metre of the same Chintz. The glorious yellow colour is what I had hoped for with only a fraction of the effort I’d already expended on the dandelions to no avail.
turmeric yellow
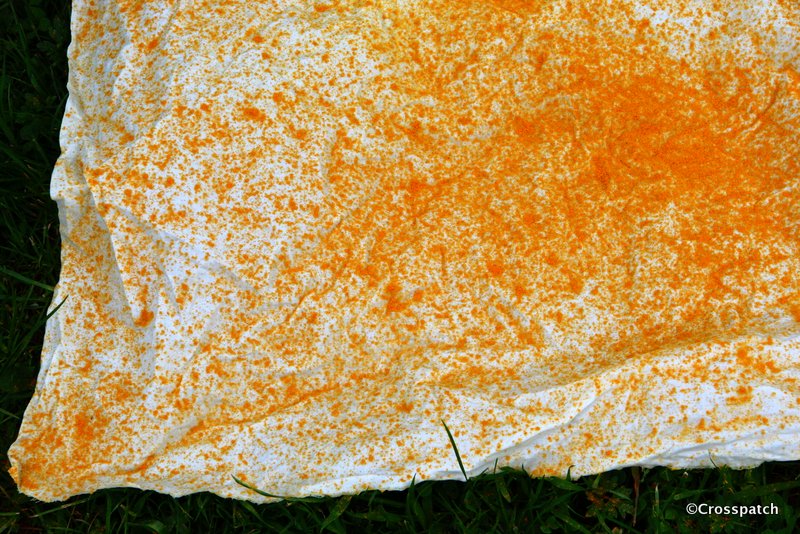
So what to do with the very disappointing length of dandelion yellow? I threw it down on the lawn, and while still hot and wet I sprinkled over it the rest of the jar of turmeric in the hope of achieving a two tone and speckled effect. My plan was to leave it out all night, hoping it wouldn’t rain, but not too concerned if it did, to see what the outcome would be.
turmeric speckling
I was quite pleased with the result, a subtle speckling of yellow on a pale lemony background. Next stop-Orange, onion skins are the best natural option, only one slight problem, my Dearest hates onions, so we never buy them. Anyone spare their onion skins please?
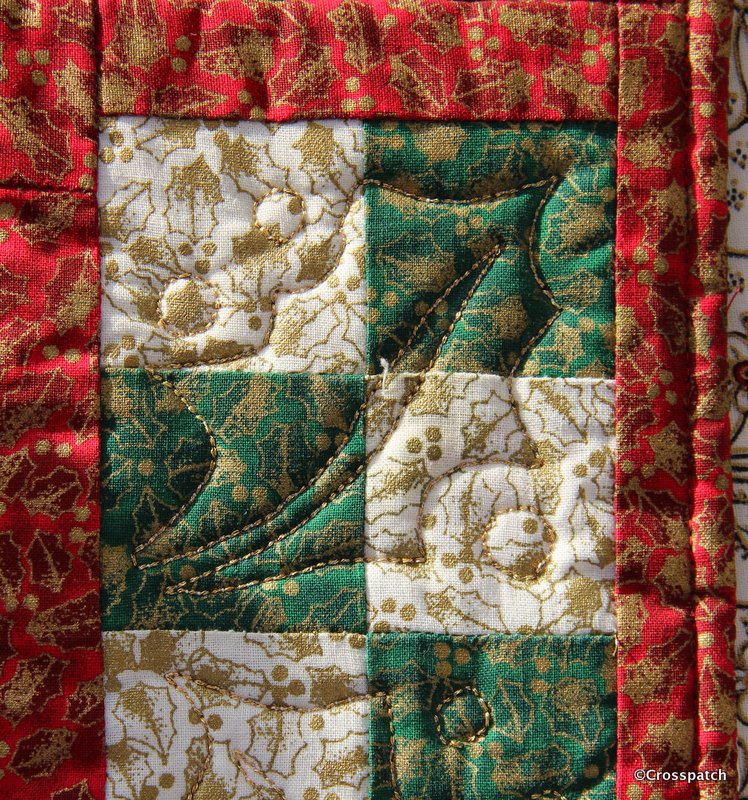
I copied the quilt pattern from a hand bill advert I found, it was a tiny but simple holly leaf with berries, which I had to scale up and transfer to cardboard, machine stitched with gold thread for a little Christmas sparkle.
finished article
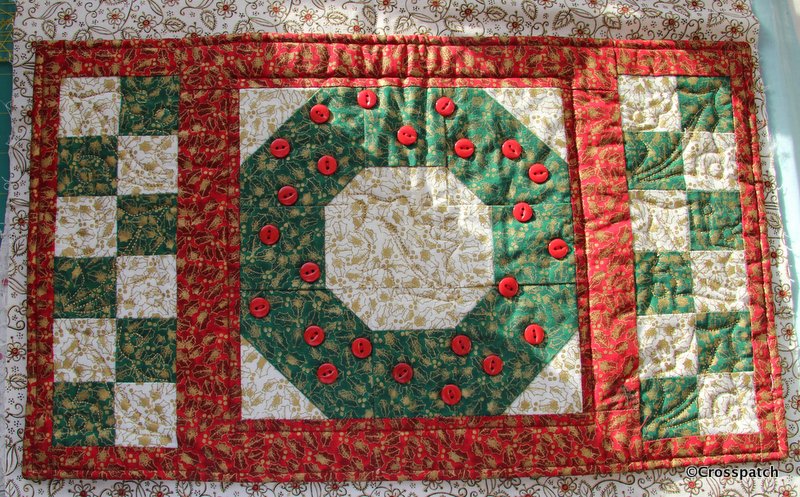
Here’s another thing I found when searching through my Christmas fabric box, a placemat I made years ago, and the makings of another one. Which is great because I can show you how I made it without having to make another! If only I can remember how it went together.
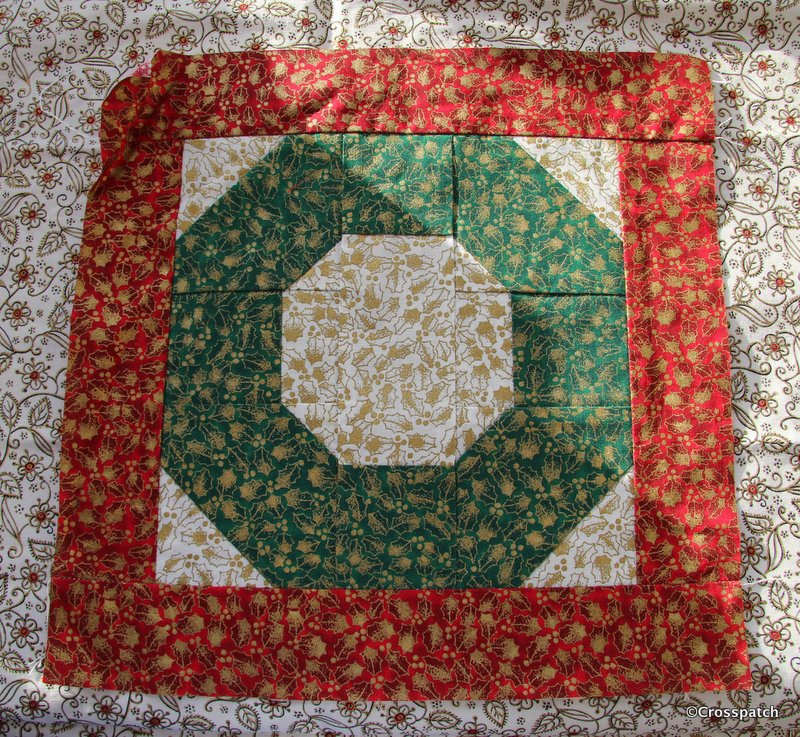
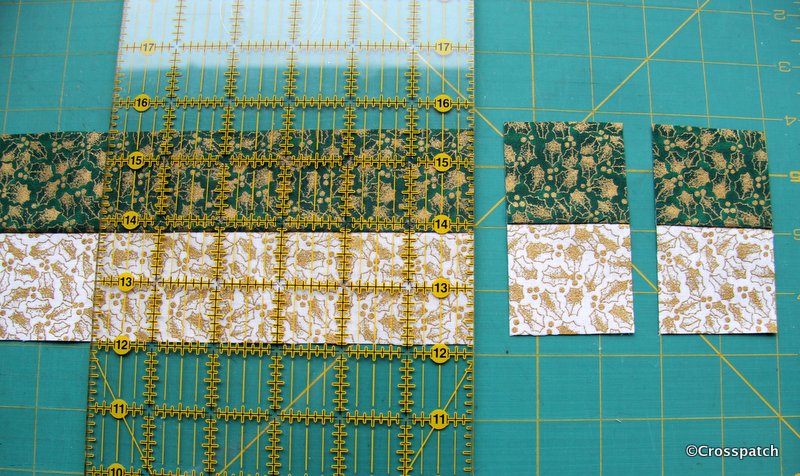
start with snowball block
The centre block, the Christmas wreath, is a “kind of” nine patch, made up of a centre strip 2 green squares 2.5 inches and a white rectangle 2.5″ by 3.5″. the corner squares are 3.5″. The red border is 2 inches, can’t think why. The chequerboard border is made up of 2.5 inch squares too.
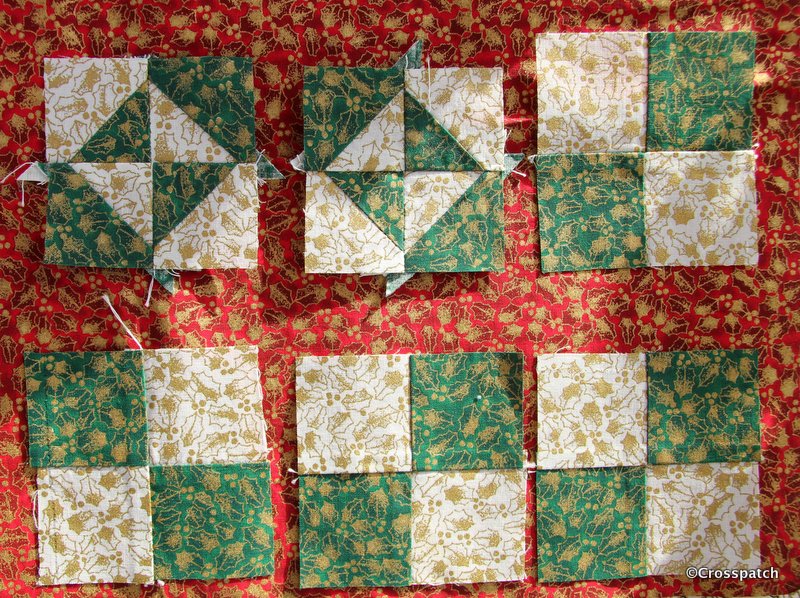
just little squares
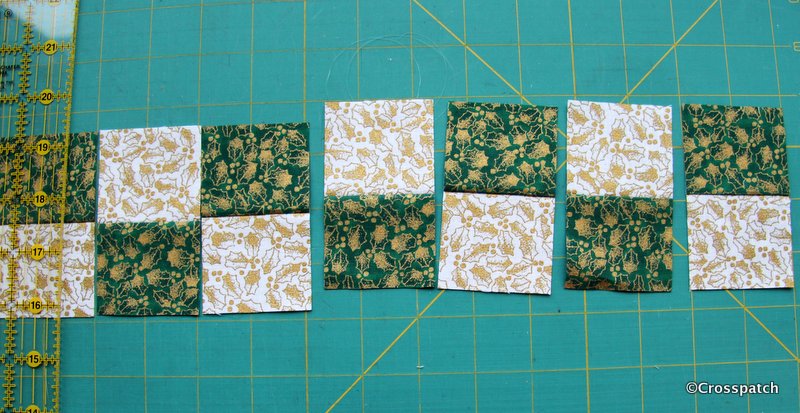
The little square in square blocks I think must have been made up of the bits left over when I made the corner blocks.
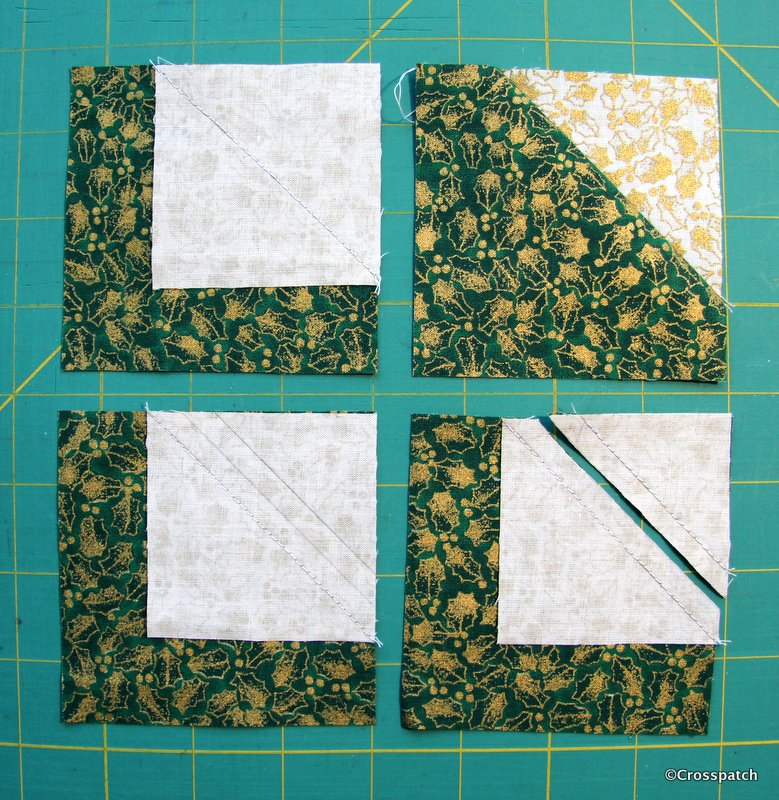
corner block
I used the stitch and flip method, place a small square on the larger square at the corner, stitch diagonally corner to corner, then cut off all but the seam allowance, and flip over to create a new corner to the block, this block uses that method twice with two different size smaller squares on diagonally opposite corners. I took the opportunity to sew together the two bits I would cut off, simply because it’s easier to sew fiddly little bits while they are still attached to the larger piece.
a little gold sparkle
I copied the holly leaf quilting pattern from a hand bill advert I found, it was a tiny but simple line drawing of a holly leaf with berries, which I had to scale up and transfer to cardboard,cereal box card. I drew round the pattern with a disapearing pen, and machine stitched with gold thread for a little Christmas sparkle. Finally the Christmas wreath block, which is supposed to be a holly wreath is embellished with little red buttons, they are too big to be berries, but smaller ones would have been difficult to source, and I would have needed very many of them to get the balance of colour right.
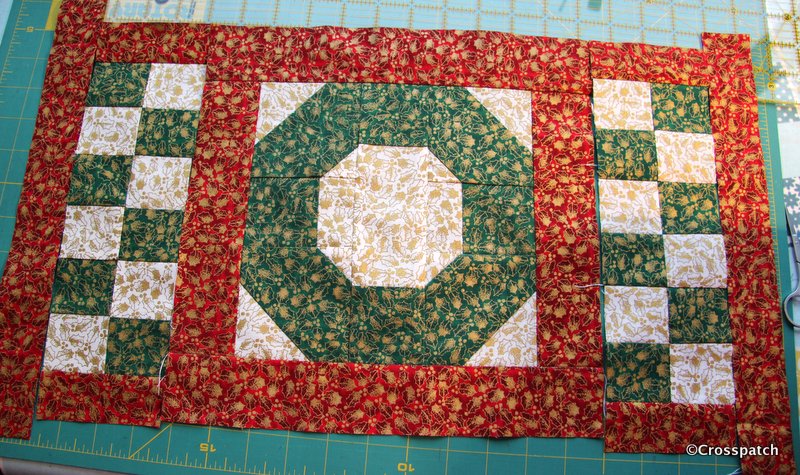
subsequently I’ve cut some more chequerboard squares and made another Christmas wreath placemat… well I’ve got the top done. The wadding backing and quilting will have to wait till I can get to a shop that sells wadding.
easy squareseasy peasyputting it together.
I’m also making something bigger, I’m not sure yet what it will look like, possibly a table runner to go the length of the table or maybe just something for the middle of the table to hide all the table mats, and protect my snowy white table cloths. Watch this space, but don’t hold your breath, it might be ready for next Christmas.
I just have to use these little squares, waste not want not. My first thought was to just put them together , on a red background, or maybe add some applique.
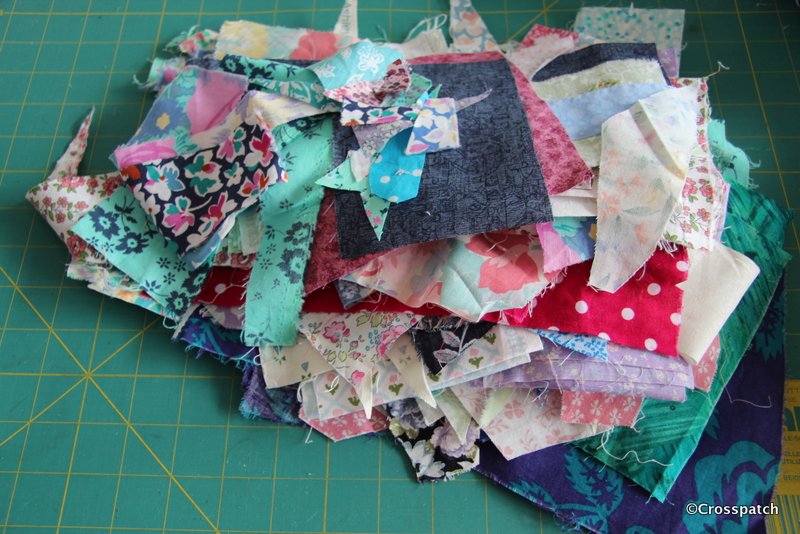
foundation pieced hearts
What do you do with your unfinished projects, I don’t remember making these scrappy hearts blocks, who knows how long they have a lain unloved in the bottom of a box? While searching for some star templates to finish another project I found another UFO (Un-finished Object) four little red hearts foundation pieced from scraps of red fabric on cream calico. Well what can I do with those? Looking at the fabrics I don’t think I have any left, I don’t recognise them at all, but no matter, I think I can finish them into a usable size by introducing another red fabric.
maybe like this?
Co-incidentally, my quilting group’s annual challenge this year is “call it red“. I just have to use these little squares, waste not want not. My first thought was to just put them together as in the picture, on a red background.
Or… I could add some applique hearts in Calico on red, with red stitchery… perhaps some more foundation pieced hearts in different reds… perhaps… anyway I have till July to figure it out.
I love red and white quilts and I had been planning to begin a red and white quilt for Cecily’s challenge , a feathered star in white on a red background, but if I’m honest it’s not likely to happen, not unless I find an eighth day in the week, or am in the happy position of being able to retire before July. So I’m really pleased to have found these Hearts, I can get them made into something before July… surely.
I have recently redecorated and re-carpeted my Studio and am back in and free to sew again, but for one small problem, now the room is clean and warm and bright, a certain 15 year old who had denied any designs upon the space, now thinks his own room is way too small for him and perhaps my playroom will suit him better. In the summer when I have redecorated the living room, I will have to think about decamping to what is currently the dining room, so hopefully I can get my little red hearts quilt completed before then.
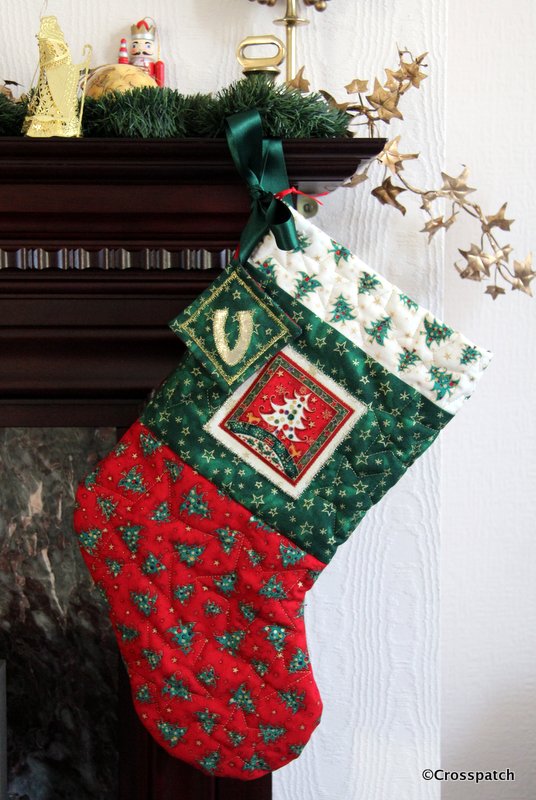
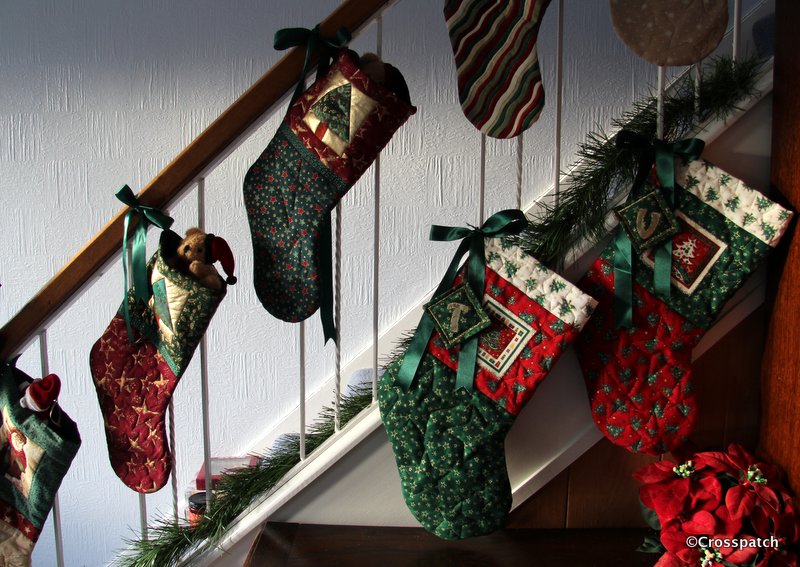
I’m celebrating finally finishing two Christmas stockings I began 8 years ago.
finished at last
I’m celebrating finally finishing two Christmas stockings I began 8 years ago. The children for whom I began making them were 7 and 11, are now 15 and 19. If you want the whole story check out my archive for December 2012and January 2013. Suffice to say Christmas is always a busy time and sometimes you just have to prioritise, Sewing takes second place to shopping, cooking and cleaning only once a year, at Christmas.
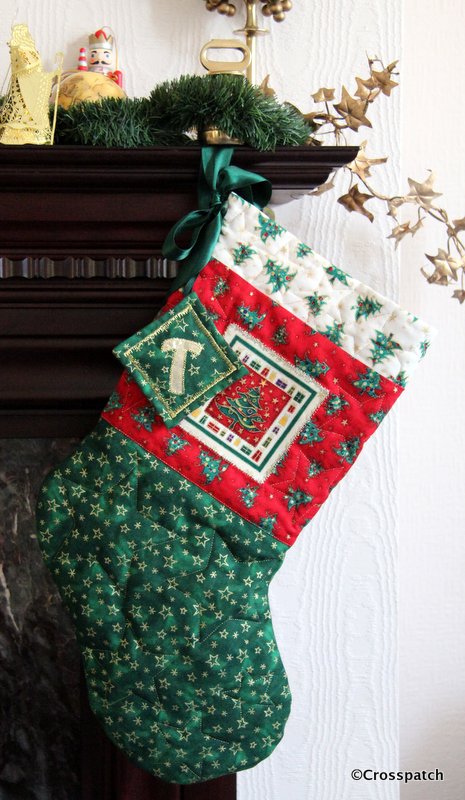
both finished
So beginning where I left off, one of the stockings was quilted and ready to be made up, the other was not. I wanted them to be the same and I had lost the quilting templates, 5 little cardboard stars in graduated sizes which I created using cookie cutters, which I had also subsequently lost, and to this day have not turned up… I suspect foul play.
Thankfully the templates did turn up, and this Christmas I was determined to finish what I’d started. I used a disappearing pen, (which for some reason isn’t disappearing) and drew the stars on the lining of the stocking, then putting the gold thread in the spool and a transparent thread on the top I quilted from the back stars in different sizes to fill the spaces round the motif in the centre of the stocking leg, and in the foot of the stocking.
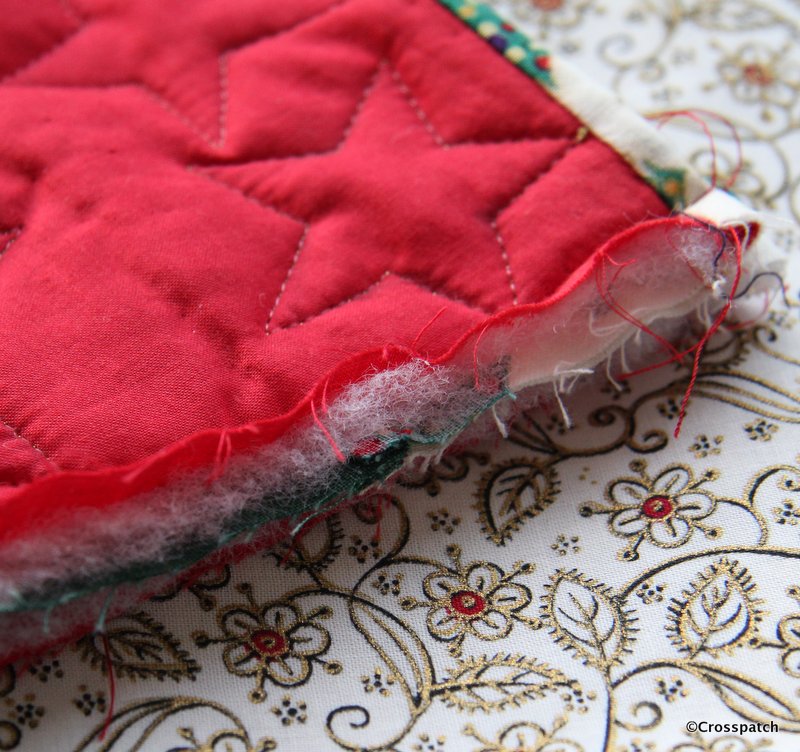
final finishing touches
Putting the right sides together I stitched the two halves around the edge with a generous 3/8ths seam allowance to make it easier to neaten the edges. To finish the seams on the inside I cut away the wadding, and hand stitched the lining closed over the raw edges down to the bottom of the leg. Beyond there the foot still has raw edges showing, well not showing, but that’s the point, you can’t see it so I’m not going to worry about it, I may overlock the raw edges with a machine stitch…when I have a minute.
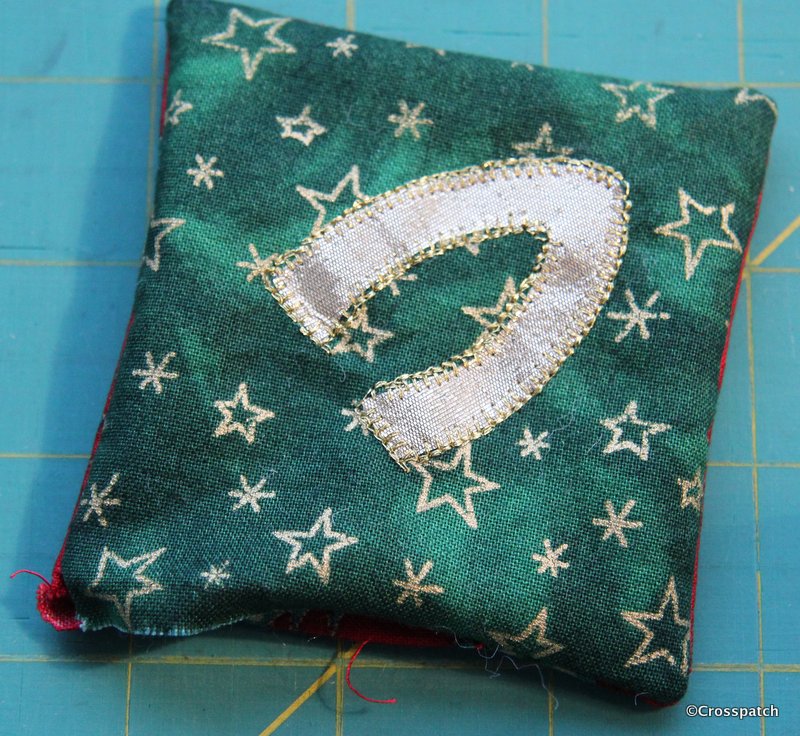
another mistake
Next, I had to make the swing tags for each stocking, cutting two squares of fabric for each tag, and applying a gold letter to the green side of each. I worried that the gold letter might eventually peel off having been applied with Bondaweb, so I used my gold thread again and stitched around the edge with a machine blanket stitch, not very accurately I have to say, but I wasn’t about to unpick and start again.
Right sides together again, with a little wadding on the back, I made another mistake; if you leave the hole to turn the fabric at a corner you’ll never achieve a neat closure… unpicked and did it again, this time with the turning gap amidships.
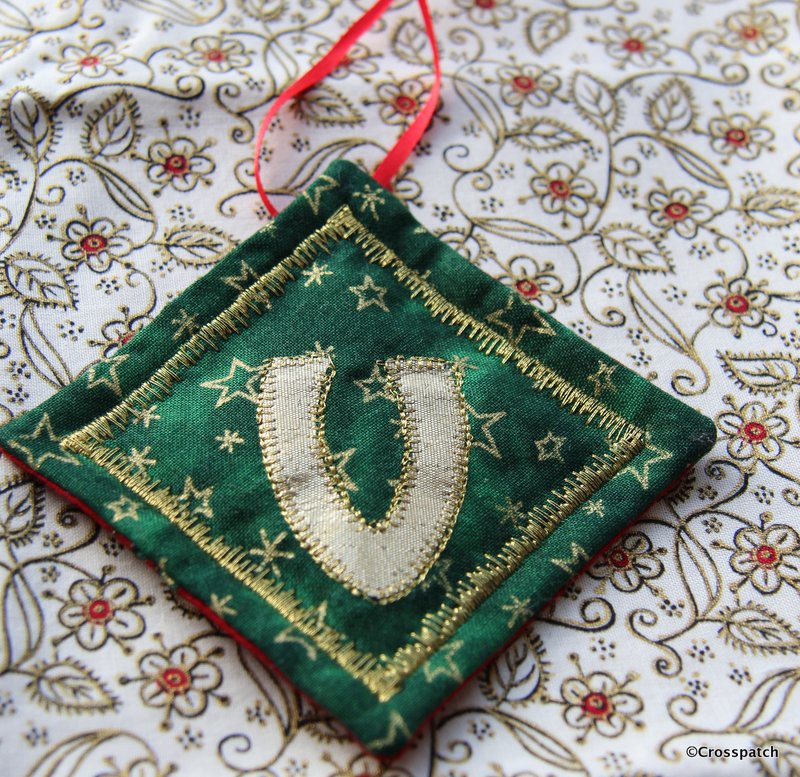
better, all 4 corners stitched and clipped.
Having snipped the corners and turned each tag right ways out, I neatly closed the open edge by hand. Then I topstitched a gold border using another fancy machine stitch like the one I used on the stocking motifs.
ribbon loop
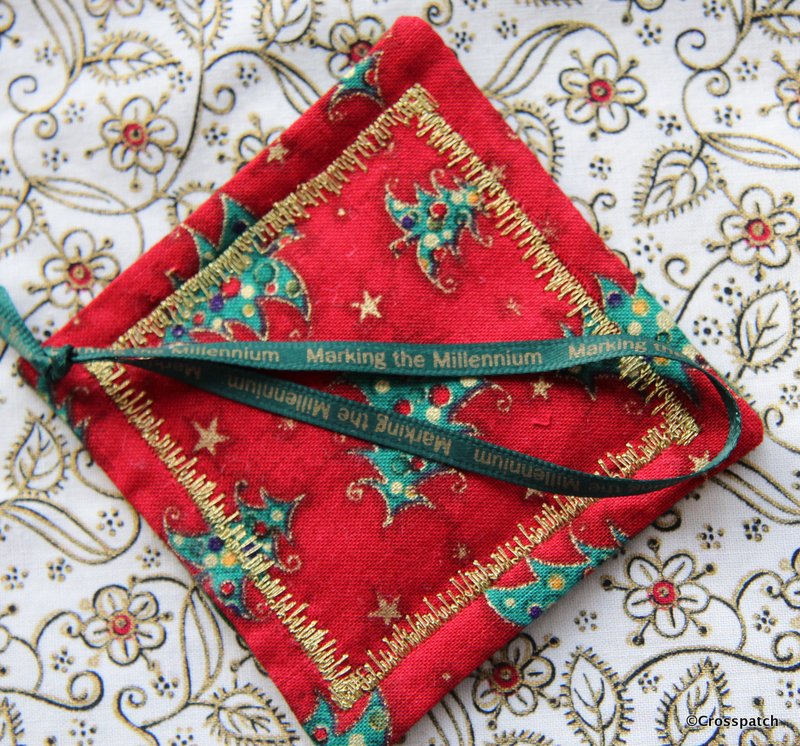
Finally a loop of ribbon was attached to the back of each tag, these ribbons tend to get ragged over time so rather than stitch it into the seam I’ve just tacked it to the back. The 15 year old is a Millennium baby, born in 2000, and when I first knew him at 7 he couldn’t say Millennium, he would a say Millellium, or Minnellium, it has always been a thing I could tease him with, so I used some ribbon I had tucked away since the Millennium, it has “Marking the Millennium” printed on it. Maybe if he keeps and treasures his stocking, it may make him smile every Christmas…long after my day.
millennium ribbon
And so they are completed and hung up ready for Christmas… now all I have to do is help the 19 year old make a wall hanging, and start the wrapping, with only 3 days left till Christmas.
I’m always on the lookout for Haberdashery; buttons for instance, so I was really pleased to find this tin full of buttons some of them quite old, for £2 at a car boot fair.
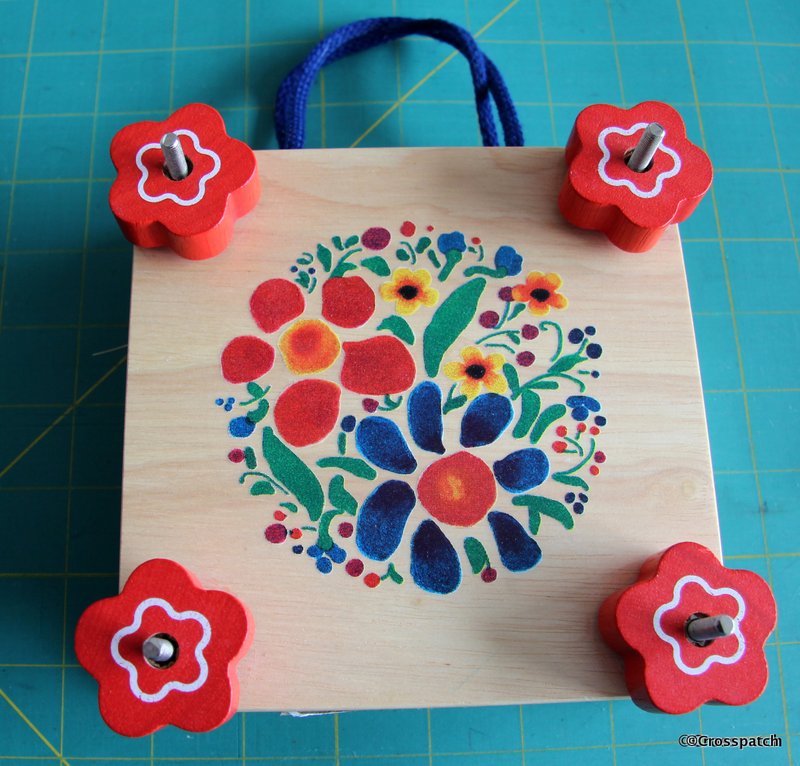
flower press
Don’t you just love a bargain? I do, let me show you what I have found recently, more thrifty buys. A few months ago I came across a lady teaching paper making. I’ve always wanted to have a go at that so when she offered to sell me a kit I could not resist it. To make paper with pretty little organic inclusions in it you need organic matter, flower petals for instance.There were some in the kit, but I thought I could make some of my own from the flowers in my own garden. If you just collect petals they will dry up and discolour, they need to be pressed to preserve shape and colour. My dearest suggested I buy a flower press but I reckoned I could find one in a charity shop, and a few weeks later… presto £1 in my local charity shop. It even came with pressed flowers in it. I have a good collection of flower petals in the press waiting till I have time to get out that paper making kit, cold wet winter weekends are just around the corner.
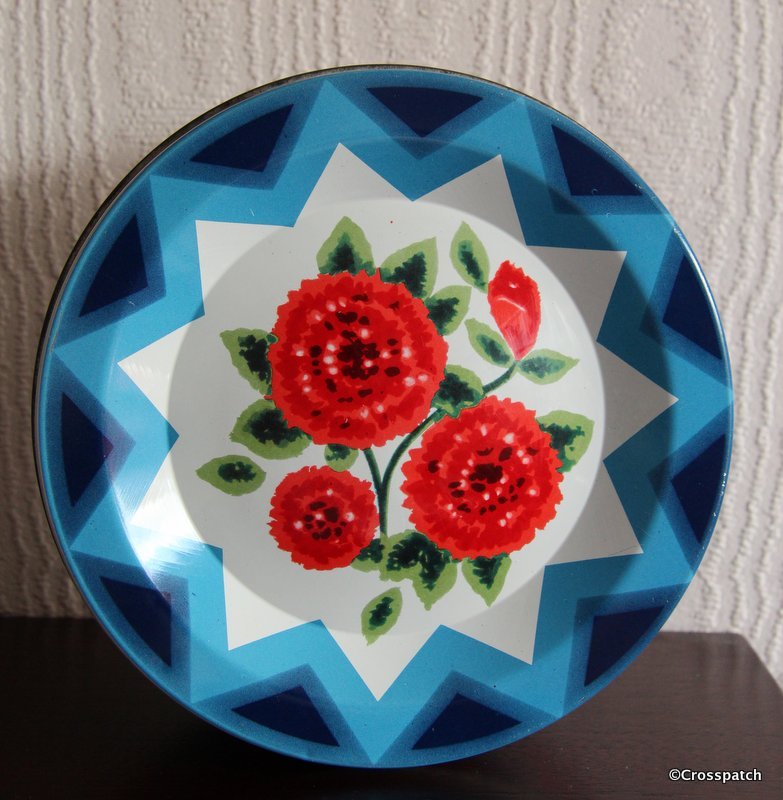
button tin
I’m always on the lookout for Haberdashery; buttons for instance, so I was really pleased to find this tin full of buttons some of them quite old, for £2 at a car boot fair. I guess there must be easily £20 worth of old buttons which I can sell, and the tin is vintage, in really good condition it’s a 1960’s Quality street tin. A similar one on Etsy is selling for £4.99. Maybe I should open my own Etsy shop.
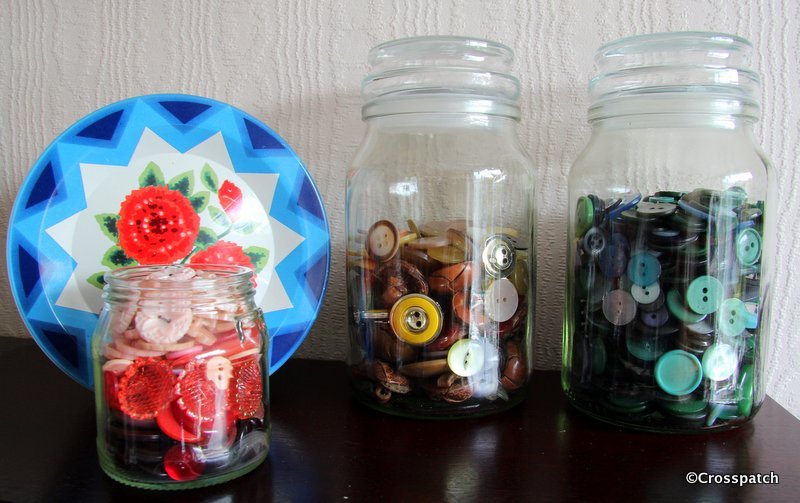
button jars
A few days later I found a plastic bag full of buttons also £2, some of which are also quite old, together with the ones in the tin there was enough to fill all of these jars. I might sell the old ones, the Victorian and Art Deco ones, and use the others for embellishments on patchwork or fabric pictures. I’m really pleased with my thrifty buys. It doesn’t take much to please me when it comes to craft materials, my thrift shop bargains.
no little beads clinging to every surface, my hands, my clothes… if you’ve ever had dealings with polystyrene beads you’ll know what I mean.
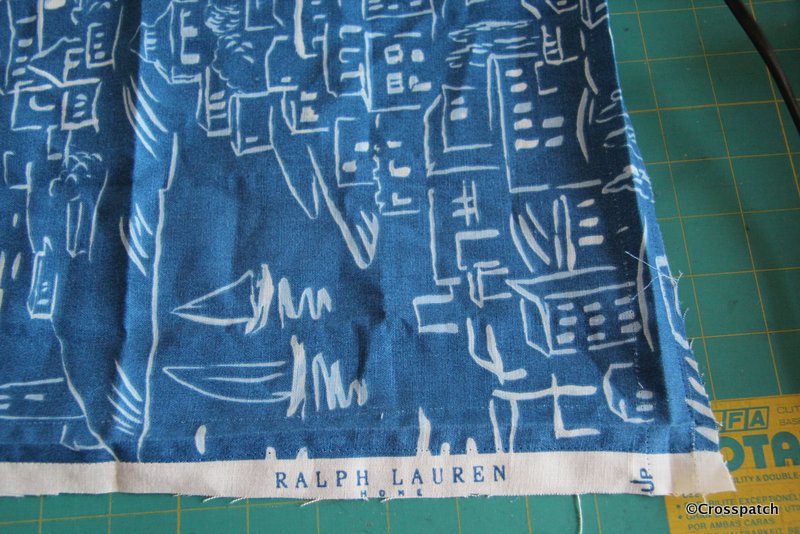
freebie fabric
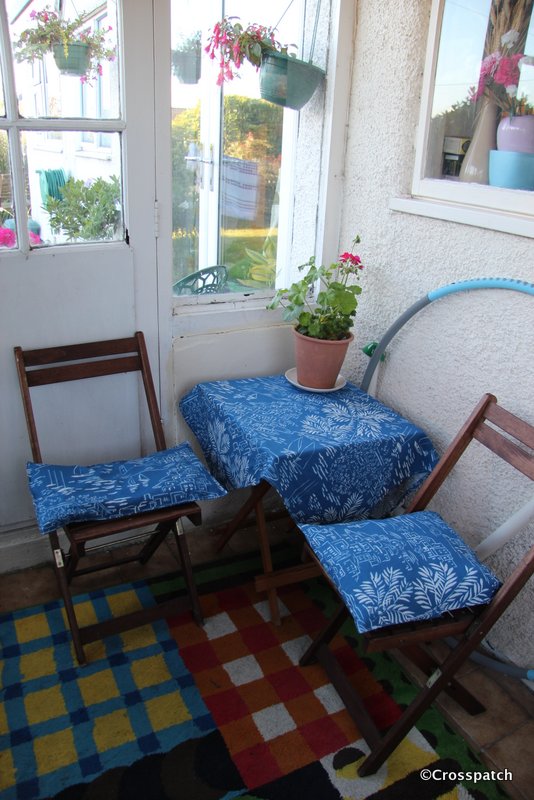
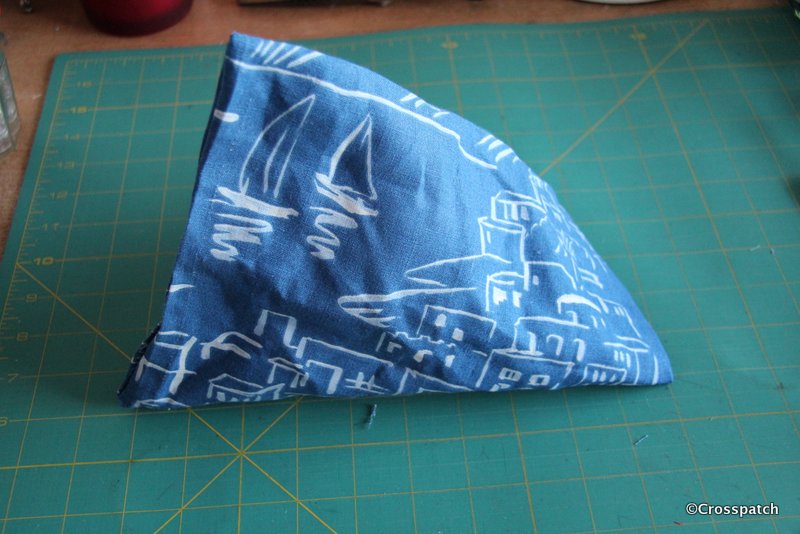
In the middle of developing an idea about making a beanbag support for my camera I visited my sister and whilst telling her all about it she showed me her new make. She had been to the wonderful factory shop we have locally which sells designer furnishing and dress weight fabrics, and bought a small amount of Ralph Lauren Home fabric. She had made cushions and a table cloth to spruce up her porch, to make it into somewhere she could sit when the sun is shining but not quite warmly enough to be outside. She had a small amount left which she gave to me, because it was just the size I needed for my project. I’m such a lucky sister.
Inside/outside sitting area
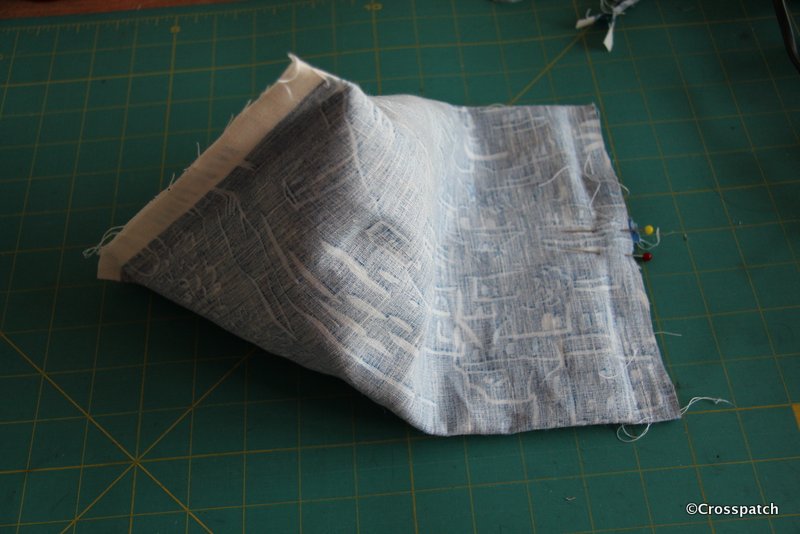
So I made a beanbag, by turning the fabric into a tube and then stitching the end seams at 180 degrees to one another to create a little humbug shaped beanbag cushion, leaving a gap at one end for the filling.
make a humbug beanbag
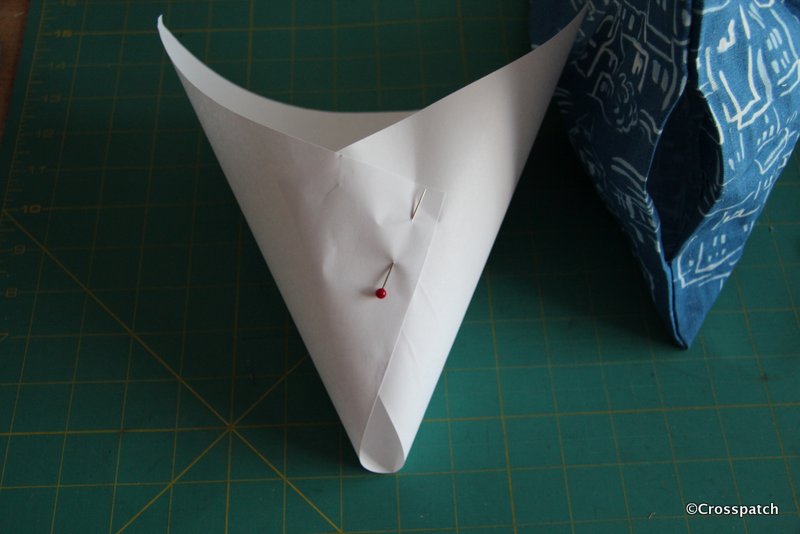
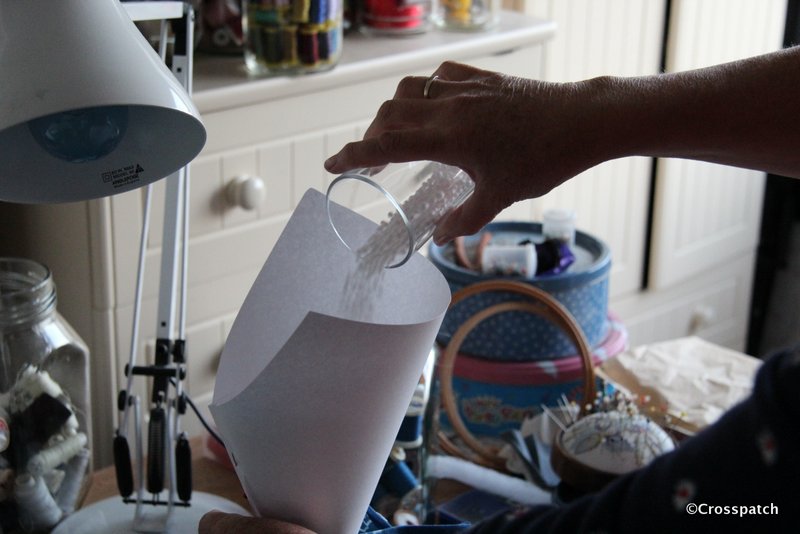
I turned the beanbag right sides out, and made a paper funnel out of some scrap paper to fill the bag with.
paper funnel
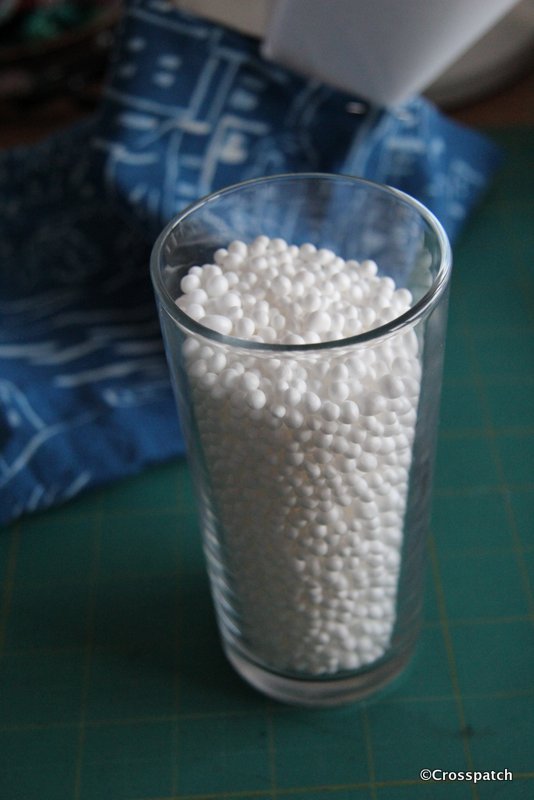
The beanbag is filled with polystyrene beads, which I have recycled from an old beanbag seat that was bought for the 15 year old to sit on when he has a little lad, and which has lain forlorn and unused in my studio for longer than I care to admit (my excuse is I always knew it would come in handy one day). l could have used rice or beans but I wanted it to be as light as possible, because my camera kit is already heavy enough.
polystyrene beads
I scooped a glassful of beads from the old beanbag seat, then holding the funnel inside the bag with one hand it was really easy to pour the polystyrene beads into the bag, encountering very little problem with static cling. There were a few beads left in the bottom of the glass, probably because I didn’t dry it properly, but no little beads clinging to every surface, my hands, my clothes… if you’ve ever had dealings with polystyrene beads you’ll know what I mean.
filling the beanbag
It just needed a machine stitched closure, to make sure it won’t bleed little beads all over the place and it’s done.
beanbag
and what’s the point of all this I hear you wondering? It’s my own take on beanbag camera kit. At the time I had just bought a telephoto lens for my camera, and at 300mm you can’t really hand hold without getting camera shake. I have a tripod but don’t really want to hump it about with me, it’s rather heavy and my hips and knees are getting arthritic so the weight is a problem. This light as air little cushion allows me to set up my camera on a wall or fence post and take pictures without camera shake… if there is a handy wall at the right height.
camera on a wall
Subsequently I bought myself to a monopod but I still carry the beanbag, it weighs nothing at all and cost me nothing but a little time and ingenuity. My sister is also a keen photographer, I wonder if she might like one…and then my niece… but then I have an idea for a slight design adaptation… watch this space.